Hello amigurumi lovers and beautiful visitors, I wanted to share the free amigurumi patterns for you here. In my article I will share 1 pattern and how to make it for you. At the end of my article, I will share amigurumi patterns that can generate ideas for you.
INSTRUCTIONS:
This pattern is written in US English terms and worked in continuous rounds unless stated otherwise.
MATERIALS NEEDED:
DK weight cotton yarn in pink, white and blue colour.
2.5 mm crochet hook.
6 mm flat back or safety eyes.
Fiberfill for stuffing.
Tapestry needle.
Black/ brown felt for boba pearls.
Adhesive glue.
Black embroidery thread and needle.
STITCHES/ABBREVIATIONS
R – round/ row.
Ch – chain.
St(s) – stitch(es).
Sc – single crochet.
Inc – increase (2sc in one st).
Hdc – half double crochet.
FLO – front loops only.
BLO – back loops only.
Sl st – slip stitch.
[…] – repeat the instructions given in between the brackets.
(…) – total number of stitches.
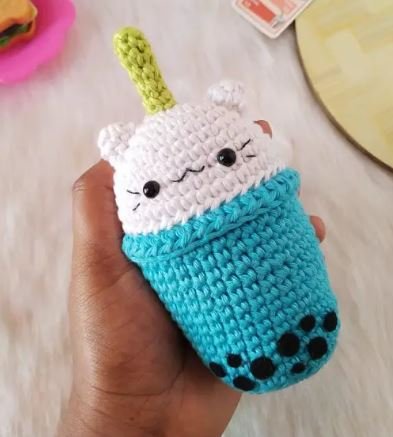
CUP:
Using pink yarn,
R1: 6 sc in a magic ring (6).
R2: [ Inc ] x 6 (12).
R3: [ Sc, inc ] x 6 (18).
R4: [ Sc, inc, sc ] x 6 (24).
R5: [ Sc 3, inc ] x 6 (30).
R6: (BLO) Sc in each st(30).
R7-9: Sc in each st (30)
R10: [ Sc 9, inc ] x 3 (33).
R11-14: Sc in each st (33).
For a rigid base, cut a small piece of cardboard in circular shape and place it at the bottom of the cup.
R15: [ Sc 10, inc ] x 3 (36).
R16-19: Sc in each st (36).
R20: (Work in FLO) Hdc in each st (36). Slip stitch to the first Hdc.
Fasten off and sew the ends. Stuff the cup
Fold the last hdc round of the cup outwards. This will make the rim of the cup.
CAT:
Using white yarn,
R1: 6 sc in magic ring (6).
R2: [ Inc ] x 6 (12).
R3: [ Sc, inc ] x 6 (18).
R4: [ Sc, inc, sc ] x 6 (24).
R5: Sc in each st (24)
R6: [ Sc 3, inc ] x 6 (30).
R7-8: Sc in each st (30).
R9: [ Sc 2, inc, sc 2 ] x 6 (36).
R10: Sc in each st (36).
Fasten off leaving a long tail for sewing.
Insert 6 mm safety eyes between R8 and R9 with 5 stitches in between.
You can embroider the mouth and whisker at this point if you prefer.
I’d like to add details after sewing all the parts as it gives more freedom on where to place them.
EARS (MAKE 2):
Using white yarn,
R1: 5 sc in magic ring (5).
R2: inc, sc, inc, sc, inc .
Fasten off leaving a long tail for sewing.
STRAW:
Using blue yarn,
R1: 6 sc in magic ring (6).
R2: (BLO) Sc in each st (6).
R3-6: Sc in each st (6).
Fasten off leaving a long tail for sewing.
Cut a small length of pipe cleaner and insert it into the straw (optional). You could also stuff with fiberfill .
ASSEMBLING:
Using the remaining yarn tail from the cat, sew the cat head (both loops) to the back loops of the cup (at
R20) using a whip stitch.
Start stuffing when you are three fourths done and continue to stuff as you go. Make sure to stuff both the cat head and cup firmly.
Sew the ears between R3-R6 on both sides of the cat head.
Embroider a small inverted ‘v’ shape for the mouth.
Add in whiskers one stitch away from the eyes.
Attach the straw at the top of the cat head.
Finally cut around 10 -12 small round brown/ black felt and glue to the cup using adhesive glue.
Feel free to tag me (@freeamigurumii) in your photos on Instagram or Facebook if you’d like!
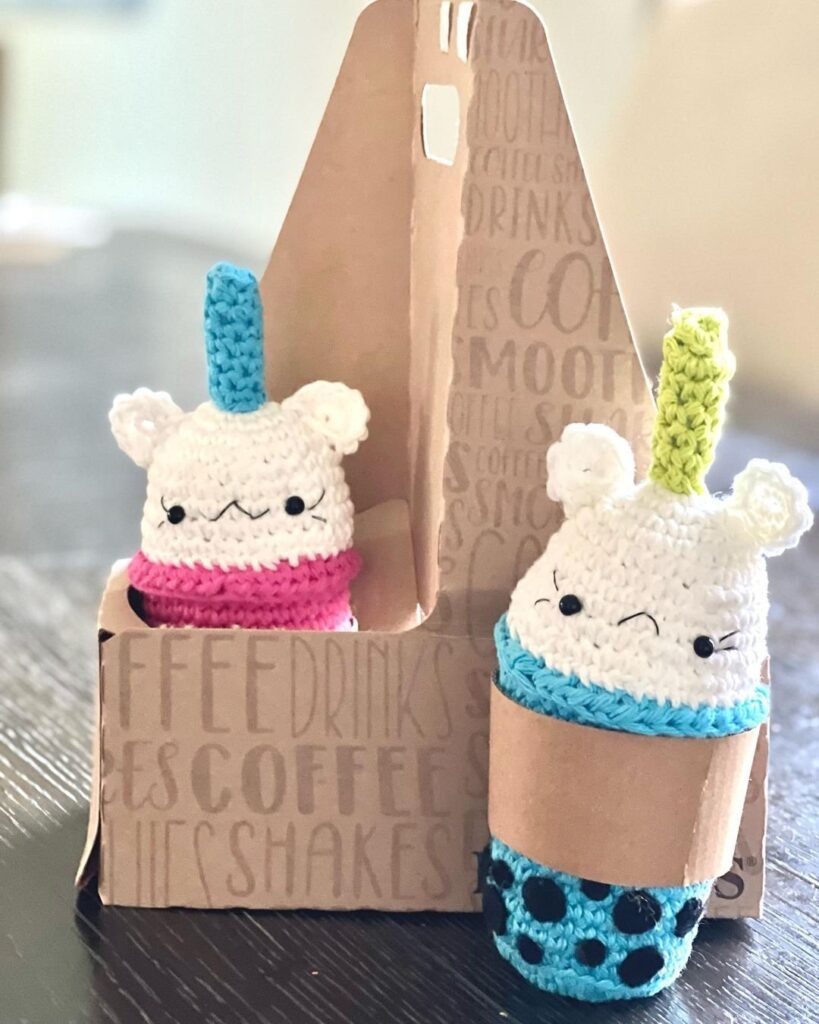
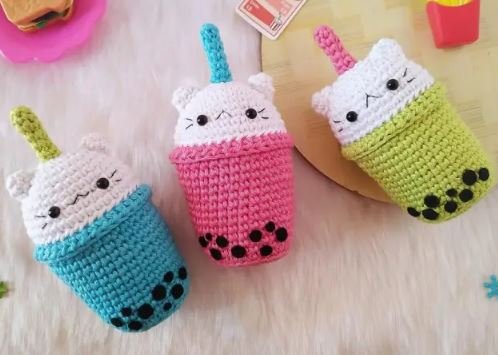
All Finished.