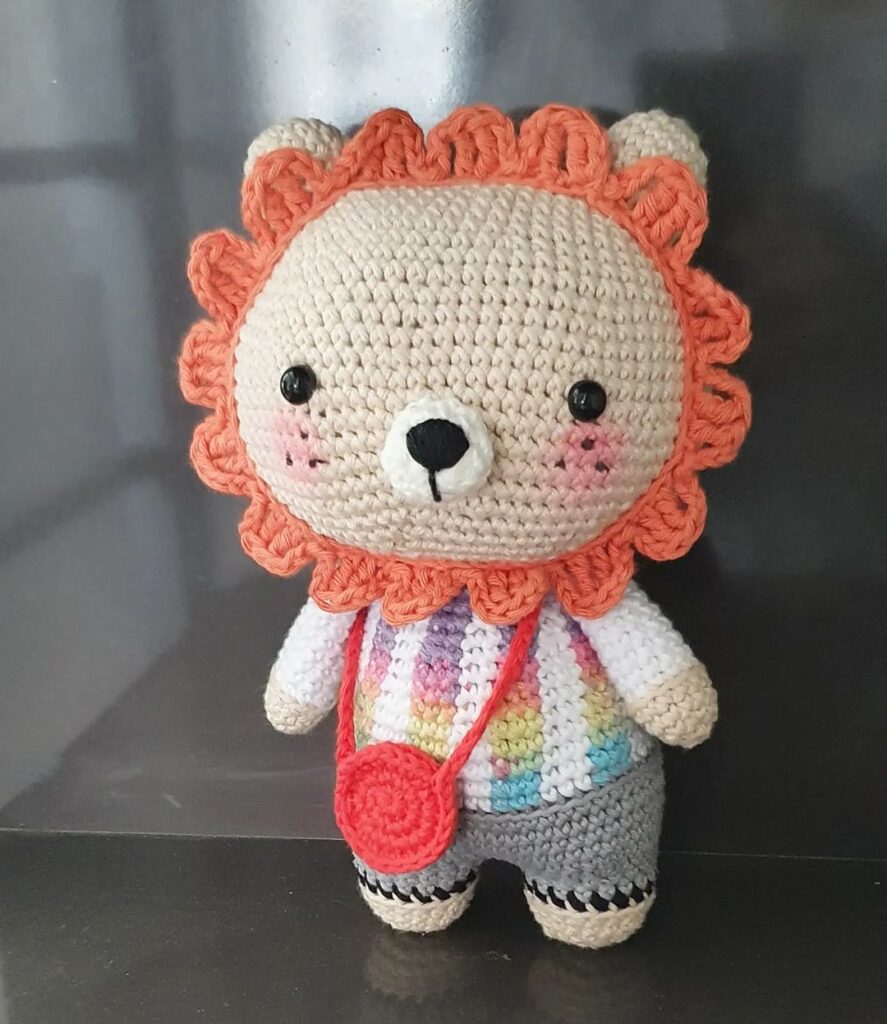
Hello amigurumi lovers and beautiful visitors, I wanted to share the free amigurumi patterns for you here. In my article I will share 1 pattern and how to make it for you. At the end of my article, I will share amigurumi patterns that can generate ideas for you.
Tools and materials:
- Hook number 2.5, scissors, needle with a wide eye, sewing needle with black thread for sewing on eyes
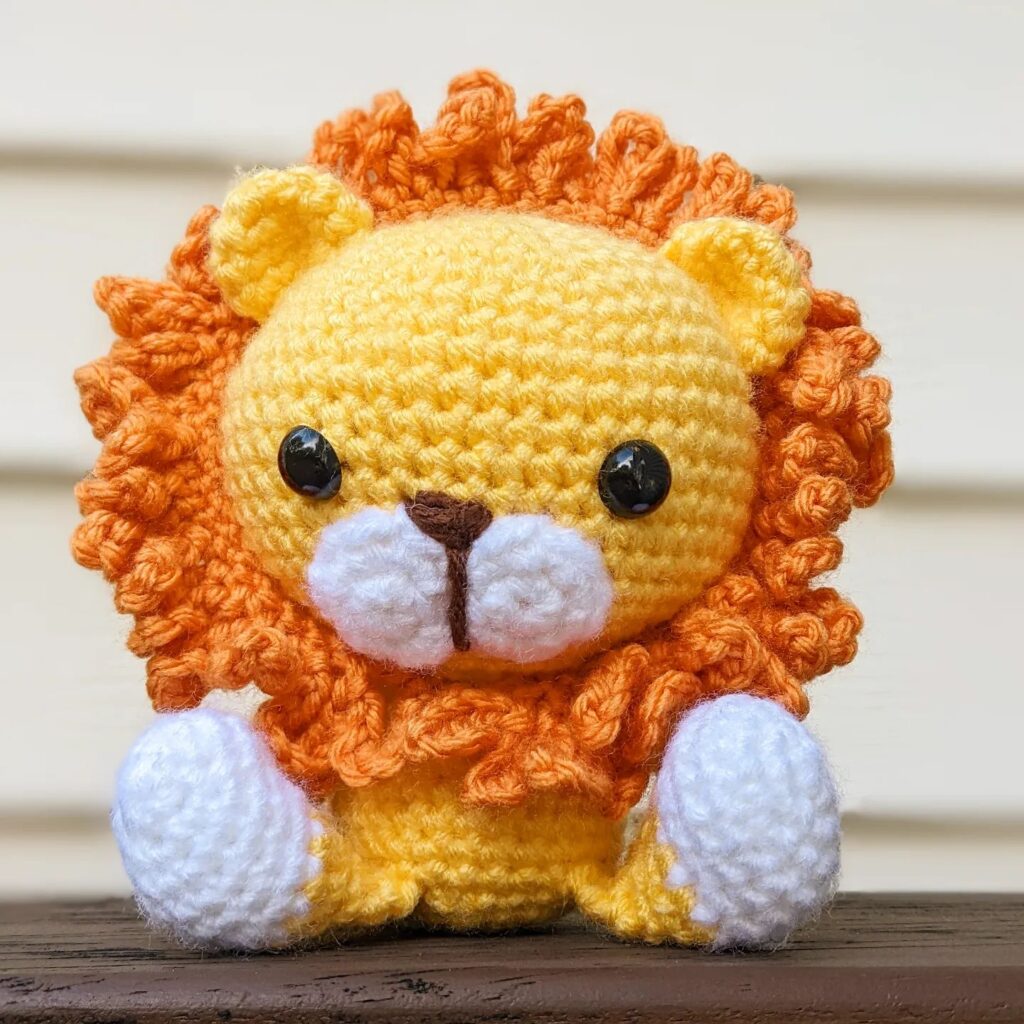
- Yarn: the main yellow color Polissya “Favorite”, Halo “Coffee” for the mane, nose and tail tassel, the rest of the white YarnArt Jeans yarn for the muzzle. You can choose the colors and yarn of your choice.
- Eyes on a secure mount or 2 beads
- Holofiber for stuffing
Abbreviations:
RLS – single crochet
VP – air loop
P – loop
UB – decrease (knit 2 loops with one RLS)
PR – increase (2 RLS in one loop)
SP – connecting loop
R – row
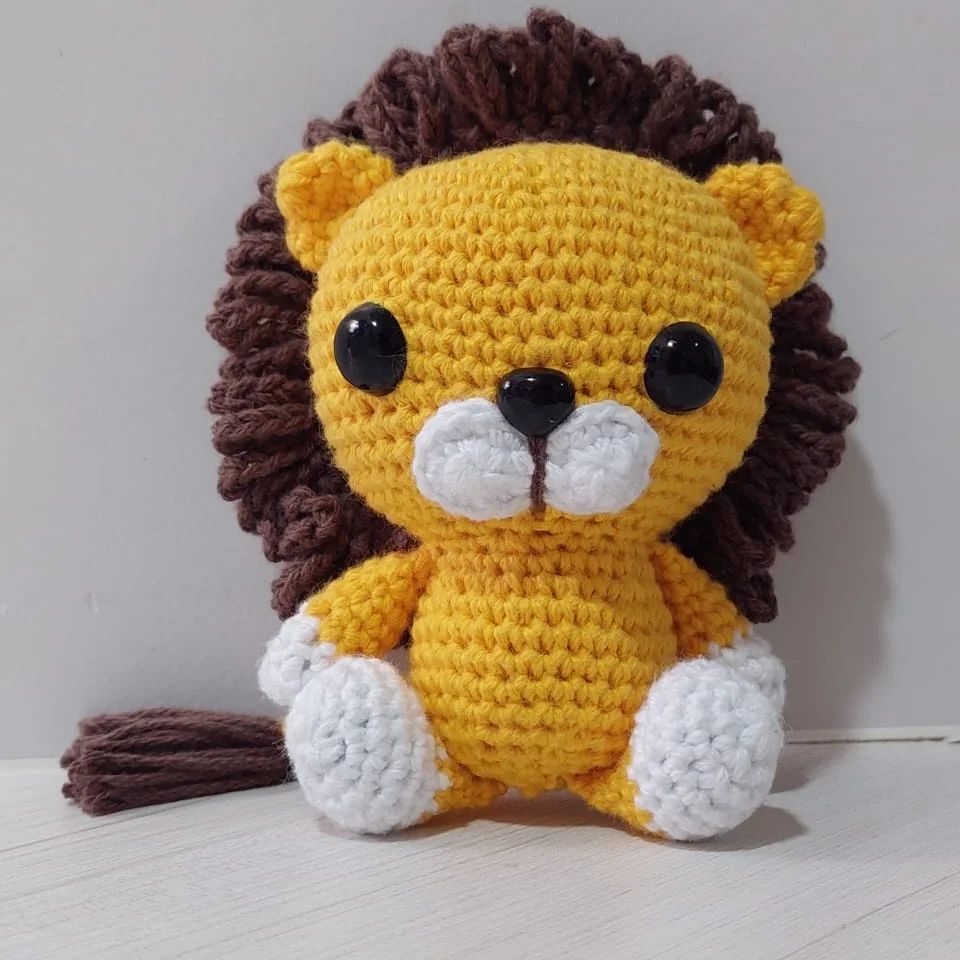
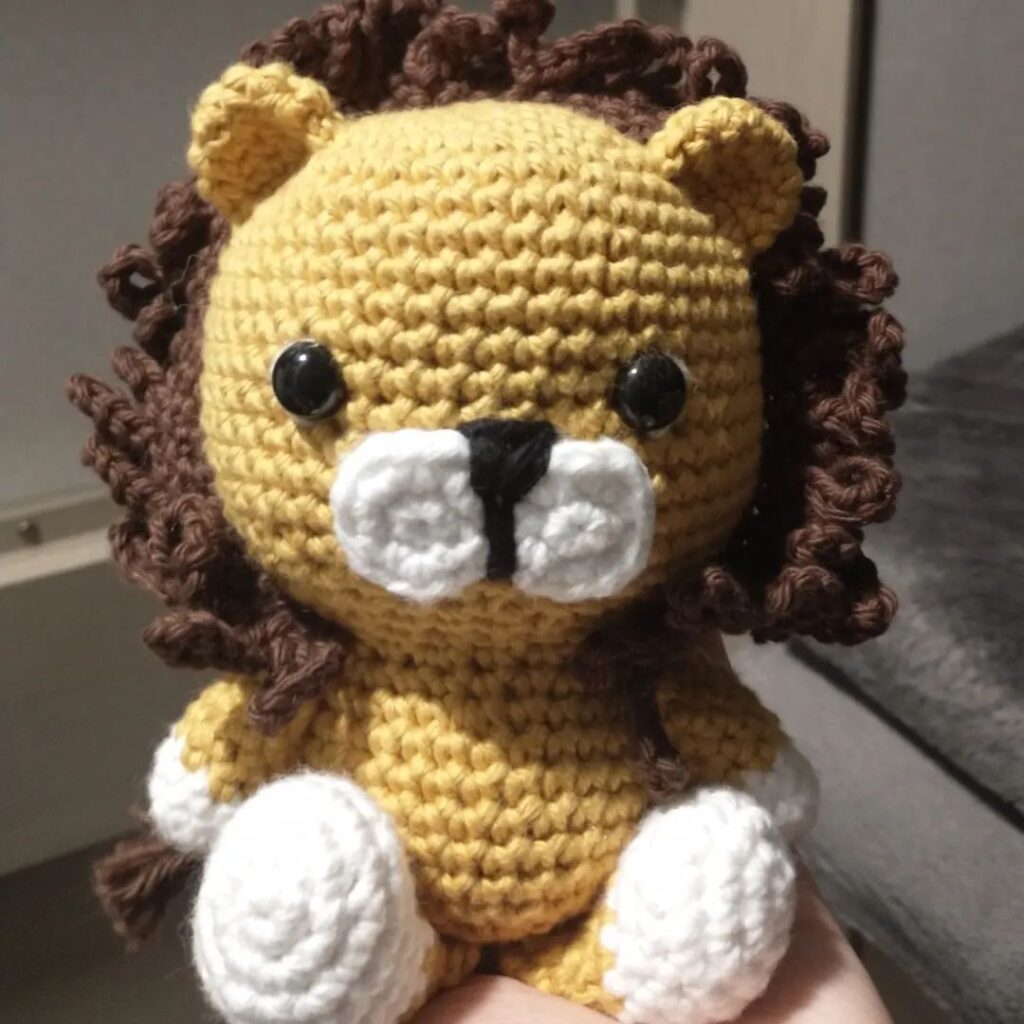
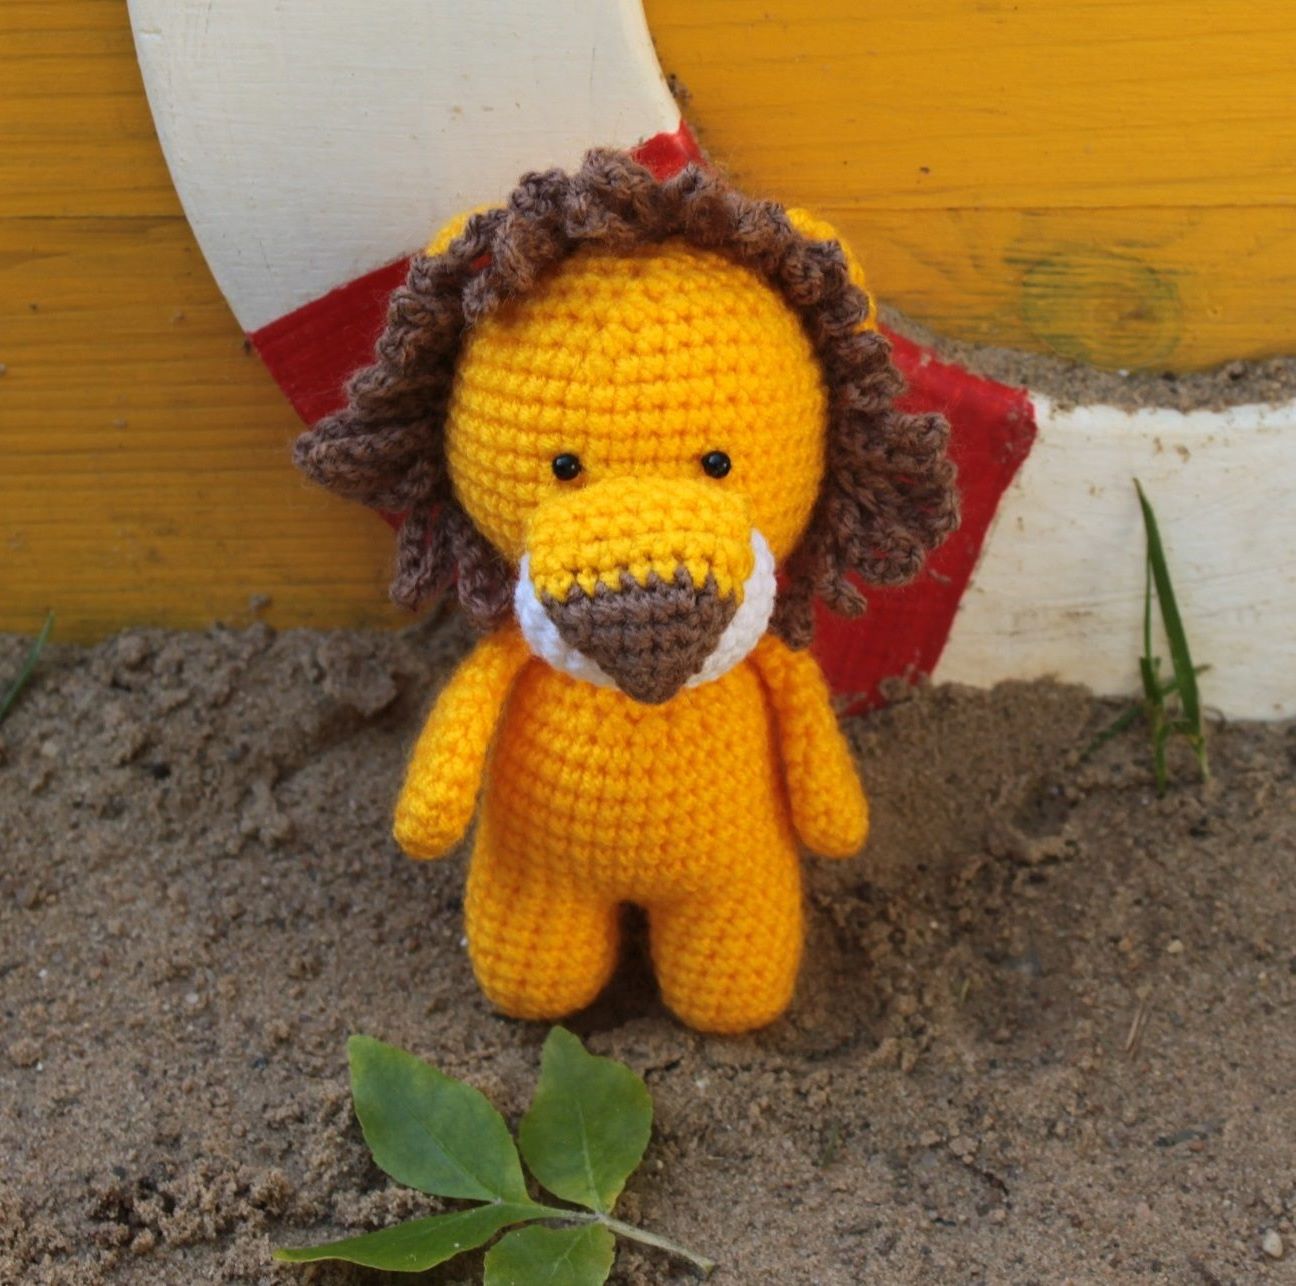
Toy size: 12 cm
Tail
Make a tassel with coffee-colored thread on a yellow thread. Dial a chain of 6 VPs with a yellow thread, tie a tassel to the thread, knit a lifting loop, knit 1 RLS = (6 P) into each loop of the VP chain.
Cut off a small thread. Knit a tail detail at the beginning of the 15th row of the body, hide the tails of the thread in knitting.
Hand (2 parts)
1 R – 2 VP, 6 RLS = (6 P). [Dial 2 air loops, knit 6 sc in the second loop from the hook]
2 R – 6 PR \u003d (12 P). [Knit 6 increments in a row]
3-6 R – 12 RLS = (12 P)
7 R – (RLS, UB) 4 times = (8 P)
8-11 R – 8 RLS = (8 P)
12 R – fold the part knit in half, capturing the loops 2 RLS, UB, SP \u003d (3 P).
Cut the thread, leaving a short tail.
Legs-torso-head
We start knitting by knitting 2 parts of the legs from 1 to 7 rows inclusive. We knit the first leg and cut the thread, leaving a short tip. Having knitted the 7th row of the second leg, in the 8th row we connect the parts into one part of the body.
1 R – 2 VP, 7 RLS = (7 P). [Dial 2 air loops, knit 7 sc into the second loop from the hook]
2 R – 7 PR \u003d (14 P). [Knit 6 increments in a row]
3-8 P – 14 RLS = (14 P). [Knit 6 rows in a circle without changes, 1 sc in each loop of the previous row]
9 P – 13 sc, 2 inc, 13 sc = (30 p)
10 p – 14 sc, 2 inc, 14 sc = (32 p)
11 – 14 R – 32 RLS \u003d (32 P).
15 R – tie the tail into the first loop, 31 RLS = (32 P)
16 – 17 R – 32 RLS = (32 P).
18 R – 13 RLS, 4 UB (the place of this group of decreases is the belly of the toy), 11 RLS \u003d (28 P)
19 R – (2 RLS, UB) 7 times \u003d (21 P)
20 R – (UB, 5 RLS) 3 times \u003d (18 P)
21 R – 18 RLS \u003d (18 P)
22 R – 4 RLS, we knit the arm: we attach the part of the arm to the body and knit 3 RLS, simultaneously capturing the loops of the arm and body, 6 RLS, we knit the second hand in the same way first: 3 RLS, 2 RLS = (18 P)
23 R – 18 RLS = (18 P)
We stuff the part of the body with holofiber
Let’s start knitting the head :
24 R – (2 RLS, PR) 6 times \ u003d (24 P)
25 R – (3 RLS, PR) 6 times \u003d (30 P)
26 R – (4 RLS, PR) 6 times \u003d ( 36 P)
27 R – (5 RLS, PR) 6 times \u003d (42 P)
28 R – (6 RLS, PR) 6 times \
u003d (48 P) Next, we knit 7 rows without changes, 1 RLS in each loop of the previous row.
29-35 R – 48 RLS \u003d (48 P)
36 R – (6 RLS, UB) 6 R \u003d (42 P)
37R – (5 RLS, UB) 6 R \u003d (36 P)
38 R – (4 RLS, UB) 6 R = (30 P)
39 R – (3 RLS, UB) 6 R = (24 P)
ATTENTION! If you chose the eyes on a secure fastening, then before you continue knitting further, insert the eyes.
40 R – (2 RLS, UB) 6 R \u003d (18 P)
41 R – (RLS, UB) 6 R \u003d (12 P)
42 R – 6 UB, SP \u003d (6 P)
Cut the thread longer, crochet the remaining 6 loops to the end of the cut thread and pull off the knitting, fasten the thread with a knot and hide the tip inside the toy with a hook.
Muzzle
White thread.
1 R – 6 RLS \u003d (6 P)
2 R – 6 PR \u003d (12 P)
3 R – (1 RLS, PR) 6 times \u003d (18 P)
4 R – (2 RLS, PR) 6 times \u003d (24 P)
5-7 R – 24 RLS = (24 P)
Sew the muzzle to the head.
Nose
Coffee-colored thread.
1 R – 6 RLS \u003d (6 P)
2 R – 6 PR \u003d (12 P)
3 R – (1 RLS, PR) 6 times \u003d (18 P)
4 R – (2 RLS, PR) 6 times \u003d (24 P)
5 R – (3 RLS, PR) 6 times = (30 P)
Go to the yellow thread, fold the part in half and again in half and knit 15 RLS along the edge of the part with yellow thread, knit in a circle 3 rows of 15 RLS, then knit 8 sc, simultaneously capturing the loops of both sides of the part.
Sew the nose to the muzzle. Sew on bead eyes, embroider eyebrows with black thread.
Ears (2 parts)
1 R: 6 RLS \u003d (6 P)
2 R: 6 PR \u003d (12 P)
3 R: (1 RLS, PR) 6 times \u003d (18 P)
4 R: (2 RLS, PR) 6 times = (24 P)
5P: Fold the part in half, along the edge of the part, piercing both sides of the part, knit 12 sc = (12 P)
Fold the part in a semicircle, sew to the head between the 4th and 9th rows from the top of the toy.
Mane
Attach a coffee-colored thread in the 27th row and knit arches of 12 ch, attaching an arch to the head of the st, around the circumference of the head as follows: 1 arch for each row. In the area of \u200b\u200bthe ears, knit shorter arches: 8-9 loops.
If desired, you can knit a mane all over the back of the toy.
Feel free to tag me (@freeamigurumii) in your photos on Instagram or Facebook if you’d like!
All Finished.