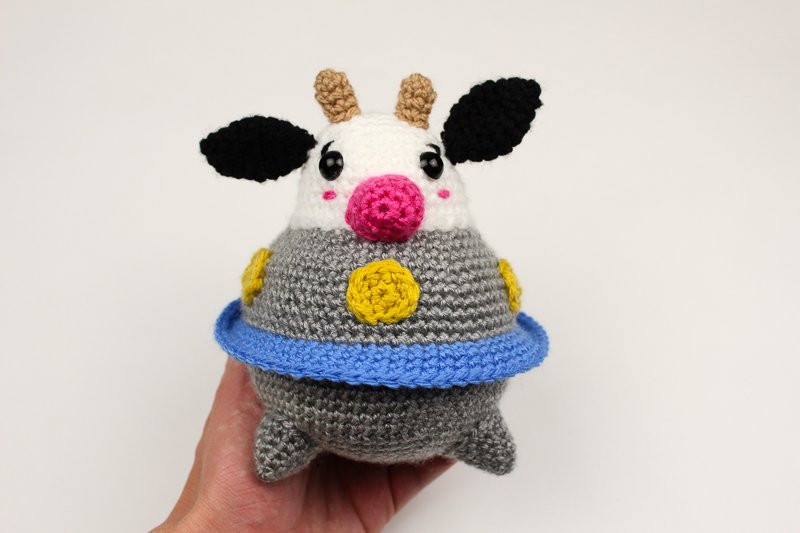
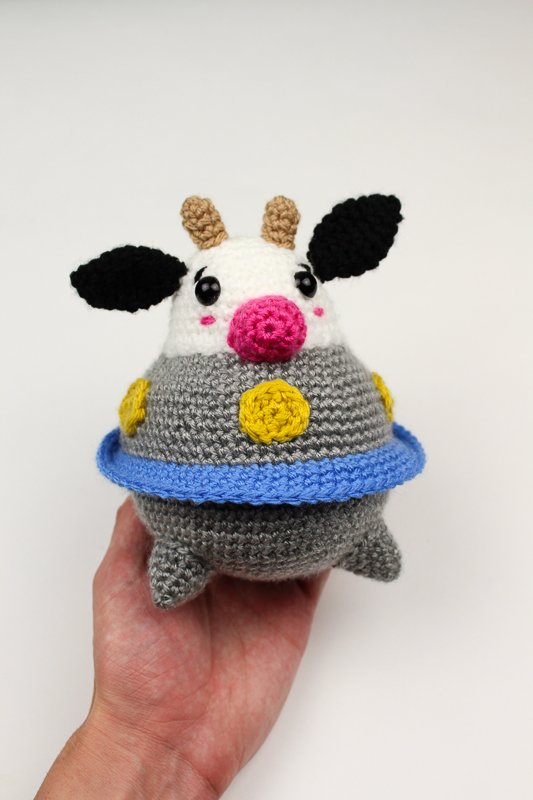
Hello amigurumi lovers and beautiful visitors, I wanted to share the free amigurumi patterns for you here. In my article I will share 1 pattern and how to make it for you. At the end of my article, I will share amigurumi patterns that can generate ideas for you.
So here’s what you’ll need:
All the yarns can be substituted with any worsted weight yarn*
Scissors
1 Skein in Lion Brand’s Basic Stitch Anti-Pilling (In Silver Heather)
1 Skein in Lion Brand’s Basic Stitch Premium (In White)
1 Skein in Lion Brand’s Basic Stitch Premium (In Black)
1 Skein in Lion Brand’s Basic Stitch Premium (In Raspberry)
1 Skein in Lion Brand’s Basic Stitch Premium (In Goldmine)
1 Skein in Lion Brand’s Basic Stitch Anti-Pilling (In Hot Pink)
1 Skein in Lion Brand’s Basic Stitch Anti-Pilling (In Mustard)
1 Skein in Lion Brand’s Basic Stitch Premium (In Coastal)
Darning Needle
Polyfill
Measuring tape
4mm Clover Hook
2 x 12mm Safety Eyes
Dimensions
Height: 6″ inches
Width: 5″ inches
Skill Level: Intermediate
Abbreviations: (This is written in US terms)
Ch – chain
Sl st – Slip Stitch
Sc – Single Crochet
Inc – Increase
FLO – Front Loop Only
* *- Repeat
FO -Finish Off
Notes:
- This pattern is worked in the round and not joined.
- You can choose any color combo you wish – Any worsted weight yarn will work!
- The photo tutorial for each step will be found UNDER the written step – You can find all assembly photos at the end!
Top Half of UFO
Rnd 1: 6 Single crochet into Magic Ring (6)
Rnd 2: *Inc* around (12)
Rnd 3: *Sc, Inc* around (18)
Rnd 4: *Sc 2, Inc* around (24)
Rnd 5: *Sc 3, Inc* around (30)
Rnd 6: *Sc 4, Inc* around (36)
Rnd 7: *Sc 5, Inc* around (42)
Rnd 8: *Sc 6, Inc* around (48)
Rnd 9: *Sc 7, Inc* around (54)
Rnd 10: *Sc 8, Inc* around (60)
Rnd 11: *Sc 9, Inc* around (66)
Rnd 12 – 15: Sc around (66)
Switch to blue (Coastal)
Rnd 16: In FLO, sc across (6)
17 – 19: Sc around (66)
Finish off.
Bottom Half
Rnd 1: 6 Single crochet into Magic Ring (6)
Rnd 2: *Inc* around (12)
Rnd 3: *Sc, Inc* around (18)
Rnd 4: *Sc 2, Inc* around (24)
Rnd 5: *Sc 3, Inc* around (30)
Rnd 6: *Sc 4, Inc* around (36)
Rnd 7: *Sc 5, Inc* around (42)
Rnd 8: *Sc 6, Inc* around (48)
Rnd 9: *Sc 7, Inc* around (54)
Rnd 10: *Sc 8, Inc* around (60)
Rnd 11: *Sc 9, Inc* around (66)
12 – 17: Sc around (66)
Finish off and leave tail for sewing.
UFO feet/stands – Make 3
Rnd 1: 5 Single crochet into Magic Ring (5)
Rnd 2: Sc around (5)
Rnd 3: *Inc* around (10)
Rnd 4: Sc around (10)
Rnd 5: *Sc, Inc* around (15)
Rnd 6: Sc around (15)
Finish off and leave tail for sewing
UFO Lights – Make 4
Rnd 1: 5 Single crochet into Magic Ring (5)
Rnd 2: *Inc* around (10)
Finish off and leave tail for sewing
Cow Head
Rnd 1: 6 Single crochet into Magic Ring (6)
Rnd 2: *Inc* around (12)
Rnd 3: *Sc, Inc* around (18)
Rnd 4: *Sc 2, Inc* around (24)
Rnd 5: *Sc 3, Inc* around (30)
Rnd 6 – 10: Sc around (30)
Insert your safety between rounds 7 and 8 with 7 stitches apart.
Nose
Rnd 1: 6 Single crochet into Magic Ring (6)
Rnd 2: *Inc* around (12)
Rnd 3 – 4: Sc around around (12)
Finish off and leave tail for sewing
Ears – Make 2
Rnd 1: 5 Single crochet into Magic Ring (5)
Rnd 2: Sc around (5)
Rnd 3: *Inc* around (10)
Rnd 4: Sc around (10)
Rnd 5: *Sc, Inc* around (15)
Rnd 6: Sc around (15)
Rnd 7: *Sc, Dec* around (10)
Rnd 8: Sc around (10)
Rnd 9: Dec around (5)
Close Hole Shut
Finish off and leave tail for sewing
Horns – Make 2
Rnd 1: 6 Single crochet into Magic Ring (6)
Rnd 2 – 4: Sc around 6)
Stuff firmly when sewing on!
Leave tail for sewing
Time to Assemble!
First, we’re going to attaching the top and bottom half of the UFO together! Working in those leftover back loops, you’ll be sewing it into place (Be sure to stuff firmly!)
Feel free to tag me (@freeamigurumii) in your photos on Instagram or Facebook if you’d like!


