Hello amigurumi lovers and beautiful visitors, I wanted to share the free amigurumi patterns for you here. In my article I will share 1 pattern and how to make it for you. At the end of my article, I will share amigurumi patterns that can generate ideas for you.
Supplies:
4/Medium weight yarn in the following:
Any Main Color
Any Contrast Color
12mm safety eyes, black embroidery thread, tapestry needle, scissors, and stuffing.
Additional Information:
Difficulty: Easy
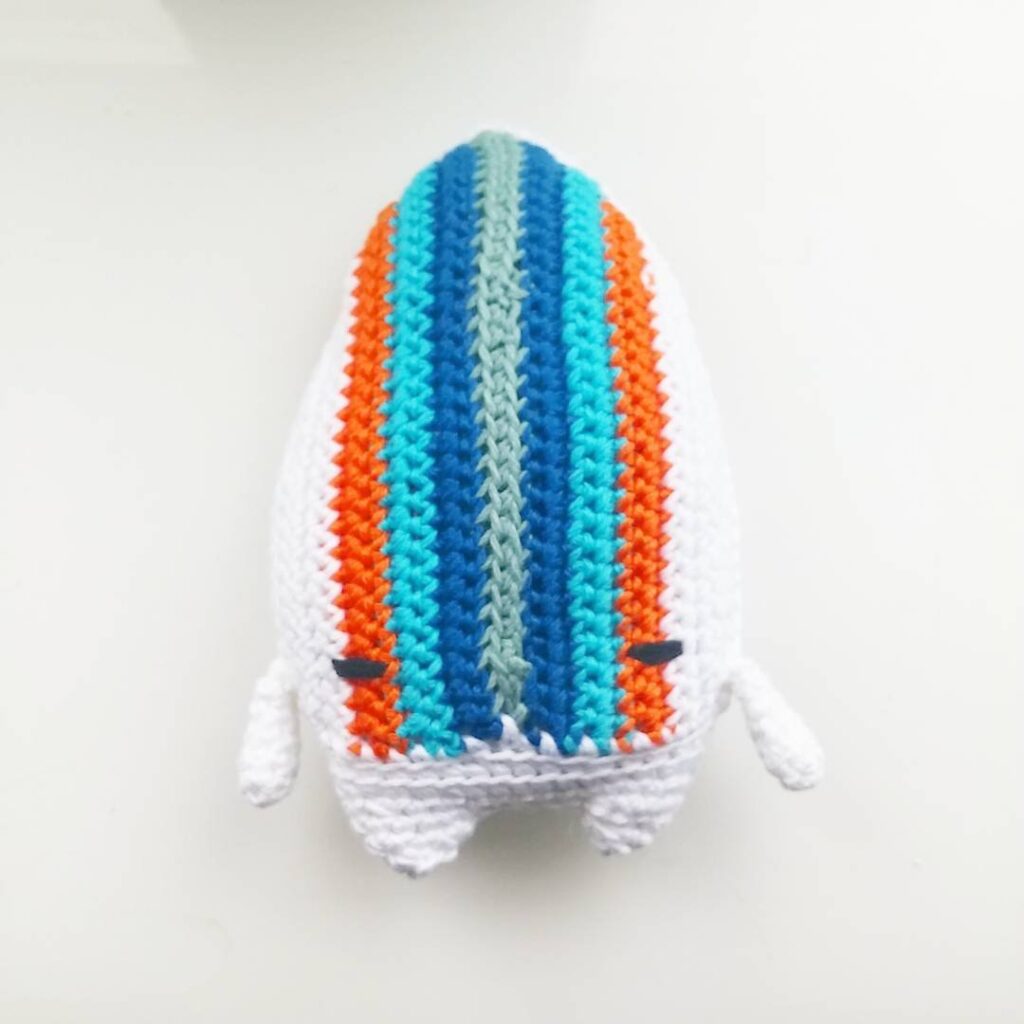
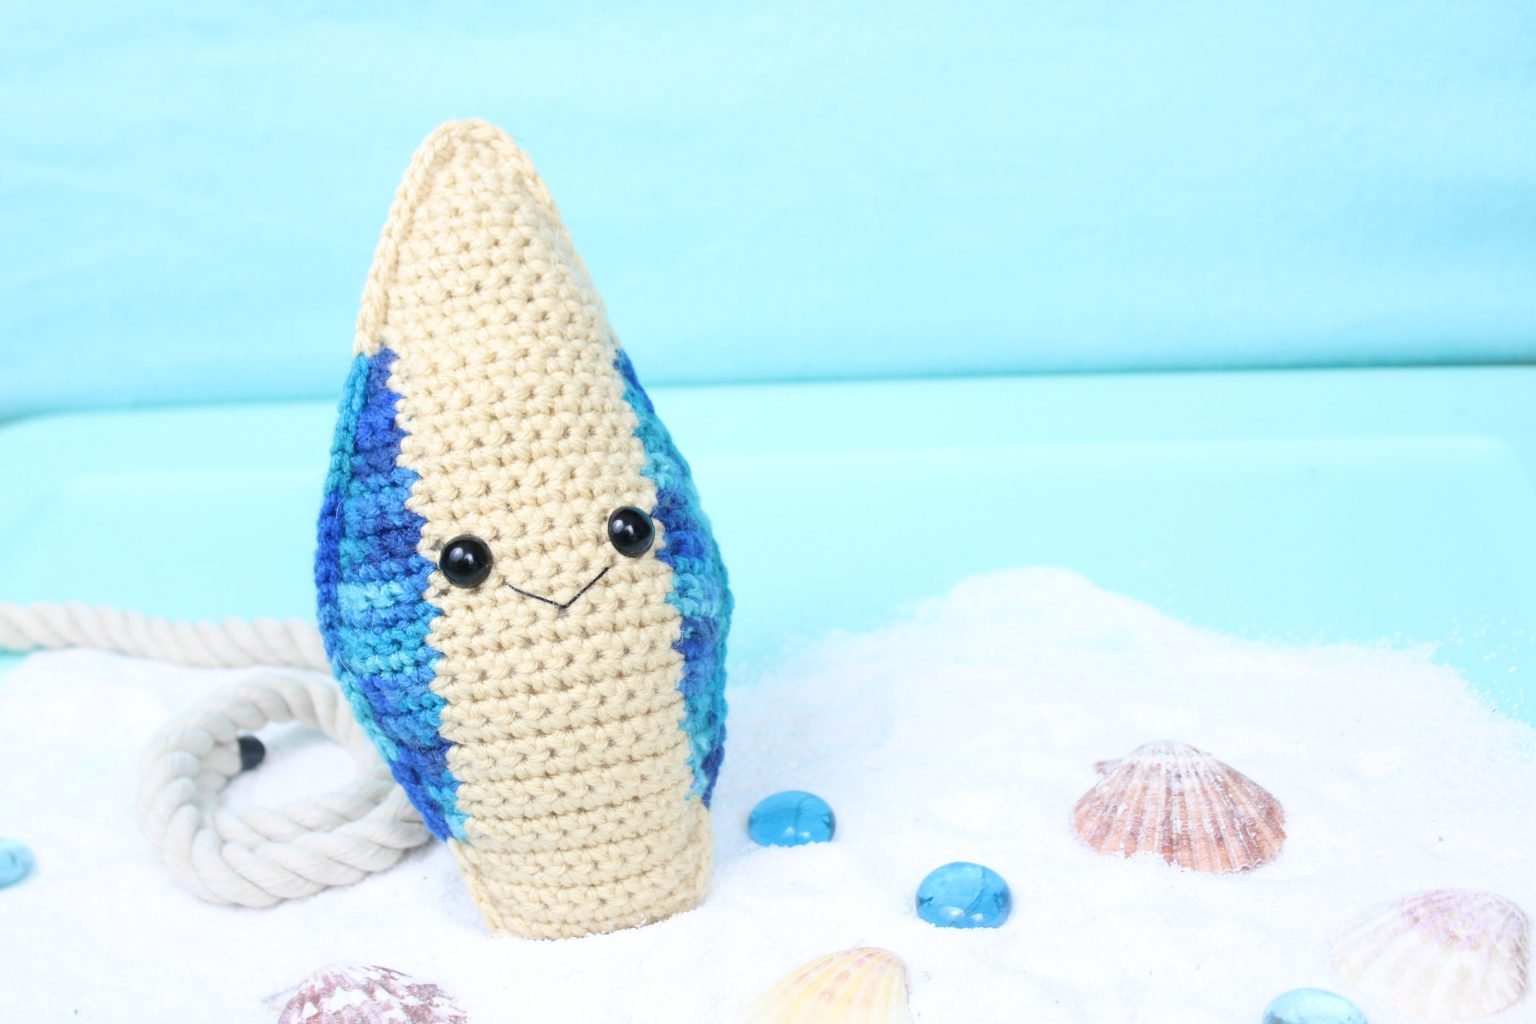
We make the front and back of the surfboard. The surfboard starts from the top and works our way to the bottom. We change colors as well, Main Color being the cream color and Contrast color being the variegated blue. After we make the front and back surfboard, we crochet them together. Next, we make the fin and sew on a smile!
Surfboard:
We start by creating the front and then the back of the surfboard. After creating both pieces, we will crochet them together! Note: Main color (abbreviation MC) is the color going down the middle, contrast color (abbreviation CC) is the colors on the sides.
Surfboard: (Make 2, 1 front and 1 back)
In Main Color
Row 1: Ch 4, Sc in the 2nd ch from the hook, Sc in the next 2 st (3)
Row 2: Turn, Sc in the next 3 st (3)
Row 3: Turn, Inc in the first st, Sc in the next st, Inc in the last st (5)
Row 4: Turn, Sc in the next 5 st (5)
Row 5: Turn, Inc in the first st, Sc in the next 3 st, Inc in the last st (7)
Row 6: Turn, Sc in the next 7 st (7)
Row 7: Turn, Inc in the first st, Sc in the next 5 st, Inc in the last st (9)
Row 8: Turn, Sc in the next 9 st (9)
Row 9: Turn, Inc in the first st, Sc in the next 7 st, Inc in the last st (11)
Row 10: Turn, Sc in the next 11 st (11)
Row 11: Turn, Change to Contrast Color and Sc 1, Change to Main Color and Sc in the next 9 st, Change to Contrast Color Sc in the next st (11)
Row 12: Turn, In CC Inc in the first st, In MC Sc in the next 9 st, In CC Inc in the last st (13)
Row 12 Will Look Like This
Row 13-14: Turn, In CC Sc in the next 2 st, In MC Sc in the next 9 st, In CC Sc in the next 2 st (13)
Row 15: Turn, Inc in the first st, Sc in the next st, In MC Sc in the next 9 st, In CC Sc in the next st, Inc in the last st (15)
Row 16-17: Turn, Sc in the next 3 st, In MC Sc in the next 9 st, In CC Sc in the next 3 st (15)
Row 18: Turn, Inc in the next st, Sc in the next 2 st, In MC Sc in the next 9 st, In CC Sc in the next 2 st, Inc in the last st (17)
Row 19-20: Turn, Sc in the next 4 st, In MC Sc in the next 9 st, In CC Sc in the next 4 st (17)
Row 21: Turn, Inc in first st, Sc in the next 3 st, In MC Sc in the next 9 st, In CC Sc in the next 3 st, Inc in the last st (19)
Note: In Round 22 we will add eye stitch markers to mark the eyes. Do this for only one side. If you’re making the back non-face side, simply don’t add eye markers.
Row 22: Turn, Sc in the next 5 st, In MC Sc in the next st. Sc in the next st and add a different colored st marker to the Sc just made. This marks where to place the eye. Sc in the next 5 st. Sc in the next st and add a different colored st marker to Sc just made. Sc in the next st, In CC Sc in the next 5 st (19)
Row 22 Eye Markers will look like this
Row 23-26: Turn, Sc in the next 5 st, In MC Sc in the next 9 st, In CC Sc in the next 5 st (19)
Add safety eyes in the marked areas from Round 22 now
Row 27: Turn, Dec 1 time, Sc in the next 3 st, In MC Sc in the next 9 st, In CC Sc in the next 3 st, Dec 1 time (17)
Row 28-29: Turn, Sc in the next 4 st, In MC Sc in the next 9 st, In CC Sc in the next 4 st (17)
Row 30: Turn, Dec 1 time, Sc in the next 2 st, In MC Sc in the next 9 st, In CC Sc in the next 2 st, Dec 1 time (15)
Row 31-32: Turn, Sc in the next 3 st, In MC Sc in the next 9 st, In CC Sc in the next 3 st (15)
Row 33: Turn, Dec 1 time, Sc in the next st. In MC Sc in the next 9 st, In CC Sc 1, Dec 1 time (13)
Row 34-35: Turn, Sc in the next 2 st, In MC Sc 9, In CC Sc 2 (13)
We will now work in the Main Color for the rest of the rows.
Row 36: In MC Turn, Dec 1 time, Sc in the next 9 st, Dec 1 time (11)
Row 37-38: Turn, Sc in the next 11 st (11)
Row 39: Turn, Dec 1 time, Sc in the next 7 st, Dec 1 time (9)
Row 40: Turn, Sc in the next 9 st (9)
Row 41: Turn, Dec 1 time, Sc in the next 5 st, Dec 1 time (7)
Row 42: Turn, Sc in the next 7 st (7)
Finish off. Make the second surfboard. Then continue on to Surfboard Assembly.
Surfboard Assembly:
Now we will crochet both pieces together. You can crochet the pieces together in a color of your choice, but I crocheted the surfboard together matching the Main Color and Contrast Color when needed. The example photos show otherwise just so you can see the yarn easier!
Place both surfboard pieces together, making sure the face is facing out and the stitches line up. Insert your crochet hook under BOTH stitches from the front and back surfboard. Pull yarn of your color choice through both of the stitches.
Single crochet around the entirety of the surfboard. Change colors to match the surfboard if you’d like. Be sure to stuff the surfboard before fully crocheting closed. Once you crochet around the entire thing, finish off and weave in the ends.
Fin:
In Contrast Color
Round 1: 6 Sc in Magic Ring (6)
Round 2: Sc in the next st, *Inc* in the next 3 st, Sc in the next 2 st (9)
Round 3: *Sc* all around (9)
Round 4: Sc in the next st, Repeat *Inc in the next st, Sc in the next st* 3 times, Sc in the next 2 st (12)
Round 5: Sc in the next 5 st, *Inc* in the next 3 st, Sc in the next 4 st (15)
Round 6: Sc in the next 8 st, *Inc* in the next 2 st, Sc in the next 5 st (17)
Finish off and fold the fin flat. Pin to the back of the surfboard and sew on. No need to stuff the fin.
Smile:
In Black Embroidery Thread
Insert the needle into the middle of the mouth area and pull out next to the left eye. Reinsert needle into the middle of the mouth and pull out next to the right eye. Reinsert needle into the middle of the mouth. Tie the ends and weave them into the surfboard.
Feel free to tag me (@freeamigurumii) in your photos on Instagram or Facebook if you’d like!
All Finished.