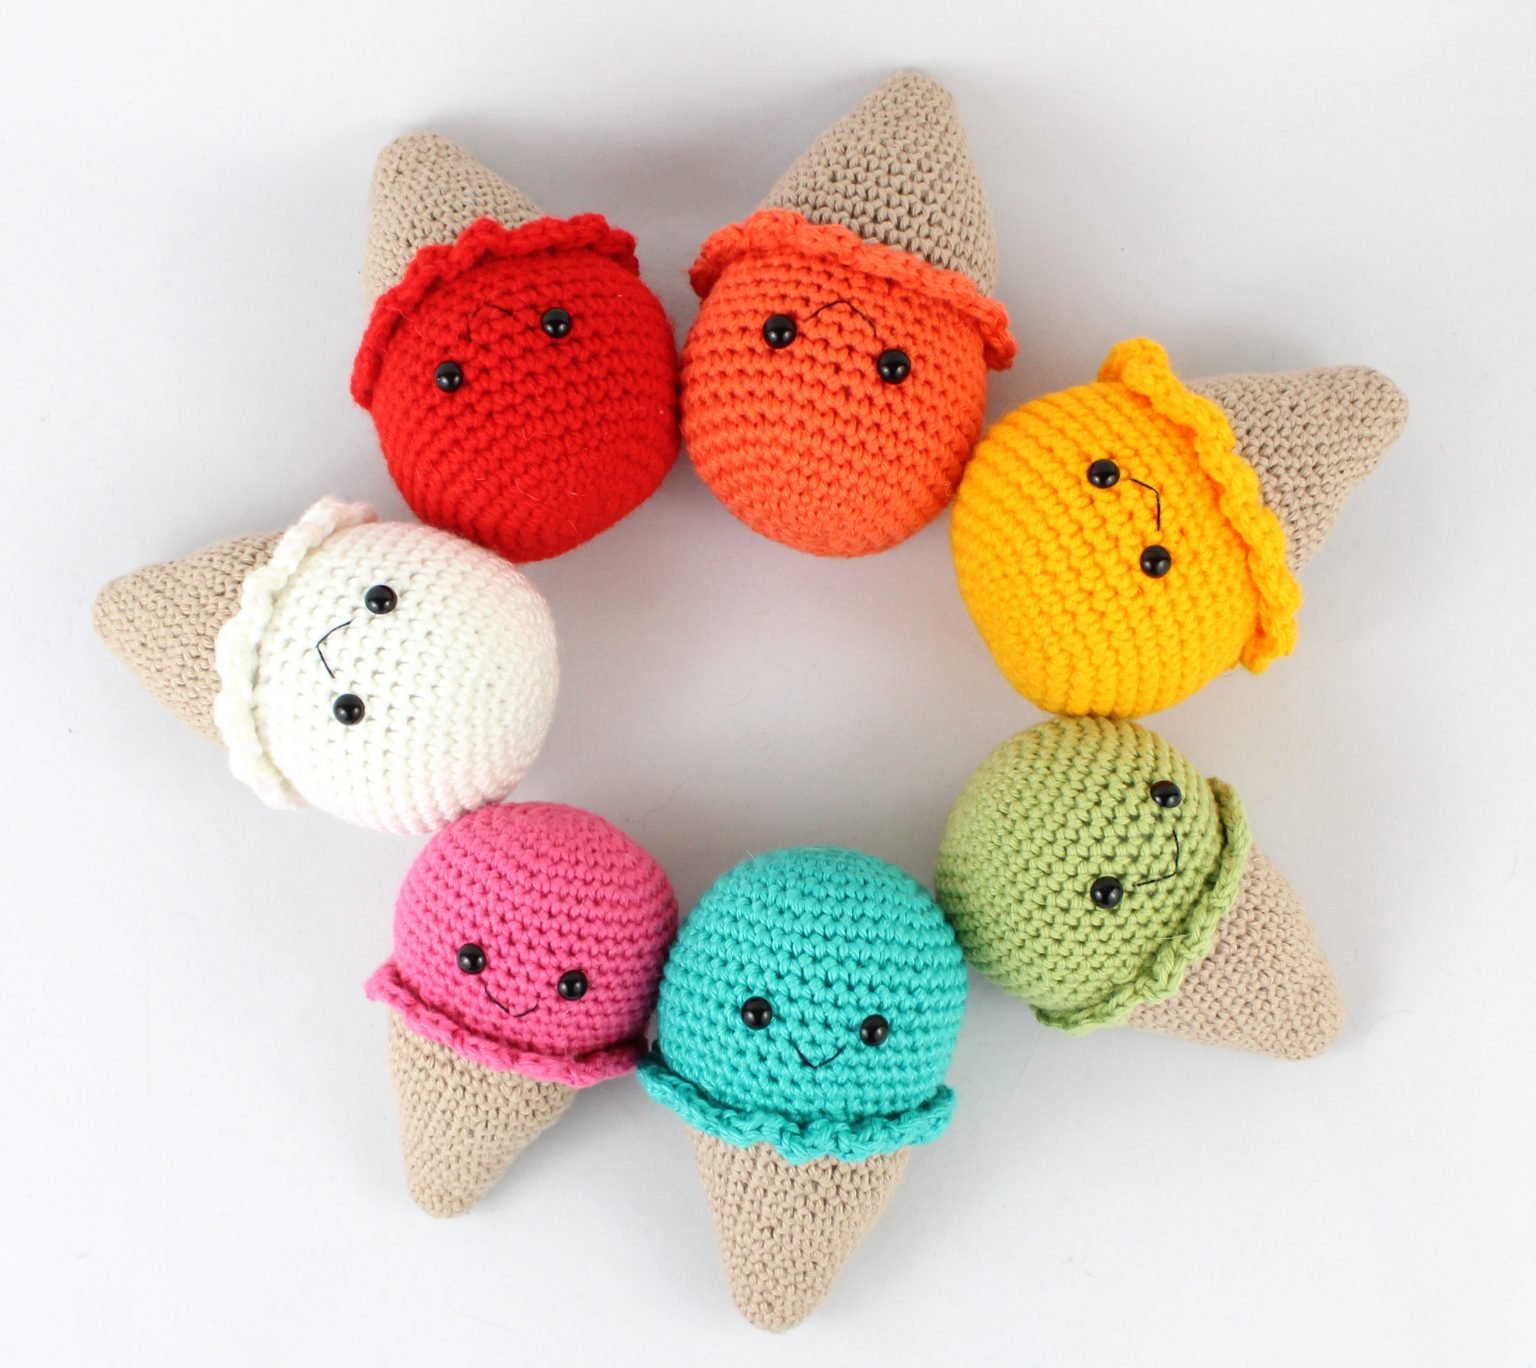
Hello amigurumi lovers and beautiful visitors, I wanted to share the free amigurumi patterns for you here. In my article I will share 1 pattern and how to make it for you. At the end of my article, I will share amigurumi patterns that can generate ideas for you.
Supplies:
4mm crochet hook, 4/Medium weight yarn in Main Color and Cone Color. 9mm safety eyes for big ice cream, 6mm safety eyes for small keychain ice cream tapestry needle, scissors, keychain (optional), and stuffing.
Additional Information:
Difficulty: Easy
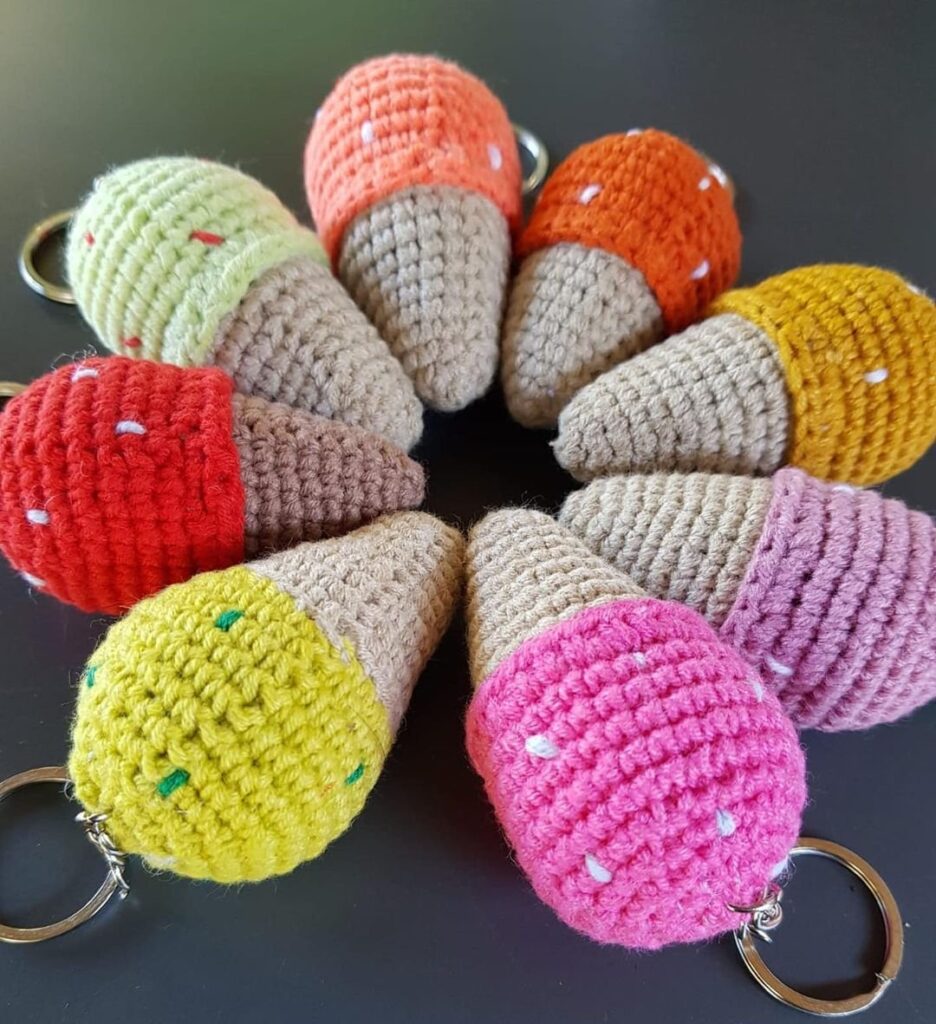
Make a big ice cream and a mini scrap,/keychain version! This pattern refers to “Main Color”. This is the main color you will use for your ice cream. We start by creating the ice cream top, then the cone, and we then sew them together. Next, you can create a mini ice cream, in which we sew on a keychain and then assemble the cone and ice cream together.
Ice Cream Top:
In Main Color
Round 1: 6 Sc in Magic Ring (6)
Round 2: *Inc* all around (12)
Round 3: *Inc, Sc* all around (18)
Round 4: *Inc, Sc 2* all around (24)
Round 5: *Inc, Sc 3* all around (30)
Round 6: *Inc, Sc 4* all around (36)
Round 7: *Inc, Sc 5* all around (42)
Round 8-11: *Sc* all around (42)
Round 12: Sc in the next 12 st. Sc in the next st and add a different colored stitch marker to the sc just made. This marks where to place the safety eye later. Sc in the next 4 st. Sc in the next st and add a different colored stitch marker to the sc just made. Sc in the next 24 st (42)
Round 12 eye markers pictures below
Round 13-16: *Sc* all around (42)
Add safety eyes in marked areas now.
Round 17: *Dec, Sc 5* all around (36)
Round 18: *Dec, Sc 4* all around (30)
Round 19: In the FLO (Front Loop Only),*Dc 4 times in the next stitch, SlSt in the next stitch* all around (75)
Finish off and leave a long tail for sewing. Set the ice cream aside for now and we will assemble it to the cone later.
Cone:
In Cone Color
Round 1: 6 Sc in Magic Ring (6)
Round 2: *Inc* all around (12)
Round 3-4: *Sc* all around (12)
Round 5: *Inc, Sc* all around (18)
Round 6-8: *Sc* all around (18)
Round 9: *Inc, Sc 2* all around (24)
Round 10-11: *Sc* all around (24)
Round 12: *Inc, Sc 3* all around (30)
Round 13-14: *Sc* all around (30)
Round 15: *Inc, Sc 4* all around (36)
Round 16-17: *Sc* all around (36)
Finish off. Continue to “Assembly”.
Ice Cream Assembly:
In Main Color
Take the tail of the yarn from the ice cream and insert it into a needle. Weave that tail of yarn to the BLO left from Round 19. Line up the ice cream and cone as shown, making sure the two tails of yarn align. Sew them together, going from the back loop only from the ice cream to the cone. Continue this until it’s almost completely sewed shut. Stuff here. Continue sewing closed. Tie a knot with both ends of yarn and weave them into the cone.
Smile:
In Black Embroidery Thread
Insert needle with thread into the middle mouth area of the ice cream and pull needle out around the left eye as shown. Reinsert needle into the original middle insertion spot and pull needle out around the right eye as shown. Reinsert needle into the original insertion spot. Done!
Mini Ice Cream Top:
In Main Color
Round 1: 6 Sc in Magic Ring (6)
Round 2: *Inc* all around (12)
Round 3: *Inc, Sc* all around (18)
Round 4: *Inc, Sc 2* all around (24)
Round 5: *Sc* all around (24)
Round 6: Sc in the next 8 st. Sc in the next st and add a different colored st marker to the Sc just made. Sc in the next 2 st. Sc in the next st and add a different colored st marker to the Sc just made. Sc in the next 12 st
Round 6 eye marked pictures below
Round 7-8: *Sc* all around (24)
Round 9: *Dec, Sc 2* all around (18)
Round 10: In the FLO (Front Loop Only) Repeat *2 Dc in the next stitch, SlSt in the next stitch* all around (27)
Finish off and leave a long tail for sewing. Add safety eyes in the marked areas from Round 6.
Set aside, we will assemble the ice cream to the cone soon.
Mini Ice Cream Cone:
In Cone Color
Round 1: 6 Sc in Magic Ring (6)
Round 2: *Sc* all around (6)
Round 3: *Inc* all around (12)
Round 4-5: *Sc* all around (12)
Round 6: *Inc, Sc* all around (18)
Round 7-8: *Sc* all around (18)
Finish off.
Adding a keychain:
In Main Color for Yarn
You can find an old keychain and reuse the metal part if you don’t have a set of new ones. Take a ~5″ piece of yarn and put it on a needle. Now insert the needle into the ice cream as shown and pull out to the top. Pull the needle through the keychain and insert it back into the ice cream. Tie a firm knot a few times with the two ends of yarn to secure.
Cone Assembly:
In main Color
Take the tail of the yarn from the ice cream and insert it into a needle. Weave that tail of yarn to the BLO left from Round 10. Line up the ice cream and cone as shown, making sure the two tails of yarn align. Sew them together, going from the back loop only from the ice cream to the cone. Continue this until it’s almost completely sewed shut. Stuff here. Continue sewing closed. Tie a knot with both ends of yarn and weave them into the cone.
Smile:
In Black Embroidery Thread
Insert needle with thread into the middle mouth area of the ice cream and pull needle out around the left eye as shown. Reinsert needle into the original middle insertion spot and pull needle out around the right eye as shown. Reinsert needle into the original insertion spot.
Feel free to tag me (@freeamigurumii) in your photos on Instagram or Facebook if you’d like!
All Finished.