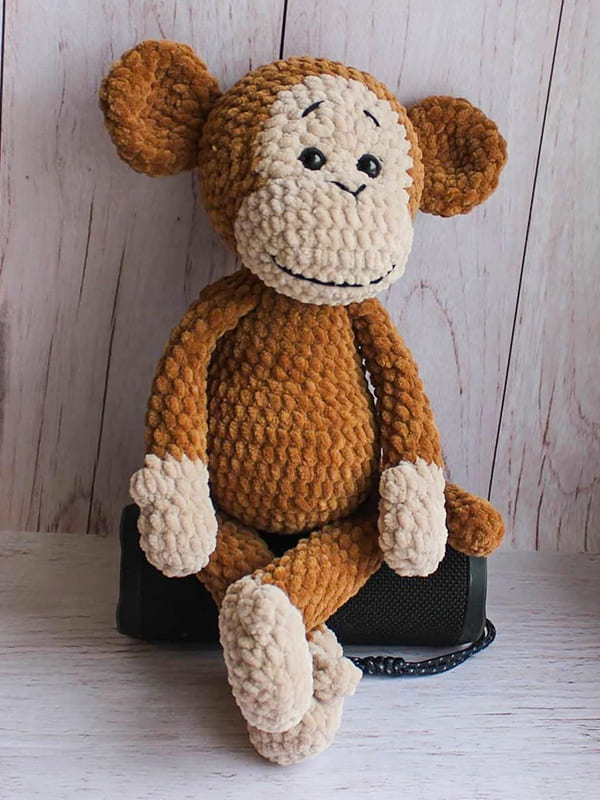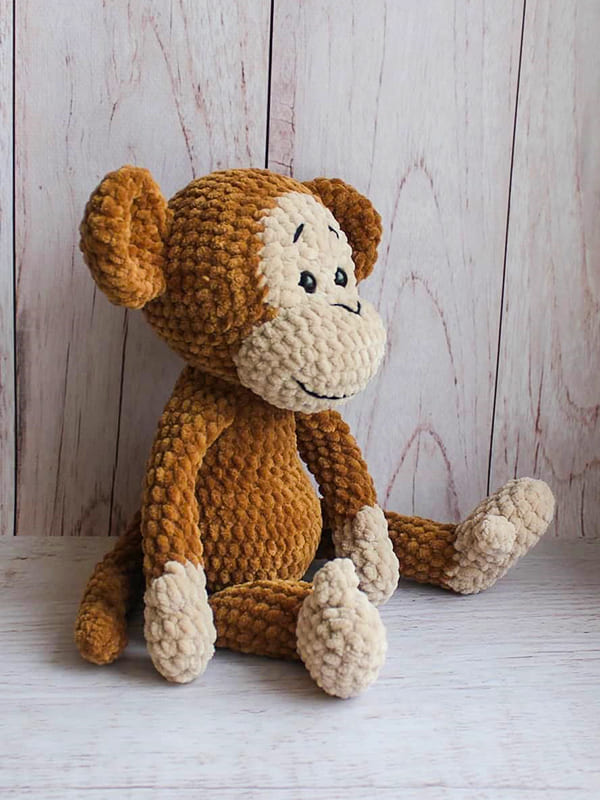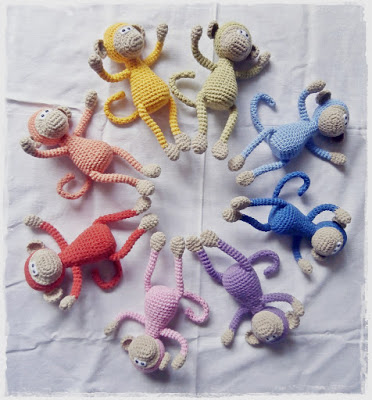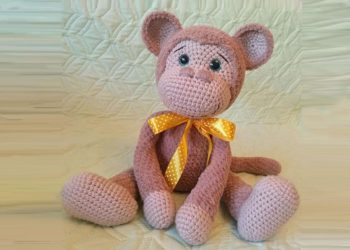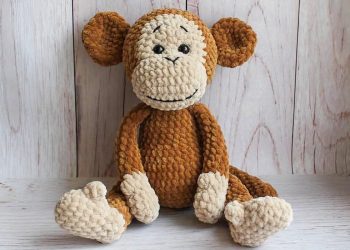
Hello amigurumi lovers and beautiful visitors, I wanted to share free amigurumi models with you here. In my article, I will share with you a model and how to make it. At the end of my article, I will share with you the detailed construction patterns of the mold.
Necessary Materials
• Plush yarn Himalaya Dolphin Baby, YarnArt Dolce main color – one skein the color of the muzzle and paws – a little
• Filler (holofiber, sintepukh)
• Eyes 12 mm
• Thread for decorating the muzzle
• Crochet hook No. 3.5 mm or 4 mm
• Needle for stitching parts and tightening
• Thread for tightening
Abbreviations
MR- Magic ring
Sc- Single crochet
Hdc- Half double crochet
Inc- Increase
Dec- Decrease
HDC-INC- Half double crochet increase
Dc- Double crochet
Ch- Chain
• The height of the finished toy is about 30 cm.
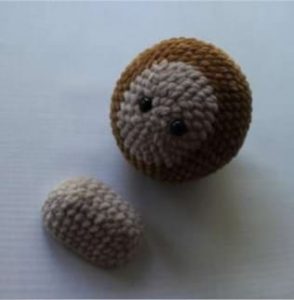
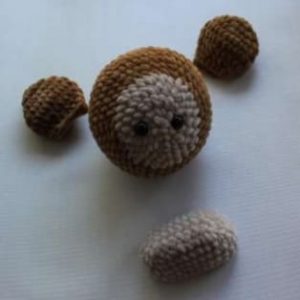
Head
Muzzle color
Rnd 1. 6 sc in MR
Rnd 2. (inc)*6 (12)
Rnd 3. (3 hdc inc, 3 sc)*2 (18)
Rnd 4. (hdc, hdc inc)*3, 3 sc, (hdc, hdc inc)*3, 3 sc (24)
Rnd 5. (2 hdc, hdc inc)*3, 3 sc, (2 hdc, hdc inc)*3, 3 sc (30)
Change color to main
Rnd 6. (4 sc, inc)*6 (36)
Rnd 7. (5 sc, inc)*6 (42)
Rnd 8. (6 sc, inc)*6 (48)
Rnd 9-13. 48 sc (5 rnds)
Rnd 14. (6 sc, dec)*6 (42)
Rnd 15. (5 sc, dec)*6 (36)
Rnd 16. (4 sc, dec)*6 (30)
Rnd 17. (3 sc, dec)*6 (24)
Rnd 18. (2 sc, dec)*6 (18)
Rnd 19. (1 sc, dec)*6 (12)
Rnd 20. 6 dec
Insert eyes between rows 2 and 3.
Muzzle
Muzzle color
Rnd 1. 9 ch
Rnd 2. from the 2nd loop 7 sc, 3 sc in one loop, expand crochet, 7 sc, 3 sc in one loop (20)
Rnd 3. 7 sc, 3 inc, 7 sc, 3 inc (26)
Rnd 4. 7 sc, (sc, inc)*3, 7 sc, (sc, inc)* 3 (32)
Rnd 5-6. 32 sc (2 rnds)
Sew a muzzle between 1 and 9 rows,
Make a tightening, arrange.
Ears
Main color
Rnd 1. 6 sc in MR
Rnd 2. (inc)*6 (12)
Rnd 3. (1 sc, inc)*6 (18)
Rnd 4. (2 sc, inc)*6 (24)
Rnd 5-6. 24 sc (2 rnds)
Rnd 7. (2 sc, dec)*6 (18)
Rnd 8. (sc, dec)*6 (12)
Fold in half, crochet together, sew to the head between 11 and 12 rows.
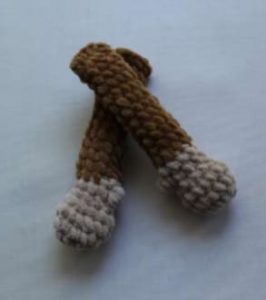
Arms
Paw color
Rnd 1. 4 ch
Rnd 2. from the 2nd loop 2 sc, 3 sc in one loop, expand crochet, 2 sc, 3 sc in one loop (10)
Rnd 3. (2 sc, inc, sc, inc) x 2 (14)
Rnd 4. 14 sc
Rnd 5. (2 sc, dec, sc, dec) x 2 (10)
Rnd 6. 9 sc, bump of 5 sc (from one loops we crochet 5 untied dc, then crochet them together) (10)
Rnd 7. 10 sc
Change color to main
Rnd 8-19. 10 sc (12 rows)
Fold in half, crochet together.
We only stuff the paws, not much, the paws should remain flat.
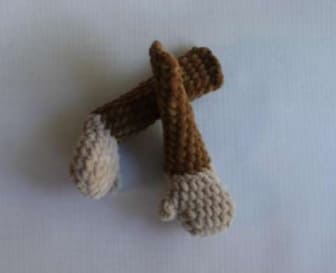
Finger
Paw color
Rnd 1. 4 sc in MR
Rnd 2. 4 sc
Leave a thread to connect.
Fingers and paws about 10 cm.
Legs
Paw color
Rnd 1. 5 ch
Rnd 2. from the 2nd loop 3 sc, 3 sc in one loop, expand crochet, 3 sc, 3 sc in one loop (12)
Rnd 3. (3 sc, inc, sc, inc)*2 (16)
Rnd 4. 16 sc
For right leg
Rnd 5. 7 sc on the foot, 3 sc on the finger, skip one on the foot loop and crochet the remaining 8 sc (18)
For left leg
Rnd 5. 14 sc on the foot, 3 sc on the finger, skip one on the foot loop and crochet sc (18)
Connect with sc the finger and the foot with a thread from the finger into the missed loops.
Rnd 6. 18 sc
Rnd 7. (dec, 4 sc, dec, sc)*2 (14)
We crochet the heel
Rnd 8. 6 sc, ch, unfold crochet
Rnd 9. 6 sc, ch, unfold crochet
Rnd 10. 6 sc, dec on ch lift, sc, 3 dec, sc, dec on ch rise (13)
Change color to main
Rnd 11-24. 13 sc (14 rnds)
Fold in half, crochet together.
We only stuff the paws, not very much, we do not turn them into balls.
Body
Rnd 1. 6 sc in MR
Rnd 2. (inc)*6 (12)
Rnd 3. (1 sc, inc)*6 (18)
Rnd 4. (2 sc, inc)*6 (24)
Rnd 5. (3 sc, inc)*6 (30)
Rnd 6. (4 sc, inc)*6 (36)
Rnd 7. (5 sc, inc)*6 (42)
Rnd 8. 7 sc, 6 sc with the left leg, 15 sc, 6 sc with the right leg, 8 sc (42)
Rnd 9-11. 42 sc (3 rows)
Rnd 12. 10 sc, dec, (2 sc, dec)*5, 10 sc (36) – there will be a tummy,
Check that the reductions are in the center, between the legs.
Rnd 13. 36 sc
Rnd 14. 10 sc, dec, (1 sc, dec)*5, 9 sc (30)
Rnd 15-16. 30 sc (2 rnds)
Rnd 17. (8 sc, dec)*3 (27)
Rnd 18. 27 sc
Rnd 19. (7 sc, dec)*3 (24)
Rnd 20. 5 sc, 5 sc with a handle, 6 sc, 5 sc with a second handle, 3 sc (24)
Rnd 21. (2 sc, dec)*3 (18)
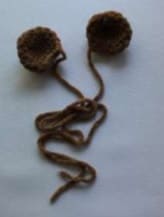
Tail
Rnd 1. 6 sc in MR
Rnd 2. (sc, inc)*3 (9)
Rnd 3-22. 9 sc (20 rnds)
Feel free to tag me (@freeamigurumii) in your photos on Instagram or Facebook if you’d like!
All Finished.