Hello amigurumi lovers and beautiful visitors, I wanted to share the free amigurumi patterns for you here. In my article I will share 1 pattern and how to make it for you. At the end of my article, I will share amigurumi patterns that can generate ideas for you.
Abbreviations
MR: Amigurumi Magic ring
sc : Single Crochet
inc : Increase
dec : Decrease
trc : Triple Crochet/ Treble Crochet
st: Stitch
dc : Double Crochet
hdc: Half Double Crochet
slst : Slip Stitch
ch : Chain
..in : make increase into same stitch as many as the number which is given in front of “inc” abbreviation (exp; 3inc, 4inc..).
FLO : Crochet into front loops only
BLO : Crochet into back loops only
Materials
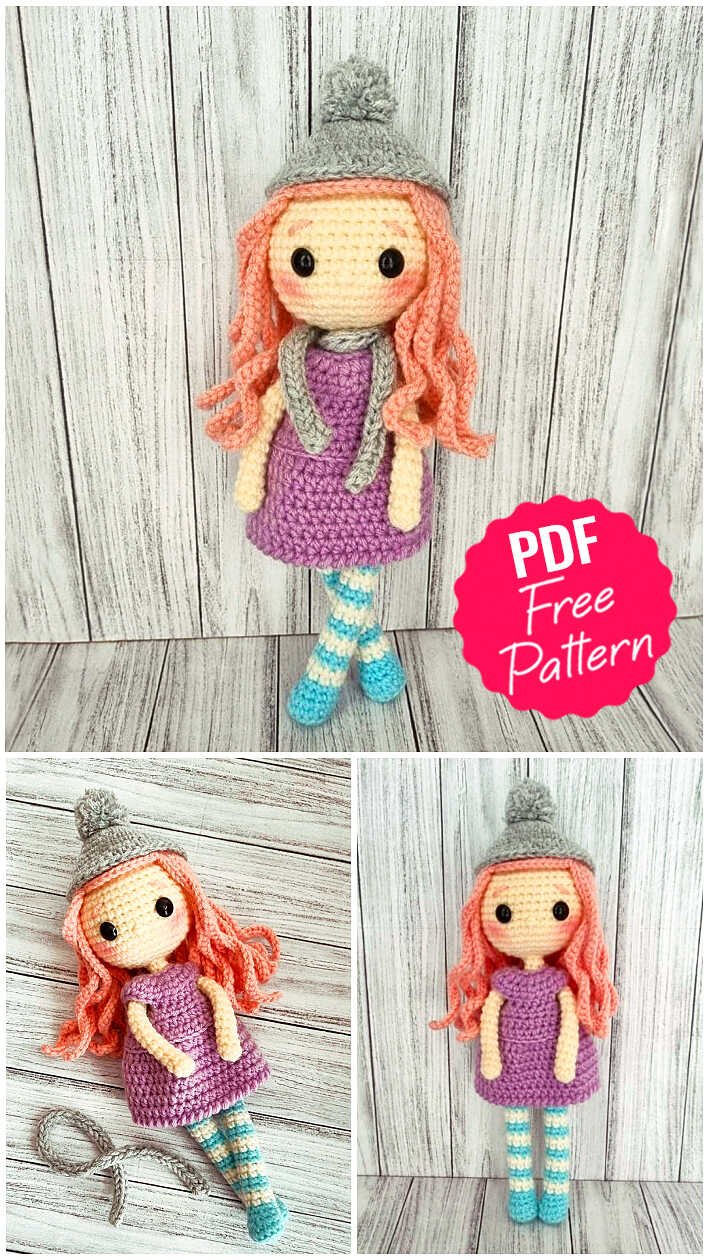
• Cotton or acrylic yarn in the following colors: light peach (for the skin), sky blue, pink, grey, light purple and milk
• 3. 5 Mm crochet hook
• Stuffing
• Wooden chopstick to support the head
• 8 Mm security eyes
Fill the doll as you go, the arms don’t need to be filled.
Arms
Light Peach Yarn
R1. sc in MR
R2. – R14. 6 sc
Make 1 sl and close the arm with 2 sc. Make the other arm and save them for later to be joint on body’s round 14.
Legs
Sky Blue Color
R1. 7 sc in MR
R2. 7 inc (14)
R3. BLO 14 sc
R4. 4 sc, 3 dec, 4 sc (11)
R5. 4 sc, 2 dec, 3 sc (9)
R6. 3 sc, 1 dec, 4 sc (8)
Color Change To Beige
R7 – R8. 8 sc
Color Change To Blue
R9 – R10. 8 sc
Color Change To Beige
R11 – R12. 8 sc
Color Change To Blue
R13 – R14. 8 sc
Color Change To Beige
R15 – R16. 8 sc
Color Change To Blue
R17 – R18. 8 sc
Color Change To Beige
R19 – R20. 8 sc
Color Change To Blue
R21 – R22. 8 sc
Color Change To Beige
R23 – R24. 8 sc
Color Change To Blue
R25 – R26. 8 sc
Color Change To Beige
R27 – R28. 8 sc
Make another sc if needed, so the last stitch is on the inside on the leg. Finish off the first leg. Make another leg and do not cut the yarn as we will join the legs to start the body.
Body
Milk yarn
Continue from de second leg
R1. 5 sc, 4 ch, We join the first leg, 8 sc, 4 sc through the chains of the union, 3 sc (24)
R2 – R6. 24 sc
Change to skin color
R7. 24 sc
R8. dec, 9 sc, dec, 11 sc (22)
R9. 4 sc, dec, 10 sc, 4 sc (20)
R10. 20 sc
R11. dec, 7 sc, dec, 9 sc (18)
R12. 18 sc
R13. (1 sc, dec)*6 (12)
R14. 12 Sc (12) join the arms with 2 sc, make sure they are even on the sides with 4 stitches between them.
R15. 12 sc
R16. 6 dec (6)
R17 – R18. 6 sc
Head
Continue from the neck
R1. 6 inc (12)
R2. 12 inc (24)
R3. (3 sc, inc)*6 (30)
R4. 2 sc, inc, (4 sc, inc)*5, 2 sc (36)
R5. (5 sc, inc)*6 (42)
R6 – R13. 42 sc
Place the eyes between rounds 8 – 9, with 7 stitches apart. Embroider the nose between rounds 7 and 8. The eyebrows are to be placed between rounds 11 – 12.
R14. (5 sc, dec)*6 (36)
R15. 2 sc, dec, (4 sc, dec)*5 2 sc (30)
R16. (3 sc, dec)*6 (24)
R17. 1 sc, dec, (2 sc, dec)*5, 1 sc (18)
R18. (1 sc, dec,)*6 (12)
R19. 6 dec (6)
Close by sewing the front loops of the last round and pull to tighten the yarn.
Dress
Light purple yarn
We will crochet in rows from now on making 2 turning chains. Chain 14, skip the las two and start from there.
R1. 12 hdc
R2. (1 hdc, inc)*6 (18)
R3. (2 hdc, inc)*6 (24)
R4. 4 hdc, 5 ch, skip 5 stitches, 6hdc, 5 cd skip 5 stitches, 4 hdc (24)
R5. 24 hdc
R6. (5 hdc, inc)*4 (28)
R7. (1 hdc, inc)*14 (42), Join with slst in for hdc, From here close all rows.
R8 – R12. 42 hdc
R13. 42 Reverse single crochet (Optional)
Finish off. Place a button on the top of the dres to close it.
Hair
Pink Yarn
R1. 6 sc in MR
R2. 6 inc (12)
R3. (1 sc, inc)*6 (18)
R4. (2 sc, inc)*6 (24)
R5. (3 sc, inc)*6 (30)
R6. 2 sc, inc, (4 sc, inc)*5, 2 sc. (36)
R7. 36 sc
To do the hair, chain 35, then 34 sc and join to the main wig with a sl. Make 24 locks of hair.
Cap
Grey yarn
R1. 6 sc in MR
R2. 6 inc (12)
R3. (1 sc, inc)*6 (18)
R4. (2 sc, inc)*6 (24)
R5. (3 sc, inc)*6 (30)
R6. 2 sc, inc, (4 sc, inc)*5, 2 sc (36)
R7. (8 sc, inc)*4 (40)
R8 – V9. 40 sc
R10. Slst, 2 ch, 40 hdc, slst.
Make a tassle and join it to the top on the cap.
To finish with some last few details put some blush on the cheeks, put some lashes and shoelaces or whatever you like, feel free to explore your creativity.
Feel free to tag me (@freeamigurumii) in your photos on Instagram or Facebook if you’d like!
All Finished.