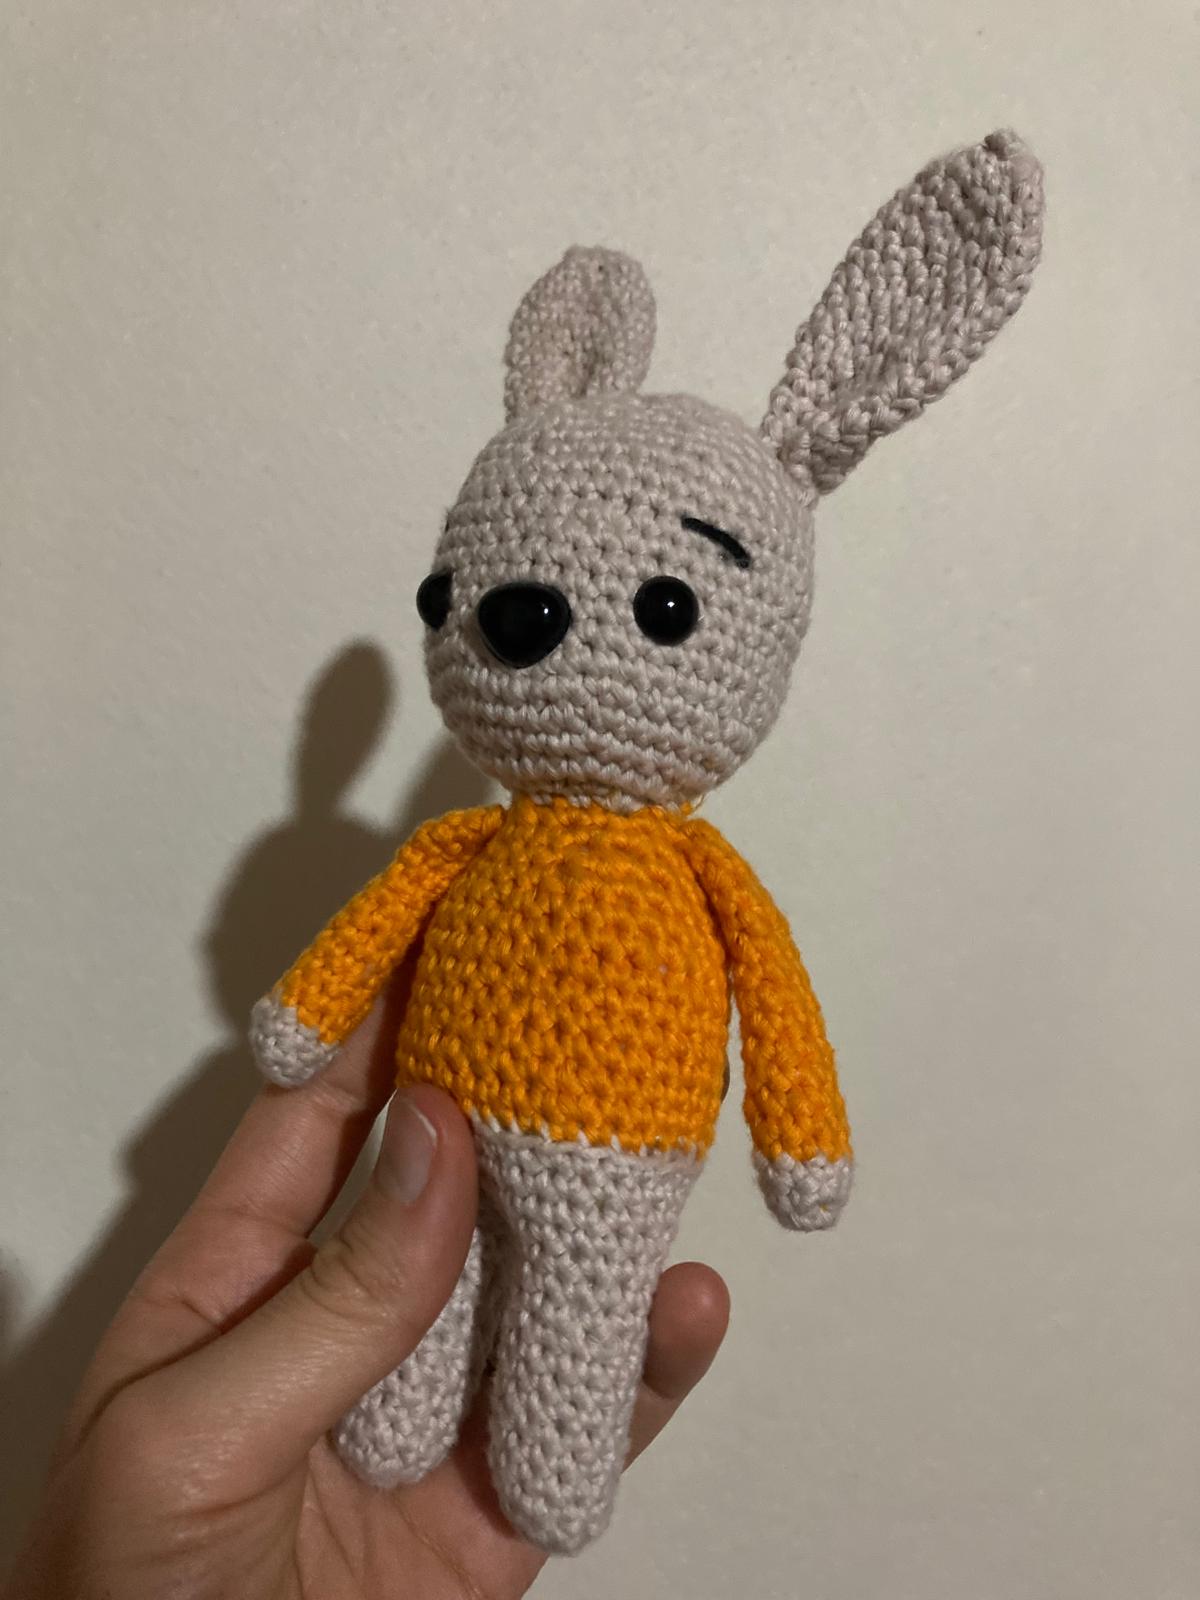
Hello amigurumi lovers and beautiful visitors, I wanted to share free amigurumi models with you here. In my article, I will share with you a model and how to make it. At the end of my article, I will share with you the detailed construction patterns of the mold.
Necessary materials
• Filler for toys (synthetic winterizer, synthetic winterizer, or holofiber).
• Yarn for crocheting (any composition, semi-cotton is preferable).
• Beads for the eyes (or eyes en secure fastening 4 mm).
• Multi-colored small buttons to decorate the clothes of dolls.
• Hook number 1.5 – 2.0 mm
Abbreviations
MR: Magic ring
Sc: Single crochet
Ch: Chain
Inc: Increase
Dec: Decrease
Slst: Slip stitch
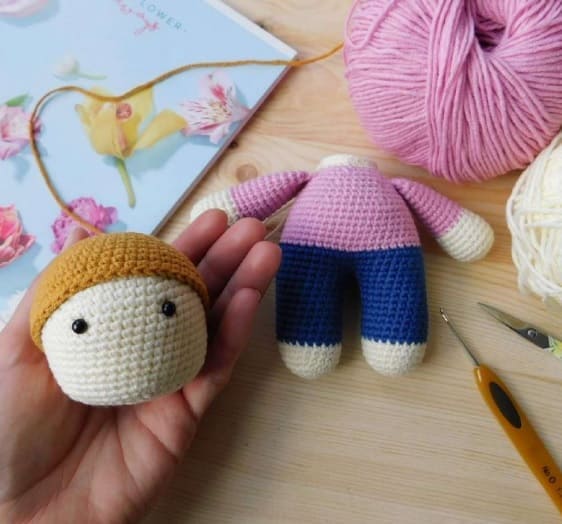
Head
Rnd 1. 6 sc in MR
Rnd 2. inc х 6 = 12 sc
Rnd 3. (1 sc, inc) х 6 = 18 sc
Rnd 4. (2 sc, inc) х 6 = 24 sc
Rnd 5. (3 sc, inc) х 6 = 30 sc
Rnd 6. (4 sc, inc) х 6 = 36 sc
Rnd 7. (5 sc, inc) х 6 = 42 sc
Rnd 8. (6 sc, inc) х 6 = 48 sc
Rnd 9–20. (12 rows) 48 sc
Rnd 21. (6 sc, dec) х 6 = 42 sc
Rnd 22. 2 sc, dec, (5 sc, dec) х 5, 3 sc = 36 sc
Rnd 23. (4 sc, dec) х 6 = 30 sc
Rnd 24. 1 sc, dec, (3 sc, dec) х 5, 2 sc = 24 sc
Insert eyes (if you chose eyes on a secure mount) between the 12th and 13th rows. The distance between the eyes is 6-7 loops (at your discretion). Eye size 4 mm.
Arms (Make 2)
We crochet with the main color.
Rnd 1. 6 sc in MR
Rnd 2. inc х 6 = 12 sc
Rnd 3. (1 sc, inc) х 6 = 18 sc
Rnd 4. (5 sc, inc) х 3 = 21 sc
Rnd 5–7. 21 sc
Rnd 8. (5 sc, dec) х 3 = 18 sc
Rnd 9. 18 sc
Change the main color to the color of the clothes.
Rnd 10–18. (9 rows) 18 sc
Rnd 19. (4 sc, dec) х 3 = 15 sc
Rnd 20. (3 sc, dec) х 3 = 12 sc
Rnd 21. Fold the piece in half at the top and crochet 5 sc.
Leave a long end of the thread for sewing on the part.
Also, if desired, the handles can not be sewn, but crochet into the body.
We crochet the handles in the 33rd row or sew between the 33rd and 34th rows.
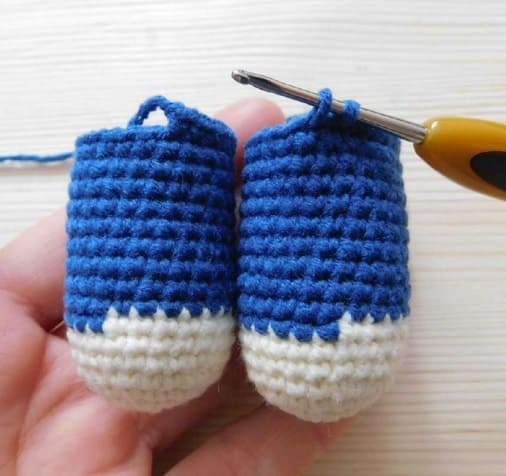
Left leg
We crochet with the main color.
Rnd 1. 6 sc in MR
Rnd 2. inc х 6 = 12 sc
Rnd 3. (sc, inc) х 6 = 18 sc
Rnd 4. (2 sc, inc) х 6 = 24 sc
Rnd 5–7. 24 sc
We change the color of the thread from the main one to the color of the clothes (blue, light blue – we crochet jeans).
Rnd 8–17. (10 rows) 24 sc
At the end of the 17th row, we crochet ch, cut the thread and pull it through ch, thereby we fix it.
Right leg
We crochet with the main color.
Rnd 1. 6 sc in MR
Rnd 2. inc х 6 = 12 sc
Rnd 3. (sc, inc) х 6 = 18 sc
Rnd 4. (2 sc, inc) х 6 = 24 sc
Rnd 5–7. 24 sc
We change the color of the thread from the main one to the color of the clothes (blue, light blue – we crochet jeans).
Rnd 8–17. (10 rows) 24 sc
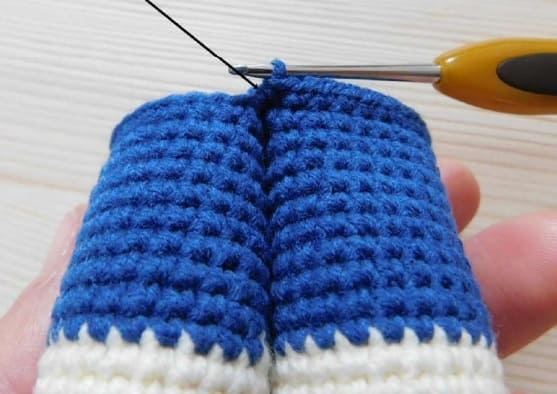
We attach one leg to the other, we continue crocheting.
We mark the beginning of the next row on the back of the toy along the left leg.
Rnd 18. 24 sc left leg, 24 sc right leg = 48 sc.*
If a hole has formed between the legs, sew it with a thread.
(To avoid a hole, the legs can be connected as follows: we connect the legs with a decrease in the back, 23 sc on the left leg, we connect the legs with a decrease in the front, 23 sc on the right leg = 48 sc).
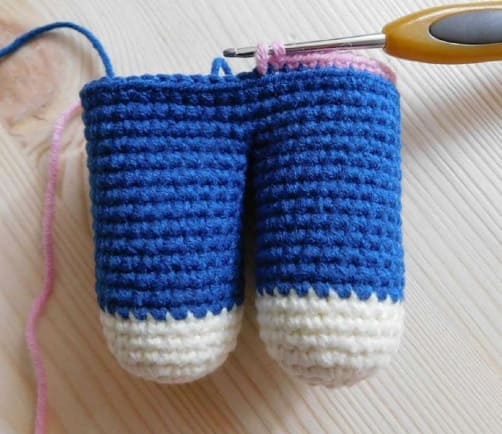
Rnd 19–21. 48 sc
Change the color of the thread to the color of the sweater.
Rnd 22–28. 48 sc
Rnd 29. (6 sc, dec) х 6= 42 sc
Rnd 30-31. 42 sc
Rnd 32. (5 sc, dec) х 6 = 36 sc
Rnd 33. 36 sc. In this row we crochet arms.
Rnd 34. (4 sc, dec) х 6 = 30 sc
Rnd 35. (3 sc, dec) х 6 = 24 sc
Change the color of the clothes to the main color.
Rnd 36–37. 24 sc
Hairstyle
Rnd 1. 6 sc in MR
Rnd 2. inc х 6 = 12 sc
Rnd 3. (1 sc, inc) х 6 = 18 sc
Rnd 4. (2 sc, inc) х 6 = 24 sc
Rnd 5. (3 sc, inc) х 6 = 30 sc
Rnd 6. (4 sc, inc) х 6 = 36 sc
Rnd 7. (5 sc, inc) х 6 = 42 sc
Rnd 8. (6 sc, inc) х 6 = 48 sc
Rnd 9–16. (8 rows) 48 sc
Hairstyle “Bagels” (2 pieces)
Rnd 1. 6 sc in MR
Rnd 2. inc х 6 = 12 sc
Rnd 3. (1 sc, inc) х 6 = 18 sc
Rnd 4. (2 sc, inc) х 6 = 24 sc
Rnd 5–7. 48 sc
Rnd 8. (2 sc, dec) х 6 = 18 sc
Rnd 9. (4 sc, dec) х 3 = 15 sc
Assembly
Sew on the head.
We sew on the handles, if you did not crochet them in the course of crocheting the body.
We sew a wig to the head, then “bagels”.
We decorate clothes with a button.
We decorate the hairstyle with crochet bows or ribbons.
Embroider nose, mouth and eyelashes.
Feel free to tag me (@freeamigurumii) in your photos on Instagram or Facebook if you’d like!
All Finished.