Hello amigurumi lovers and beautiful visitors, I wanted to share the free amigurumi patterns for you here. In my article I will share 1 pattern and how to make it for you. At the end of my article, I will share amigurumi patterns that can generate ideas for you.
Different Yarns for Different Crochet Stuffed Animals
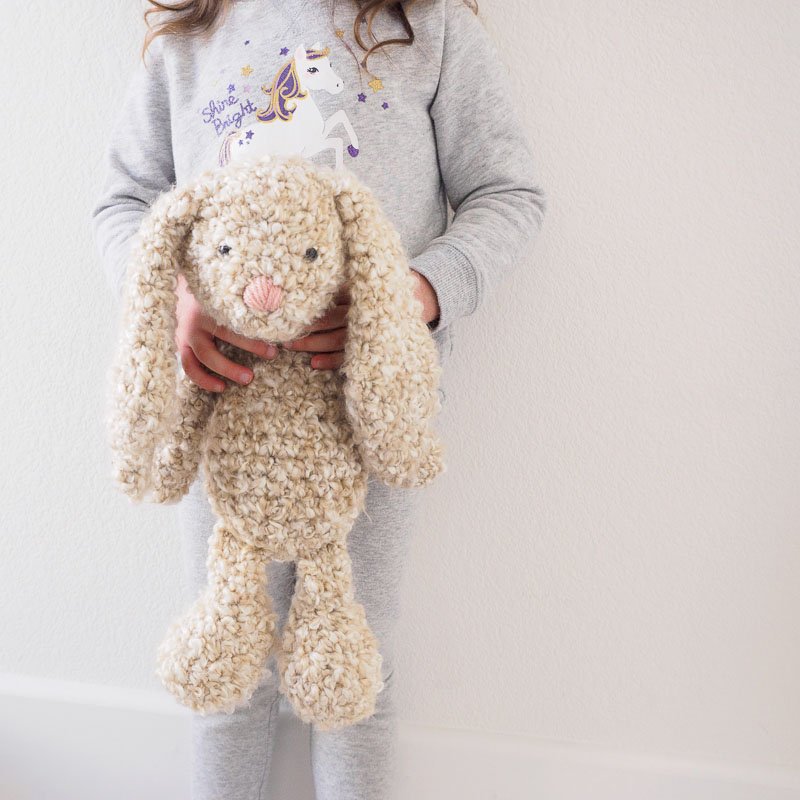
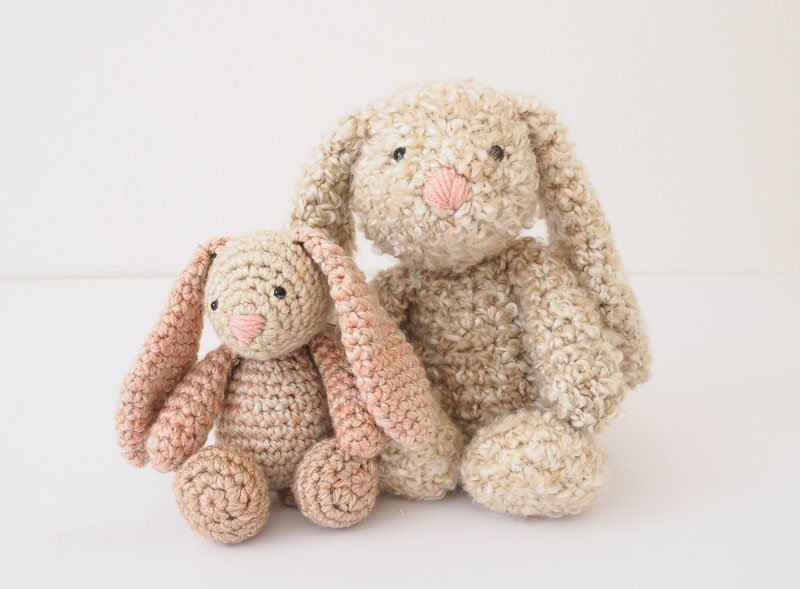
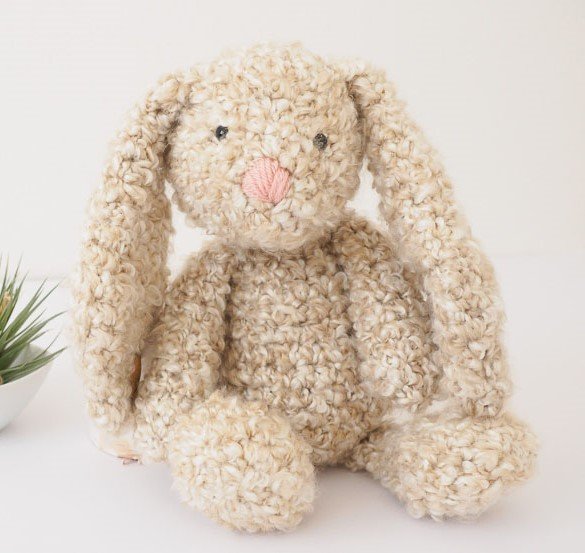
The large bunny shown in the picture below is made with Lion Brand Homespun Thick and Quick. The small bunny is made in Lion Brand Vanna’s Colors, which is discontinued. Because the Homespun can be difficult to work with, especially if you’re new to crochet, I do recommend working with a normal, twisted, worsted weight yarn first to get the hang of crocheting stuffed animals. Once you’re comfortable feeling your crochet stitches, you can make your crochet bunny in any kind of yarn for different effects. Homespun Quick and Thick has a wonderful curly cue feel, or try Lion Brand Go For Faux for something more furry!
Working with Hard to See Yarn
When working with yarn like Homespun Thick and Quick, make sure you’re using the right size crochet hook. You may need to play around with crochet hook sizes to ensure your stitches are loose enough to recognize by touch, and tight enough to prevent the stuffing from falling out. For the large, Homespun Thick and Quick bunny, I used an 8mm (size L) Clover USA crochet hook.
To help with navigating these hard-to-see stitches, I also used a lot of stitch markers, like Clover’s flexible quick locking stitch markers. My smaller, worsted weight crochet bunny was worked in joined rounds, which makes it easier to frog rounds while designing, but the Homespun bunny was worked in a continuous spiral, with the exception of the head, which was worked in joined rounds to maintain symmetry.
On the starting magic circle, lock a stitch marker on the first sc and the 6th sc, so that when you pull the magic circle in, you know where to work the first stitch of the 2nd round, as well as the last stitch of the 2nd round. Use the stitch marker as a guide to feel for exactly where to insert your hook, because you won’t be able to tell just from looking at it.
If you’re making the head and working in joined rounds, make the slip stitch join into the stitch indicated by your first stitch marker. Work a chain stitch, and an sc into the same stitch. Lock a stitch marker on this first sc. Continue working around and lock a stitch marker on the last stitch. Now use the first stitch marker to guide you on where to make the next slip stitch join. When working continuous rounds, it’s less important to have stitch markers on both the first and last stitch, but it’s still useful to help you keep track of your rounds. I actually started color coding with my stitch markers to keep track of how many rounds of 18 or 15 or 12 stitches I had worked, but that’s up to you. Just pull out all the stitch markers when you’re done with the piece.
One great thing about using a hard-to-see yarn is that it’s usually very forgiving when it comes time to assemble your bunny. You can pretty much split the yarn and sew wherever you’d like, but to be super secure, make sure you’ve sewn through a full stitch, and not just the fuzz. The only issue to watch out for is when you’re installing the eyes. Safety eyes work well with tightly crocheted amigurumi, but because these stitches are so loose, the eyes can pop out easily, even when it’s “locked”. When you’re adding the eyes, make sure to insert the eye through an actual stitch itself, splitting the yarn in that stitch. Do not attach it in the space between rows or stitches, as those gaps are too big. Make sure it can’t pop out on its own before locking the backing in place.
Completing Your Crochet Bunny
As for stuffing the bunny, just keep it light. Use a regular polyfill stuffing, not the loose anti-clumping type. You definitely want a bit of clumping here so that no tidbits of fluff come out between the stitches. You can stuff the head a bit tighter than the rest of the pieces in order to give it more definition, but still keep it light and squishy. All the pieces are supposed to be soft, bouncy and floppy, so don’t worry about getting everything perfectly in place or symmetrical – this is meant to be a love toy, not a display toy.
Lastly, make a pom pom and sew it to the bunny bottom. This helps her sit up (kind of). Plus, it’s a pom pom, and who ever says no to a pom pom ? I used Lion Brand Wool Ease Thick and Quick wrapped around a Clover Pom Pom Maker to create a thick and fluffy pom pom. Here, you can also use any yarn you’d like, but I preferred a different texture to emphasize the tail.
SUPPLIES
- 1 ball: Lion Brand Homespun Thick and Quick (227g/8oz, 160yds/146m, 6 Super Bulky)
- small length of pink yarn
- 1 Clover USA crochet hook L/8.00mm*
- 9mm safety eyes
- Clover Quick Locking Stitch Marker Set
- polyfill stuffing
- scissors
- tapestry needle
ABBREVIATIONS
- sl st – slip stitch
- ch – chain stitch
- sc – single crochet
- hdc – half double crochet
- sc2tog – single crochet decrease: Insert hook into front loop of next st. Without yarning over, insert hook into front loop of next st. Yarn over. Pull through 2 loops on hook. Yarn over, pull through remaining loop on hook.
- sc3tog – Insert hook into front loop of next st. Without yarning over, insert hook into front loop of next 2 st. Yarn over. Pull through 3 loops on hook. Yarn over, pull through remaining loop on hook.
- hdc2tog – half double crochet decrease
PATTERN NOTES
- The bunny head is worked in joined rounds, with the first sc worked into same st as join.
- The other pieces are worked in continuous rounds.
- If working with Homespun Thick and Quick, make sure to attach the eyes through (splitting) the yarn, and check that the eyes are secure before locking it in.
- The ear is unstuffed.
FLOPPY-EARED STUFFED BUNNY CROCHET PATTERN
Head
Round 1: Work 6 sc in a magic circle. Join to first sc with sl st. (6)
Round 2: Ch 1. Work 2 sc in each st around. Join to first sc with sl st. (12)
Round 3: Ch 1. Work 1 sc in each st around. Join to first sc with sl st. (12)
Round 4: Ch 1. Work 1 sc in each of next 2 st. Work 2 sc in next st, 1 sc in next st. Work 2 sc in each of next 4 st. Work 1 sc in next st, 2 sc in next st. Work 1 sc in each of next 2 st. Join to first sc with sl st. (18)
Round 5: Ch 1. Work 1 sc into first st. Work 2 sc into next st, 1 sc in each of next 5 st. Work 2 sc in each of next 4 st, 1 sc in each of next 5 st. Work 2 sc in next st, 1 sc in last st. Join to first sc with sl st. (24)
Round 6-9: Ch 1. Work 1 sc in each st around. Join to first sc with sl st. (24)
Stop here to embroider on the nose right on Round 1, and attach the eyes approximately between Rounds 3 and 4, centered around the nose.
Round 10: Ch 1. Work [1 sc in each of next 2 st, and 1 sc2tog] 6 times. Join to first sc with sl st. (18)
Round 11: Ch 1. Work 1 sc in each st around. Join to first sc with sl st. (18)
Round 12: Ch 1. Work [1 sc in next st, 1 sc2tog] 6 times. Join to first sc with sl st. (12)
Stop here to stuff the head before the hole gets too small. Stuff the head a little more full, but not tightly.
Round 13: Ch 1. Work 6 sc2tog. Join to first sc with sl st. (6)
Cut yarn, leaving a yarn tail. Pull yarn through last st. Sew yarn tail through front loops of each of 6 st. Pull tight, fasten off, weave in ends.
Body
Round 1: Work 6 sc in magic circle. (6)
Round 2: Work 2 sc in each st around. (12)
Round 3: Work [1 sc in next st, 2 sc in next st] 6 times. (18)
Round 4: Work 1 sc in each st around.(18)
Round 5: Work [1 sc in each of next 2 st, 2 sc in next st] 6 times. (24)
Round 6-9: Work 1 sc in each st around. (24)
Round 10: Work [1 sc in each of next 2 st, and 1 sc2tog] 6 times. (18)
Round 11-12: Work 1 sc in each st around. (18)
Round 13: Work [1 sc in next st, 1 sc2tog] 6 times. (12)
Round 14: Work 1 sc in each st around. (12)
Round 13: Work 6 sc2tog. (6)
Cut yarn and fasten off, leaving a long tail for sewing. Stuff lightly.
Ears
Round 1: Work 6 sc in magic circle. (6)
Round 2: Work 1 sc in each st around. (6)
Round 3: Work [1 sc in next st, 2 sc in next st] 3 times. (9)
Round 4: Work [1 sc in next 2 st, 2 sc in next st] 3 times. (12)
Round 5: Work [1 sc in next 3 st, 2 sc in next st] 3 times. (15)
Round 6-8: Work 1 sc in each st around. (15)
Round 9: Work [1 sc in next 3 st, sc2tog] 3 times. (12)
Round 10-11: Work 1 sc in each st around. (12)
Round 12: Work [1 sc in next 2 st, sc2tog] 3 times. (9)
Round 13-14: Work 1 sc in each st around. (9)
Round 15: Work [1 sc in next st, sc2tog] 3 times. (6)
Round 16-17: Work 1 sc in each st around. (6)
Ch 1. Squeezing the last round together, and working through all 4 loops, work 2 sc across. Cut yarn, leaving a yarn tail for sewing, and fasten off.
Arms
Round 1: Work 6 sc in magic circle. (6)
Round 2: Work [1 sc in next st, 2 sc in next st] 3 times. (9)
Round 3-4: Work 1 sc in each st around. (9)
Round 5: Work 1 sc2tog. Work 1 sc in each st around. (8)
Round 6-7: Work 1 sc in each st around. (8)
Round 8: Work 1 sc2tog. Work 1 sc in each st around. (7)
Round 9-10: Work 1 sc in each st around. (7)
Stop here to stuff the arm lightly.
Round 11: Work 1 sc2tog. Work 1 sc in each st around. (6)
Ch 1. Squeezing the last round together, and working through all 4 loops, work 2 sc across. Cut yarn, leaving a yarn tail for sewing, and fasten off.
Feet & Legs
Round 1: Work 6 sc in magic circle. (6)
Round 2: Work 2 hdc in next st, 2 sc in each of next 2 st, 2 hdc in next st, 2 sc in each of next 2 st. (12)
Round 3: Work 2 sc in each of next 2 st, 1 sc in each of next 3 st, 2 sc in each of next 3 st, 1 sc in each of next 3 st, 2 sc in next st. (18)
Round 4-5: Work 1 sc in each st around. (18)
Round 6: Work 1 sc in each of next 5 st, sc2tog, hdc2tog 2 times, sc2tog, 1 sc in each of next 5 st. (14)
Round 7: Work 1 sc2tog, 1 sc in each of next 2 st, sc2tog 3 times, 1 sc in each of next 2 st, 1 sc2tog. (9)
Round 8: Work 1 sc in each of next 3 st, 1 sc3tog, 1 sc in next st, 1 sc2tog. (6)
Stop here to stuff the feet lightly.
Round 9-10: Work 1 sc in each st around. (6)
Ch 1. Squeezing the last round together, and working through all 4 loops, work 2 sc across. Cut yarn, leaving a yarn tail for sewing, and fasten off.
Assembly
- Ears are attached approximately between Rounds 7-8 on either side of the head.
- Body is attached to head in line with the ears and with the nose pointing directly forwards.
- Arms are attached to the body in line with the ears, approximately 1 row down from where the body attaches to the head.
- Legs are attached to the bottom of the body bisecting the center point
- Pom pom tail is optional and attached at your discretion.
Feel free to tag me (@freeamigurumii) in your photos on Instagram or Facebook if you’d like
All Finished.