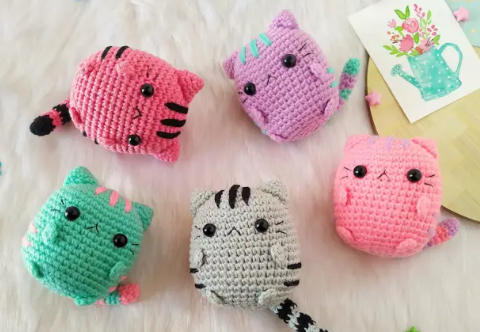
Hello amigurumi lovers and beautiful visitors, I wanted to share the free amigurumi patterns for you here. In my article I will share 1 pattern and how to make it for you. At the end of my article, I will share amigurumi patterns that can generate ideas for you.
MATERIALS NEEDED:
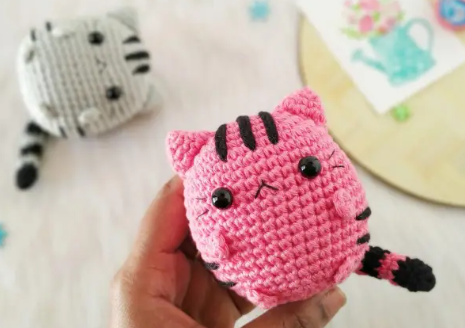
Sport weight cotton yarn in any two colours of your choice ( I have used pink as main colour
and black for stripes)
2 mm crochet hook.
8 mm flat back or safety eyes.
Fiber fill for stuffing.
Tapestry needle.
Black embroidery thread and needle.
HEAD AND BODY:
Using pink yarn,
R1: 6 sc in a magic ring (6).
R2: Inc in each st (12).
R3: [ Sc, inc ] x 6 (18).
R4: [ Sc 2, inc ] x 6 (24).
R5: [ Sc 3, inc ] x 6 (30).
R6: [ Sc 4, inc ] x 6 (36).
R7: [ Sc 5, inc ] x 6 (42).
R8-19: Sc in each st (42).
R20: [ Sc 5, dec ] x 6 (36).
Insert safety eyes between R10 and R11 with 7 stitches in between.
R21: [ Sc 4, dec ] x 6 (30).
R22: [ Sc 3, dec ] x 6 (24).
R23: [ Sc 2, dec ] x 6 (18).
Stuff firmly with fiberfill and continue to stuff till the end.
R24: [ Sc, dec ] x 6 (12).
R25: Dec x 6 (6).
Fasten off and close the ends.
LEGS (MAKE 4):
Using pink yarn,
5 sc in magic ring.
Don’t join and fasten off leaving
a long tail for sewing.
EARS (MAKE 2):
Using pink yarn,
R1: 4 sc in magic ring (4).
R2: [ Sc, inc ] x 2 (6).
R3: [ Sc, inc ] x 3 (9).
R4: [ Sc 2, inc ] x 3 (12).
Fasten off leaving a long tail for sewing.
TAIL:
Start with black yarn,
R1: 6 sc in magic ring.
R2: [ Sc 2, inc ] x 2 (8).
R3: Sc in each st (8).
R4-R5: (Pink) Sc in each st (8).
R6-R7: (Black) Sc in each st (8).
R8-R9: (Pink) Sc in each st (8).
R10-R11: (Black) Sc in each st (8).
R12-R13: (Pink) Sc in each st (8).
R14-R15: (Black Sc in each st (8).
R16-R17: (Pink Sc in each st (8).
Sc through both the top layers to close.
Fasten off leaving a long tail for sewing.
ASSEMBLING:
Sew the ears from R4 to R8.
Attach the forelegs slantingly from R14 to R15.
Attach the hind legs slanting inward from R20 to R21.
Using 2 or 3 strands of embroidery thread, make an inverted ‘v’ shape for the mouth
Sew the whiskers one stitch away from the eyes.
Using Tapestry needle and black yarn, make 3 long stripes from top of the head to R7 at the
center.
Similarly make 2 more stripes at the sides, 2 stitches away from the center stripe.
Add in 2 side stripes at R16 and another at R18 on both sides of the body.
Sew 2 back stripes at R10 and another at R12 at the back of the body.
Finally attach the tail slantingly from R18 to R19 at the back.
Feel free to tag me (@freeamigurumii) in your photos on Instagram or Facebook if you’d like!
All Finished.