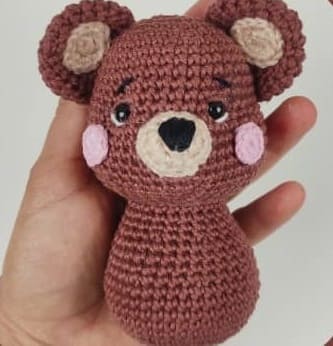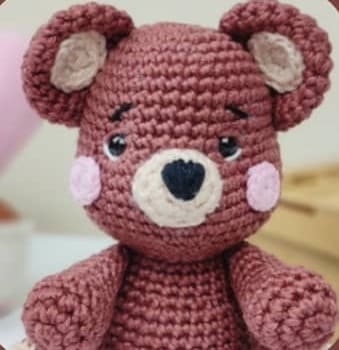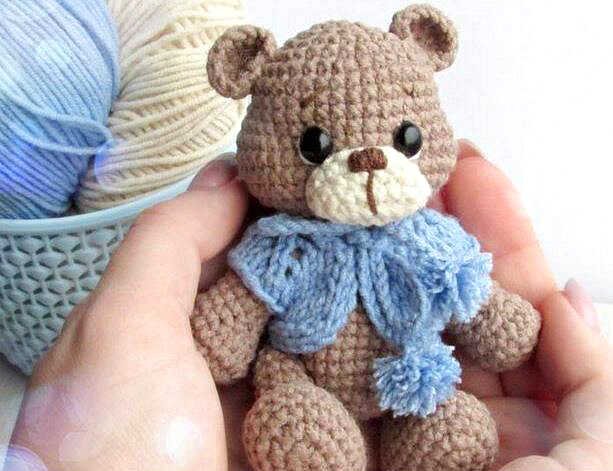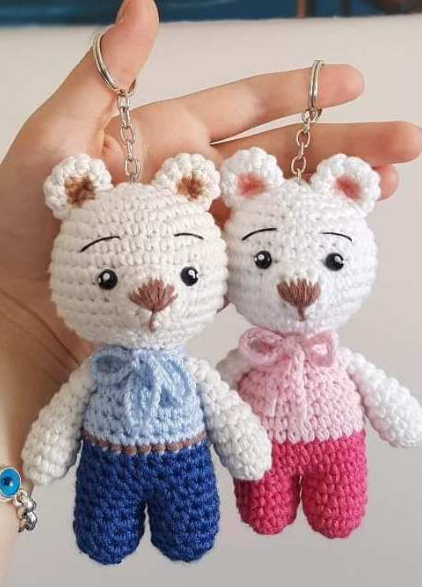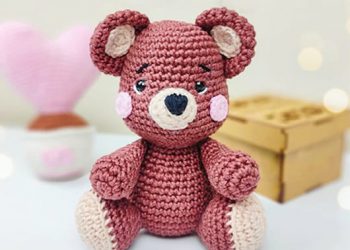
Hello amigurumi lovers and beautiful visitors, I wanted to share free amigurumi models with you here. In my article, I will share with you a model and how to make it. At the end of my article, I will share with you the detailed construction patterns of the mold.
Materials
• Amigurumi Cocoa Line
• Amigurumi Porcelain Line
• Black Amigurumi Line
• Amigurumi Pink Line
• Crochet hook 2.5 mm
• Eyes 7mm
• Scissors
• Highlighter
• Upholstery needle
Note: One skein of each line is enough.
Abbreviations
MR– magic ring
Inc– increase
Sc– single crochet
Dec– decrease
Slst– slip stitch
Ch– chain
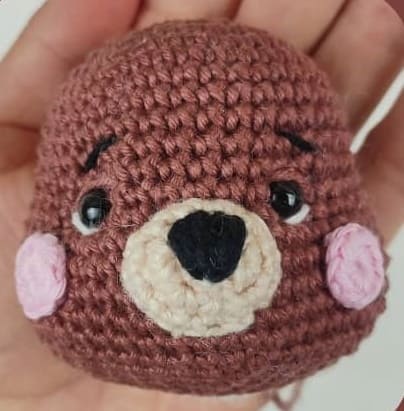
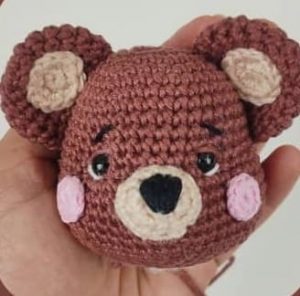
Head
Use the Cocoa line
Rnd 1. AM in 6 sc (6)
Rnd 2. inc all around(12)
Rnd 3. [1 sc and 1 inc] 6x (18)
Rnd 4. [2 sc and 1 inc] 6x (24)
Rnd 5. [3 sc and 1 inc] 6x (30)
Rnd 6. [4 sc and 1 inc] 6x (36)
Rnd 7-12. sc about sc all around (36)
Rnd 13. [5 sc and 1 inc] 6x (42)
Rnd 14. [6 sc and 1 inc] 6x (48)
Rnd 15-18. sc about sc all around(48)
Rnd 19. [6 sc and 1 dec] 6x (42)
Rnd 20. [5 sc and 1 dec] 6x (36)
Rnd 21. [4 sc and 1 dec] 6x (30)
Rnd 22. [3 sc and 1 dec] 6x (24)
Close with sl st and cut a large thread to sew the head to the body. Place eyes between rows 12 and 13 on head, 6 sc apart. Make the expression on the little face as you prefer.
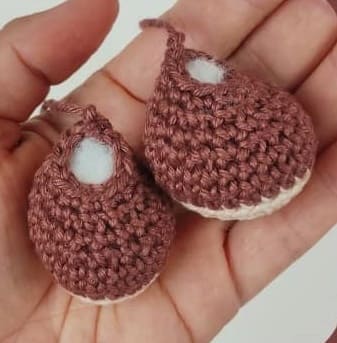
Snout
Use the Porcelain line
Rnd 1. AM in 6 sc (6)
Rnd 2. inc all around(12)
Rnd 3. sc about sc all around(12)
Close with sl st and cut a large thread. Embroider nose with black thread between row 1 and 2. Sew muzzle between rows 13 to 17 of head.
Cheeks (X2)
Use the Pink line.
Rnd 1. AM in 10 sc. Close with slst. Sew or glue the cheeks to the head below the eyes.
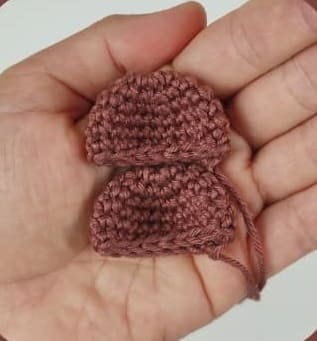
Ears (X2)
Use the Cocoa line
Rnd 1. AM in 6 sc (6)
Rnd 2. inc all around(12)
Rnd 3. [1 sc and 1 inc] 6x (18)
Rnd 4. [2 sc and 1 inc] 6x (24)
Rnd 5-6. sc about sc all around(24)
Rnd 7. [2 sc and 1 dec] 6x (18)
Close with sl st and cut a large thread. Sew ears between rows 4-12 of head.
To make the ear stains follow the ear step by step, repeat rows 1 and 2. Then close with sl st, sew or glue the ear stains.
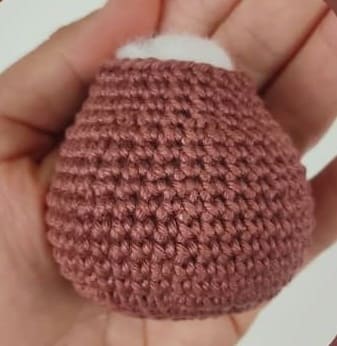
Body
Use the Cocoa line.
Rnd 1. AM in 8 sc (8)
Rnd 2. inc all around(16)
Rnd 3. [1 sc and 1 inc] 8x (24)
Rnd 4. [2 sc and 1 inc] 8x (32)
Rnd 5. [3 sc and 1 inc] 8x (40)
Rnd 6-10. sc about sc all around(40)
Rnd 11. [3 sc and 1 dec] 8x (32)
Rnd 12-14. sc about sc all around(32)
Rnd 15. [2 sc and 1 dec] 8x (24)
Rnd 16-18. sc about sc all around(24)
Close with sl st and finish the thread.
Sew the head to the body.
Legs (X2)
Use the Porcelain line
Rnd 1. Make 6 ch, from the second run, walk with 4 sc, in the last ch make 3 sc, at the bottom of the ch walk with 3 sc, 2 sc in the last ch (12)
Rnd 2. 1 inc, 3 sc, [1 inc] 3x, 3 sc, [1 inc] 2x (18)
Rnd 3. 1 sc and 1 inc, 3 sc, [1 sc and 1 inc] 3x, 3 sc, [1 sc and 1 inc] 2x (24)
Change to Cocoa color.
Rnd 4. sc about sc taking only the back straps (24)
Rnd 5-6. sc about sc all around(24)
Rnd 7. 3 sc, [1 dec and 1 sc] 6x, 3 sc (18)
Rnd 8. sc about sc all around(18)
Rnd 9. 3 sc, 6 dec, 3 sc (12)
Rnd 10. sc about sc all around(12).
Close with sl st and cut a large thread.
Sew legs between rows 6 to 8 of body.
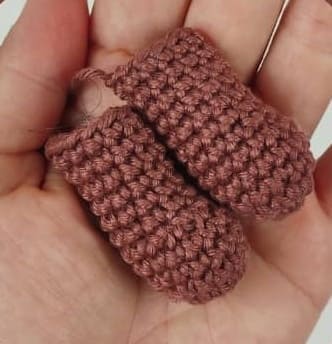
Arms (X2)
Use the Cocoa line.
Rnd 1. AM in 6 sc (6)
Rnd 2. inc all around(12)
Rnd 3. [3 sc and 1 inc] 3x (15)
Rnd 4-5. sc about sc all around(15)
Rnd 6. 4 sc, 3 dec, 5 sc (12)
Rnd 7-12. sc about sc all around(12)
Close with sl st and cut a large thread.
Sew arms between rows 13 through 18 of body.
Feel free to tag me (@freeamigurumii) in your photos on Instagram or Facebook if you’d like!
All Finished.