Hello amigurumi lovers and beautiful visitors, I wanted to share the free amigurumi patterns for you here. In my article I will share 1 pattern and how to make it for you. At the end of my article, I will share amigurumi patterns that can generate ideas for you.
MATERIALS
- Light weight yarn (DK or light worsted) in 2 colors
- I used Rico Essentials Cotton DK weight yarn in Orange and Light Yellow
- 2.25mm B hook (if you’re a tight crocheter you can use a 2.75 mm C hook)
- Stitch marker
- Black embroidery floss
- Embroidery needle
- Tapestry needle
- Toy stuffing
- Scissors
CROCHET STITCHES AND ABBREVIATIONS (US TERMINOLOGY)
I have provided a few links below for tutorials I made on how to do the specified stitch!
rnd(s) – Round(s)
mr – Magic Ring
ch – Chain
st(s) – Stitch(es)
sl st – Slip stitch
sc – Single crochet
inv dec – Single crochet invisible decrease
dec – Decrease
[ ] – Repeat the steps between the asterisk for the specified number of times
( ) – The number of stitches you should have at the end of each round
Finish off – Knot your yarn close to the piece and weave through the sts in the last round
NOTES
The face, arms, and legs are all worked in a continuous round (like a spiral). Mark the first stitch of each round with a stitch marker.
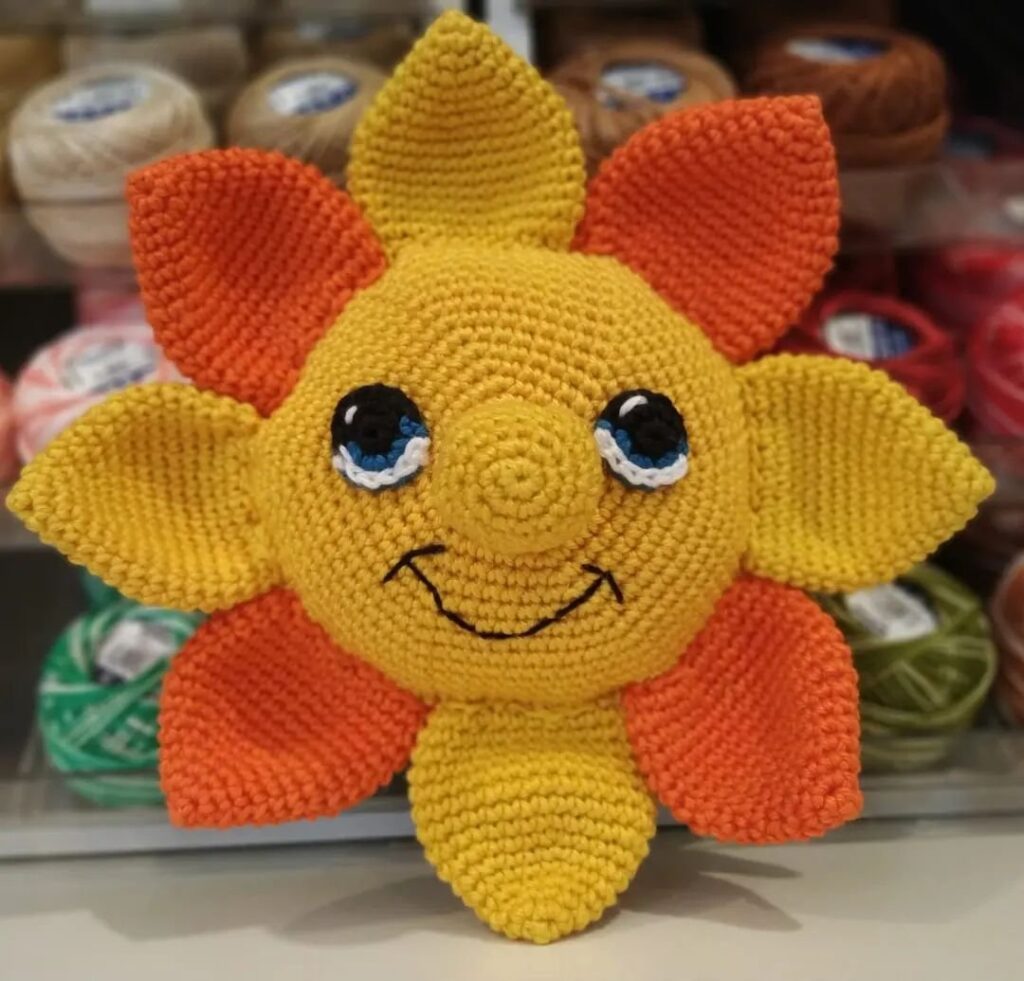
FACE – yellow yarn
Rnd 1- Start with a mr, sc 7 (7 sts)
Rnd 2- inc 7 times (14 sts)
Rnd 3- [sc 1, inc] 7 times (21 sts)
Rnd 4- [sc 2, inc] 7 times (28 sts)
Rnd 5- [sc 3, inc] 7 times (35 sts)
Rnd 6- sc in each st around (35 sts)
Rnd 7- [sc 4, inc] 7 times (42 sts)
Rnd 8- [sc 5, inc] 7 times (49 sts)
Rnd 9- [sc 6, inc] 7 times (56 sts)
Rnd 10- sc in each st around (56 sts)
Rnd 11- [sc 7, inc] 7 times (63 sts)
Rnd 12- [sc 8, inc] 7 times (70 sts)
Rnds 13-19- sc in each st around (70 sts)
NOTE: Mark the 16th rnd with a stitch marker, this will be the rnd you’ll attach the rays to at the end. At this point, weave in your beginning yarn tail and embroider the face onto the front of your sun using 6 strands of embroidery floss and your embroidery needle.
Rnd 20- [sc 8, inv dec] 7 times (63 sts)
Rnd 21- [sc 7, inv dec] 7 times (56 sts)
Rnd 22- sc in each st around (56 sts)
Rnd 23- [sc 6, inv dec] 7 times (49 sts)
Rnd 24- [sc 5, inv dec] 7 times (42 sts)
Rnd 25- [sc 4, inv dec] 7 times (35 sts)
Rnd 26- sc in each st around (35 sts)
Rnd 27- [sc 3, inv dec] 7 times (28 sts)
Rnd 28- [sc 2, inv dec] 7 times (21 sts)
NOTE: Stuff your sun now!
Rnd 29- [sc 1, inv dec] 7 times (14 sts)
Rnd 30- inv dec 7 times (7 sts)
Fasten off and finish off.
SUN RAYS (Make 7) With orange yarn, work in rows
Row 1- Make a slip knot, leaving a 12-inch tail. Ch 11.
Row 2- sc into 2nd ch from hook, sc 9, ch 1, turn (10 sts)
Row 3- dec, sc 6, dec, ch 1, turn (8 sts)
Row 4- sc 8, ch 1, turn (8 sts)
Row 5- dec, sc 4, dec, ch 1, turn (6 sts)
Row 6- sc 6, ch 1, turn (6 sts)
Row 7- dec, sc 2, dec, ch 1, turn (4 sts)
Row 8- sc 4, ch 1, turn (4 sts)
Row 9- dec 2 times, ch 1, turn (2 sts)
Row 10- sc 2, ch 1, turn (2 sts)
Row 11- dec (1 st)
Fasten off and weave in ending tail only (we’ll use the beginning tail to attach)
ATTACHING THE RAYS
Optional: wet block the rays before attaching to flatten them.
We will be sewing the rays onto the 16th row of the amigurumi Sun’s body. If you look at your sun from the front, you should be able to see 7 slice-shaped sections. Each of these sections has 10 stitches. You will be sewing your ray into the 10 stitches of each slice. Weave your yarn through a stitch on the body and sew through a space on the ray, work your way to the end of the ray (make sure you have gone through 10 stitches on the body of the sun to avoid spaces between rays). Weave in the end.
Continue this process for the rest of the rays.
On the last sewing stitch of the final ray, you will notice that the chain on the body will be in a different row than your first ray. Simply jump to the same row as the first ray to make your last st.
ARMS, yellow yarn
Rnd 1- Start with a mr, sc 6 (6 sts)
Rnd 2- [sc 2, inc] 2 times (8 sts)
Rnd 3-20- sc around (8 sts for)
Fasten off and leave a long tail for attaching.
LEGS, yellow yarn
Rnd 1- Start with a mr, sc 8 (8 sts)
Rnd 2- [sc 3, inc] 2 times (10 sts)
Rnd 3-28- sc around (10 sts for )
ATTACHING ARMS AND LEGS
Attach the arms and legs behind the amigurumi Sun’s rays. I attached all limbs to look flat by attaching the limbs to only 2 rows of stitches on the sun’s body.
Feel free to tag me (@freeamigurumii) in your photos on Instagram or Facebook if you’d like!
All Finished.