Hello amigurumi lovers and beautiful visitors, I wanted to share free amigurumi models with you here. In my article, I will share with you a model and how to make it. At the end of my article, I will share with you the detailed construction patterns of the mold.
About the master class:
This master class
written in the form
step by step instructions and
supplied with photographs.
In the master class
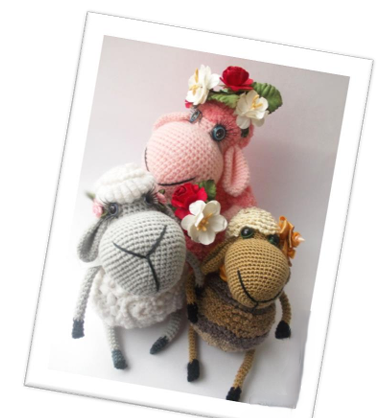
There are 3 ways
knitting sheep:
crochet and knitting;
crochet from smooth and
fluffy yarn;
crochet from smooth
yarn, imitating
“curliness”.
The size of the toy will be
depend on thickness
yarn of your choice
and may fluctuate
from 8 cm to 25 cm.
Difficulty level –
average.
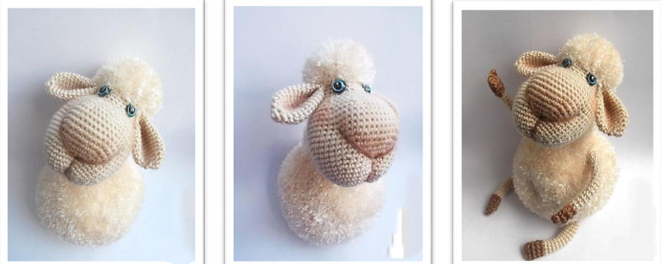
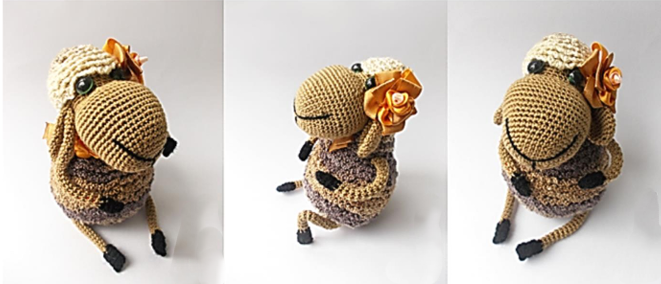
Eared Sheep
Designed and linked by Iriss
All day long sheep
I thought about the eternal:
About a cool river
The field is endless,
About funny lambs
There, in the sky,
About your curls
The grass and the weather.
About my native porch,
A carefree moth…
Thought the Sheep
About your own, the SHEEP
For sheep breeding we
you will need:
Smooth threads of the main tone;
Smooth threads in dark or contrasting colors
hoof colors;
Hook suitable for selected
threads;
Fluffy or textured yarn,
matching color with the main ones
threads;
Sock knitting needles suitable for the chosen
textured yarn;
Filler;
Needle for stitching and embroidery;
Eye beads or ready-made eyes
suitable size;
Eyelashes (optional);
Author’s master class by Irina Chudova “One sheep, two sheep, three…” Wire for arms and legs (optional). Any decorations (ribbons, flowers, beads, etc.) to suit your taste and mood Legend: VP – air loop runway – air lift loop ss – connecting post sc – single crochet dc – double crochet pssn – half double crochet dec – 2 columns together (decrease) inc – 2 stitches in 1 loop (increase) for knitting needles: p – loop faces – front loop purl – purl loop kr – edge loop persons stitch: knit odd rows with knit stitches, even rows with purl stitches loops; dec – (decrease) – knit 2 loops together inc – (increase) – knit two from one loop.
One – Sheep
hook + knitting needles
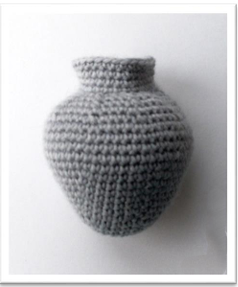
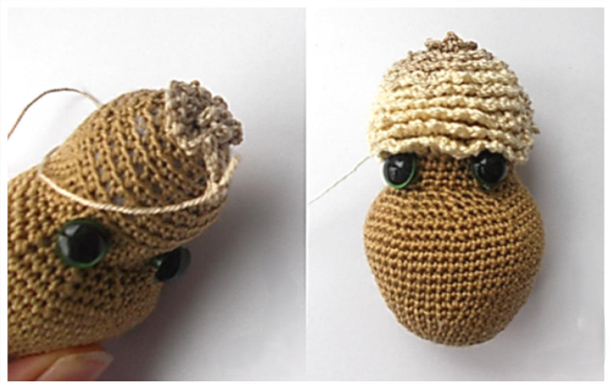
Head with the main color (fill with filler
during knitting)
1st row: 5 ch (do not close the ring!) starting from the 2nd
We knit loops from the hook:
Author’s master class by Irina Chudova “One sheep, two sheep, three…”
2nd row: 3sbn, 3sbn in 1p, 2sbn, inc = 10sbn
3rd row: inc, 2sbn, inc x 3 times, 2sbn, inc x 2 times = 16sbn
4th row: 1sbn, (inc, 3sbn) x 3 times, inc, 2sbn = 20sbn
5 row: 1sbn, inc, 6 sbn, inc, 2sbn, inc, 6 sbn, inc, 1sbn = 24sbn
6th row: (3sc, inc) x 6 times = 30 sc
7th row: 30 sc
8th row: (4sc, inc) x 6 times = 36 sc
Row 9: 36 sc
Row 10: (5sc, inc) x 6 times = 42 sc
11th row: 42 sc
Row 12: (inc, 6sbn) x 3 times, inc, 20sbn = 46 sbn
Row 13: (inc, 7sbn) x 3 times, inc, 21sbn = 50 sbn
Rows 14-18: 50 sc (5 rows)
Knit 6 offset loops (these are ordinary sc, which do not participate in the counting the total number of loops in a row and are needed to maintain the symmetry of the knitted details). New marker. Row 19: dec, (4sc, dec) x 3 times, 30sc = 46 sc 20 row: 46 sc 21 row: dec, (3 sc, dec) x 4 times, 19 sc, dec, 3 sc = 40 sc Row 22: dec, (2 sc, dec) x 4 times, 18 sc, dec, 2 sc = 34 sc 23 row: dec, (1sc, dec) x 3 times, 23sc = 30 sc 24 row: 7ss, 23sbn = 30 25 – 27 rows: 30sc (3 rows) Knit 12 offset stitches. Fasten the thread. Attach fluffy (or textured) yarn and Raise all 30 stitches on the needles in a circle. It is worth considering that when knitting with textured yarn, usually all the “fluffiness” remains on the wrong side. Therefore, it is best to knit inside out. We continue to knit in the round, but on knitting needles:
Author’s master class by Irina Chudova “One sheep, two sheep, three…”
Rows 28-31: 30 stitches 32nd row: (dec, 3p) x 6 times = 24 loops Row 33: 24 stitches Row 34: (dec, 2p) x 6 times = 18 loops Row 35: 18 stitches Row 36: (dec, 1p) x 6 times = 12 loops Row 37: 12 stitches Pull the loops together. Fasten the thread, cut it and tuck it inside.
Author’s master class by Irina Chudova “One sheep, two sheep, three…”
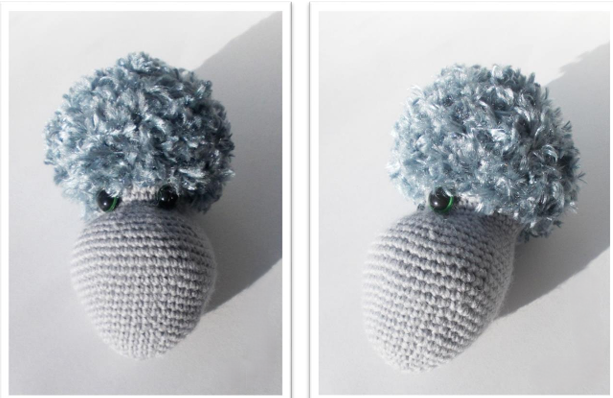
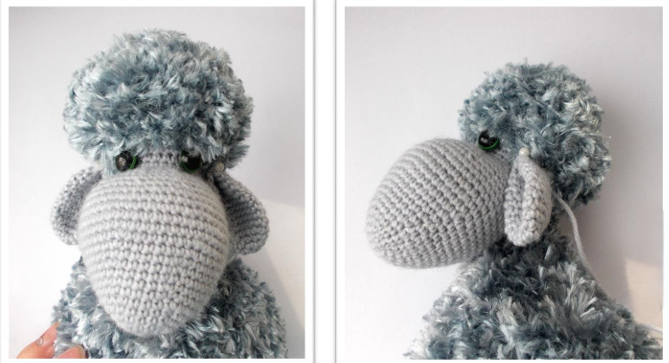
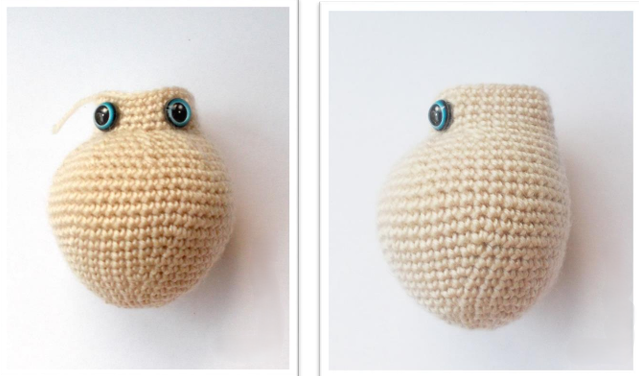
We attach the eyes in a way convenient for you (sew or glue) in the 26th row
heads at a distance of 4-5 loops from each other.
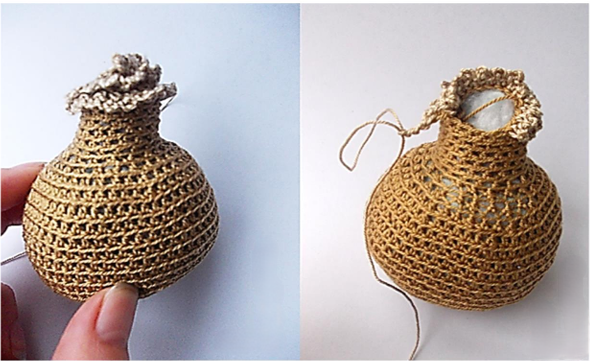
Body (knitted) with fluffy yarn
I will give a description for knitting on two needles, but if you wish, you can knit
in the round on toe needles with only knit stitches or only purl stitches.
Cast on 6 stitches on the needles;
1st row: inc x 6 times = 12 knits
2nd row: 12 purl
Row 3: (k1, inc) x 6 times = k18
4th row: 18 purl
Row 5: (k2, inc) x 6 times = k24
Row 6: P18
Row 7: (k3, inc) x 6 times = k30
Row 8: P18
Row 9: (k4, inc) x 6 times = k36
Rows 10 – 20: 36 knit stitches. satin stitch (11 rows)
Row 21: (K4, dec) x 6 times = K30
Row 22: P30
Row 23: (K3, dec) x 6 times = K24
Row 24: P24
Row 25: (K2, dec) x 6 times = K18
Row 26: P18
Row 27: (k1, dec) x 6 times = k12
28 – 32 row: 12 knit stitches. satin stitch (5 rows)
Row 33: cast off 2 stitches, knit to end of row = 10
persons
Row 34: cast off 2 stitches, purl to end of row = 8
purl
Author’s master class by Irina Chudova “One sheep, two sheep, three…” Cast off all stitches in the row. Fasten the thread. If you knitted on 2 knitting needles, then do side seam It is good to fill the body with filler. Sew the head to the body.
Ears (2 parts) with smooth yarn of the main color
1st row: 5 sc in amigurumi ring = 5 sc
2nd row: inc x 5 times = 10 sc
3rd row: (inc, 1 sc) x 5 sc = 15 sc
4th row: (inc, 2 sbn) x 5 sbn = 20 sbn
Rows 5-12: 20 sc (8 rows)
Row 13: fold the eyelet in half and knit through
both layers 10 sc
Row 14: fold the piece in half again and
knit 4 sc through both layers
Handles and legs (2 pieces each) in the main color with smooth yarn Knit a chain of 8 ch and close it with 1 dc into a ring. Rows 1-15: 8 sc in circles Attach a thread of a dark or contrasting color for the hooves Rows 16-18: 8 sc in circles Row 19: flatten the hoof, folding it in half, and knit 4 sc through both layers. Fasten the thread. If desired, the arms and legs can be insert a thin wire. Sew on the handles, choosing the most suitable for them good location, and the legs are so so that the sheep can sit confidently. See photo below.
Author’s master class by Irina Chudova “One sheep, two sheep, three…
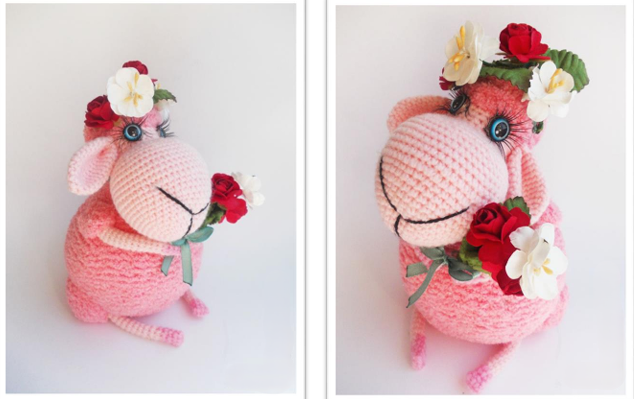
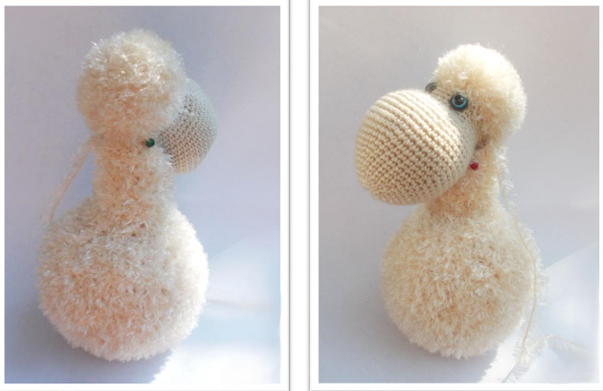
The pink sheep is knitted in exactly the same way as the gray one, but with small additions:
“Shoulders” (optional) crochet
Knit a chain of 4 ch and close it with 1 dc into a ring.
1st row: 3 ch, 11 dc in a ring of ch, ss.
Finish knitting. Leave the thread for sewing
“Hip” (optional) on 2 knitting needles
Cast on 20 stitches
1st row: kr, 18 knits, kr = 18 knits;
Row 2: cr, purl 18, cr = purl 18;
Row 3: kr, (k1, dec) x 6 times, kr = k12;
Row 4: cr, purl 12, cr = purl 12;
5th row: kr, (dec) x 6 times, kr = 6 persons;
Row 6: kr, purl 6, kr = purl 6;
Slip all the stitches onto the needle and pull off.
Sew the piece along the side seam.
Author’s master class by Irina Chudova “One sheep, two sheep, three…” Lightly stuff with stuffing before sewing. Crochet the tail (optional) from fluffy yarn Knit a chain of 6 ch. Do not close the ring. 1st row: starting from the second loop from the hook, knit 5sc along the chain. Rows 2-4: 1 runway, turn knitting, 5 sc. Finish knitting. Sew the piece together to make a tube. Leave the thread for sewing. Sew the tail to its rightful place
Two – Sheep
You can crochet (the loops are visible) from this textured yarn, like: Adelia VALERI, SOLENA from Madame Tricote, YarnArt BREEZE (Breeze), cotton grass (HT) from Kamtex or lotus stretch grass (LTS) from Kamtex
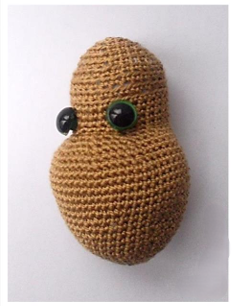
Head with the main color (fill with filler as you knit) 1st row: 5 ch (do not close the ring!) starting from the 2nd loop from the hook we knit: 2nd row: 3sbn, 3sbn in 1p, 2sbn, inc = 10sbn 3rd row: inc, 2sbn, inc x 3 times, 2sbn, inc x 2 times = 16sbn 4th row: 1sbn, (inc, 3sbn) x 3 times, inc, 2sbn = 20sbn 5 row: 1sbn, inc, 6 sbn, inc, 2sbn, inc, 6 sbn, inc, 1sbn = 24sbn 6th row: (3sc, inc) x 6 times = 30 sc 7th row: 30 sc 8th row: (4sc, inc) x 6 times = 36 sc Row 9: 36 sc Row 10: (5sc, inc) x 6 times = 42 sc 11th row: 42 sc Row 12: (inc, 6sbn) x 3 times, inc, 20sbn = 46 sbn Row 13: (inc, 7sbn) x 3 times, inc, 21sbn = 50 sbn Rows 14-18: 50 sc (5 rows) Knit 6 offset loops (these are ordinary sc, which do not participate in the counting the total number of loops in a row and are needed to maintain the symmetry of the knitted details). New marker.
Row 19: dec, (4sc, dec) x 3 times, 30sc = 46 sc 20 row: 46 sc 21 row: dec, (3 sc, dec) x 4 times, 19 sc, dec, 3 sc = 40 sc Row 22: dec, (2 sc, dec) x 4 times, 18 sc, dec, 2 sc = 34 sc 23 row: dec, (1sc, dec) x 3 times, 23sc = 30 sc 24 row: 7ss, 23sbn = 30 25 – 27 rows: 30sc (3 rows) Knit 12 offset stitches. Fasten the thread.
The eyes can be inserted already at this stage, or after the head will be completely connected. We attach the eyes in a way convenient for you (sew or glue) in the 26th row of the head at a distance of 4-5 loops from each other. Attach fluffy (or textured) yarn. It is worth considering that when knitting with textured yarn, usually all the “fluffiness” remains on the wrong side. Therefore, it is best to knit inside out.
We continue to knit in circles, but already fluffy yarn: Rows 28-31: 30sc 32nd row: (dec, 3sbn) x 6 times = 24sbn Row 33: (dec, 2sc) x 6 times = 18 sc Row 34: (dec, 1sc) x 6 times = 12 sc Row 35: dec x 6 times = 6 sc Finish knitting. Fasten the thread, cut and tuck inside. Body (crocheted) fluffy (or textured) yarn We knit in a spiral PSSN! 1st row: 8 hdc in amigurumi ring = 8 hdc 2nd row: (2 hdc in one loop) x 8 times = 16 hdc 3rd row: (2 hdc in one loop, 1 hdc) x 8 times = 24 hdc 4th row: (2 hdc in one loop, 2 hdc) x 8 times = 32 hdc Row 5: (2 hdc in one loop, 3 hdc) x 8 times = 40 hdc
Row 6: (2 hdc in one loop, 4 hdc) x 8 times = 48 pssn Row 7: (2 hdc in one loop, 5 hdc) x 8 times = 56 pssn 8 – 15 rows: 56 hdc (8 rows) Row 16: (5 hdc, 2 hdc together) x 8 times = 48 hdc Row 17: (2 hdc, 2 hdc together) x 12 times = 36 hdc Row 18: (1 hdc, 2 hdc together) x 12 times = 24 hdc Row 19: (2 hdc, 2 hdc together) x 6 times = 18 hdc 20 – 25 row: 18 hdc (6 rows) Next we knit the neck bevel in rotating rows:
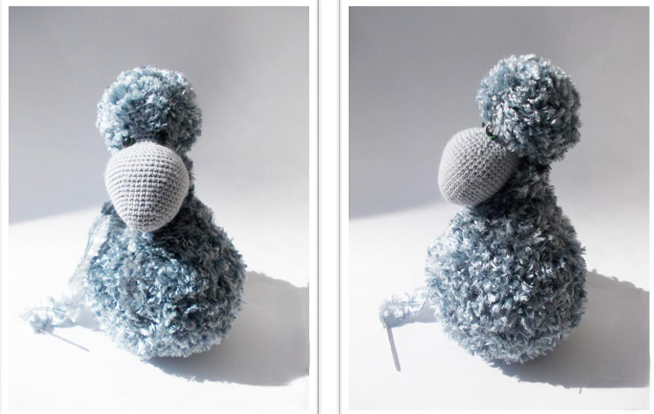
Make sure your head is positioned correctly. Look at the toy from everyone sides and, if everything suits you, sew the head to the neck. Handles and legs (2 parts each) in the main color smooth yarn Knit a chain of 8 chs and close it with 1 ss into the ring. Rows 1-15: 8 sc in circles Attach a thread of a dark or contrasting color
for hooves Rows 16-18: 8 sc in circles Row 19: flatten the hoof, folding it in half, and knit 4 sc through both layers. Fasten the thread. If desired, you can insert a thin wire into the arms and legs. Ears (2 parts) with smooth yarn of the main color 1st row: 5 sc in amigurumi ring = 5 sc 2nd row: inc x 5 times = 10 sc 3rd row: (inc, 1 sc) x 5 sc = 15 sc 4th row: (inc, 2 sbn) x 5 sbn = 20 sbn Rows 5-12: 20 sc (8 rows) Row 13: fold the eyelet in half and knit 10 sc through both layers Row 14: fold the piece in half again and knit 4 sc through both layers Finish knitting. Leave the thread for sewing. Sew ears to head based on the photo:
Embroider the nose in the shape of the letter Y, if desired, you can tint the inner parts ears and nose area. Sew on the arms and legs.
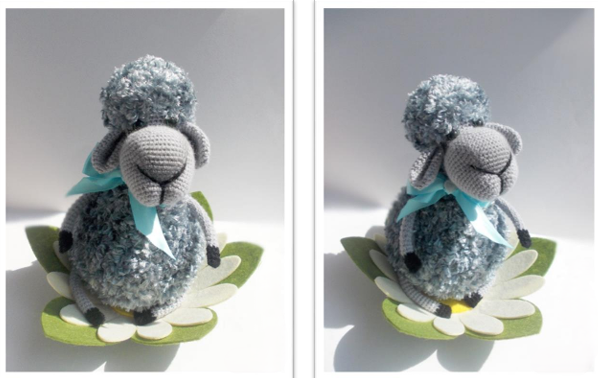
Decorate the sheep with ribbons, flowers, beads,… or knit a cap.
Three…
Head with the main color (fill with filler during knitting) 1st row: 5 ch (do not close the ring!) starting from the 2nd We knit loops from the hook: 2nd row: 3sbn, 3sbn in 1p, 2sbn, inc = 10sbn 3rd row: inc, 2sbn, inc x 3 times, 2sbn, inc x 2 times = 16sc 4th row: 1sbn, (inc, 3sbn) x 3 times, inc, 2sbn = 20sbn 5 row: 1sbn, inc, 6 sbn, inc, 2sbn, inc, 6 sbn, inc, 1sbn = 24sbn 6th row: (3sc, inc) x 6 times = 30 sc 7th row: 30 sc 8th row: (4sc, inc) x 6 times = 36 sc Row 9: 36 sc Row 10: (5sc, inc) x 6 times = 42 sc 11th row: 42 sc Row 12: (inc, 6sbn) x 3 times, inc, 20sbn = 46 sbn Row 13: (inc, 7sbn) x 3 times, inc, 21sbn = 50 sbn Rows 14-18: 50 sc (5 rows)
Knit 6 offset stitches (these are regular sc, who do not participate in the calculation of the total number of loops in a row and are needed to maintain the symmetry of the knitted part). New marker. Row 19: dec, (4sc, dec) x 3 times, 30sc = 46 sc 20 row: 46 sc 21 row: dec, (3 sc, dec) x 4 times, 19 sc, dec, 3 sc = 40 sc
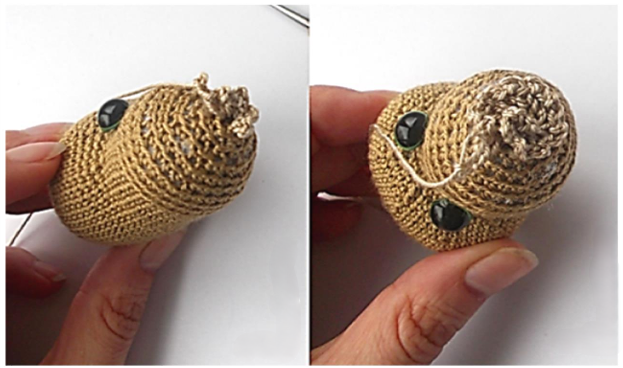
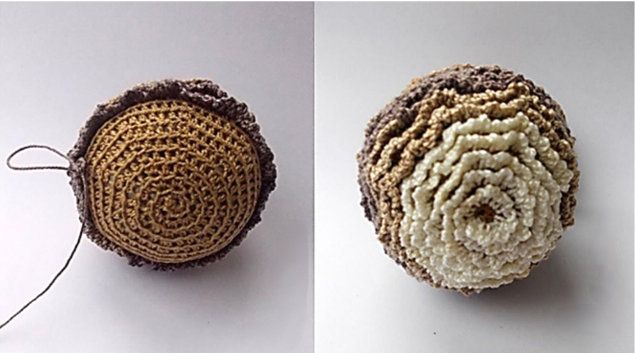
Row 22: dec, (2 sc, dec) x 4 times, 18 sc, dec, 2 sc = 34 sc 23 row: dec, (1sc, dec) x 3 times, 23sc = 30 sc 24 row: 7ss, 23sbn = 30 25 – 27 rows: 30sc (3 rows) Knit 12 offset stitches. New marker. We knit all subsequent rows using the back half loops of the previous row! Rows 28-31: 30sc 32nd row: (dec, 3sbn) x 6 times = 24sbn Row 33: 24 sc Row 34: (dec, 2sc) x 6 times = 18 sc Row 35: 18 sc Row 36: (dec, 1sc) x 6 times = 12 sc Row 37: dec x 6 times = 6 sc Attach a wool-colored thread or continue knitting with the same thread (according to desire and your plan).
We knit in the opposite direction along the left half loops: (3 ch, 1 sc) in each loop * repeat in a spiral from the crown of the head to eye level (from the 37th to the 28th row).
Fasten the thread, cut it and tuck it inside.
Torso
We knit in a spiral PRSN only for the rear half-loops!
1st row: 8 hdc in amigurumi ring = 8 hdc
2nd row: (2 hdc in one loop) x 8 times = 16 hdc
3rd row: (2 hdc in one loop, 1 hdc) x 8 times = 24 hdc
4th row: (2 hdc in one loop, 2 hdc) x 8 times = 32 hdc
Row 5: (2 hdc in one loop, 3 hdc) x 8 times = 40 hdc
Row 6: (2 hdc in one loop, 4 hdc) x 8 times = 48 hdc
Row 7: (2 hdc in one loop, 5 hdc) x 8 times = 56 hdc
8 – 15 rows: 56 hdc (8 rows)
Row 16: (5 hdc, 2 hdc together) x 8 times = 48 hdc
Row 17: (2 hdc, 2 hdc together) x 12 times = 36 hdc
Row 18: (1 hdc, 2 hdc together) x 12 times = 24 hdc
Row 19: (2 hdc, 2 hdc together) x 6 times = 18 hdc
20 – 25 row: 18 hdc (6 rows) Next we knit the neck bevel in rotating rows: 1 sc, 1 dc, turn knitting. Row 26: for the front half loops – 1 ch, 2 sc, 8 hdc, 1 sc, 1 sl, turn knitting. Row 27: for the back half loops – ch 1, 2 sc, 5 hdc, 1 sc, 1 sl. Attach a wool-colored thread or continue knitting with the same thread (according to desire and your plan).
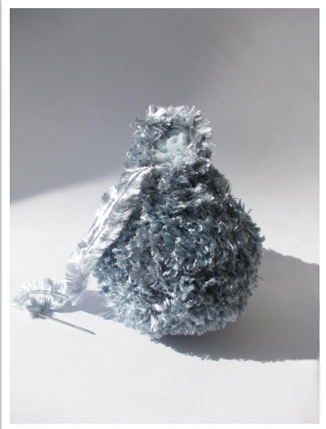
We knit in the opposite direction along the left half loops: (3 ch, 1 sc) in
repeat each loop * in a spiral from the top edge of the neck to the very bottom. Cm.
photo below.
Fasten the thread, cut it and tuck it inside.
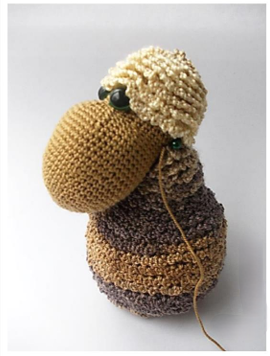
Pin the head to the neck bevel so that the upper border of the neck and the lower border of the “curls” on the head were close to each other. Make sure your head is positioned correctly. Look at the toy from everyone sides and, if everything suits you, sew the head to the neck.
Handles and legs (2 pieces each) in the main color with smooth yarn
Knit a chain of 8 ch and close it with 1 dc into a ring.
Rows 1-15: 8 sc in circles
Attach a thread of a dark or contrasting color for the hooves
Rows 16-18: 8 sc in circles
Row 19: flatten the hoof, folding it in half, and knit 4 sc through both layers.
Fasten the thread.
If desired, you can insert a thin wire into the arms and legs.
Ears (2 parts) with smooth main yarn
colors
1st row: 5 sc in amigurumi ring = 5 sc
2nd row: inc x 5 times = 10 sc
3rd row: (inc, 1 sc) x 5 sc = 15 sc
4th row: (inc, 2 sc) x 5 sc = 20 sc
Rows 5-12: 20 sc (8 rows)
Row 13: fold the eye in half and knit
through both layers 10 sc
Row 14: fold the piece in half again and knit 4 sc through both layers.
Finish knitting. Leave the thread for sewing.
Registration
1. Sew beady eyes, finding the optimal location for them.
2. Sew the ears to the head.
3. Embroider the nose and mouth in a Y shape using black thread.
4. Sew on the legs so that the sheep sits confidently.
5. Sew on the handles.
6. Decorate the sheep according to your desire and mood.
The ratio of the thickness of smooth and fluffy (textured) yarn can be anyone. As a result, of course, the proportions of the sheep will change, but this is in any case this will be very interesting!!!
Feel free to tag me (@freeamigurumii) in your photos on Instagram or Facebook if you’d like!
All Finished.