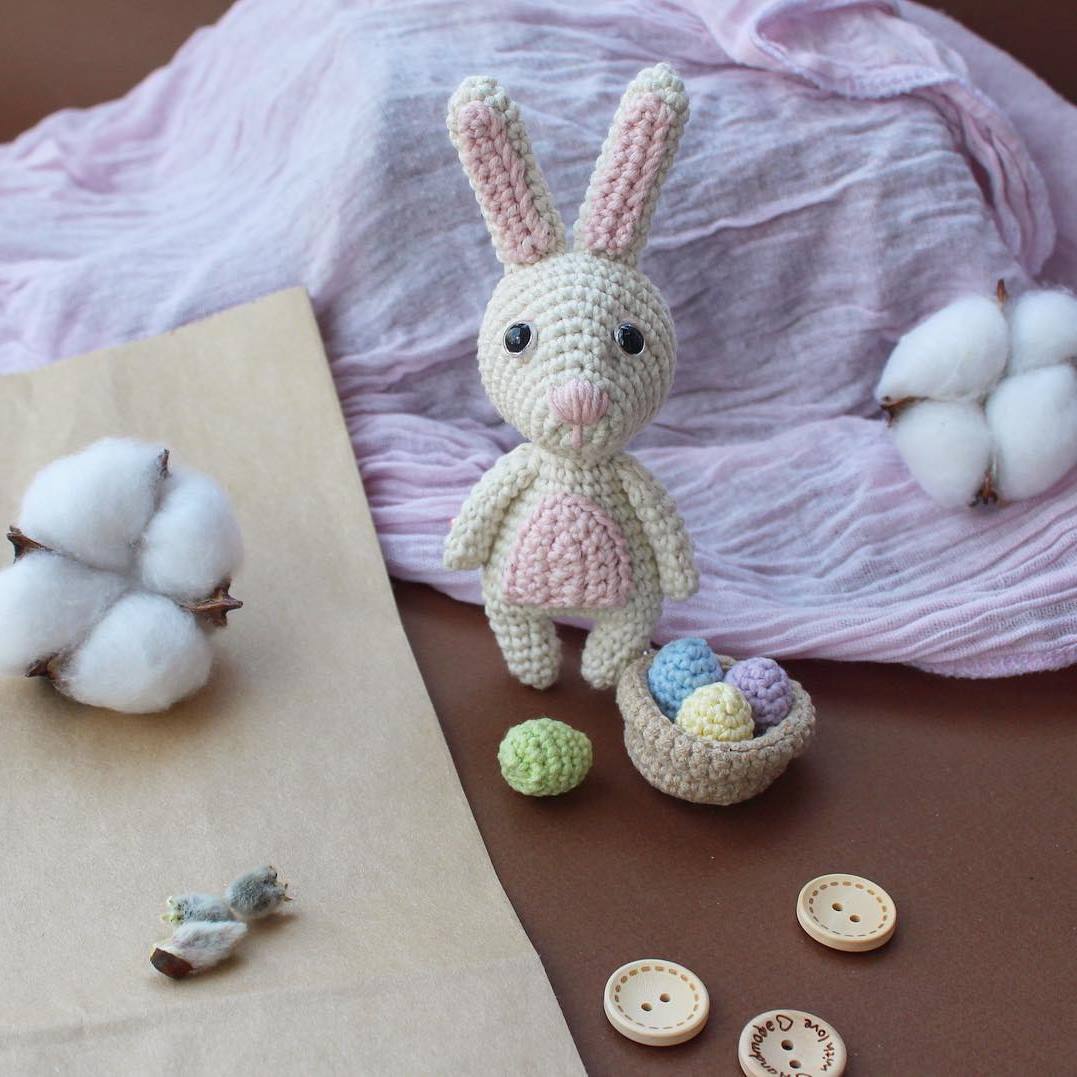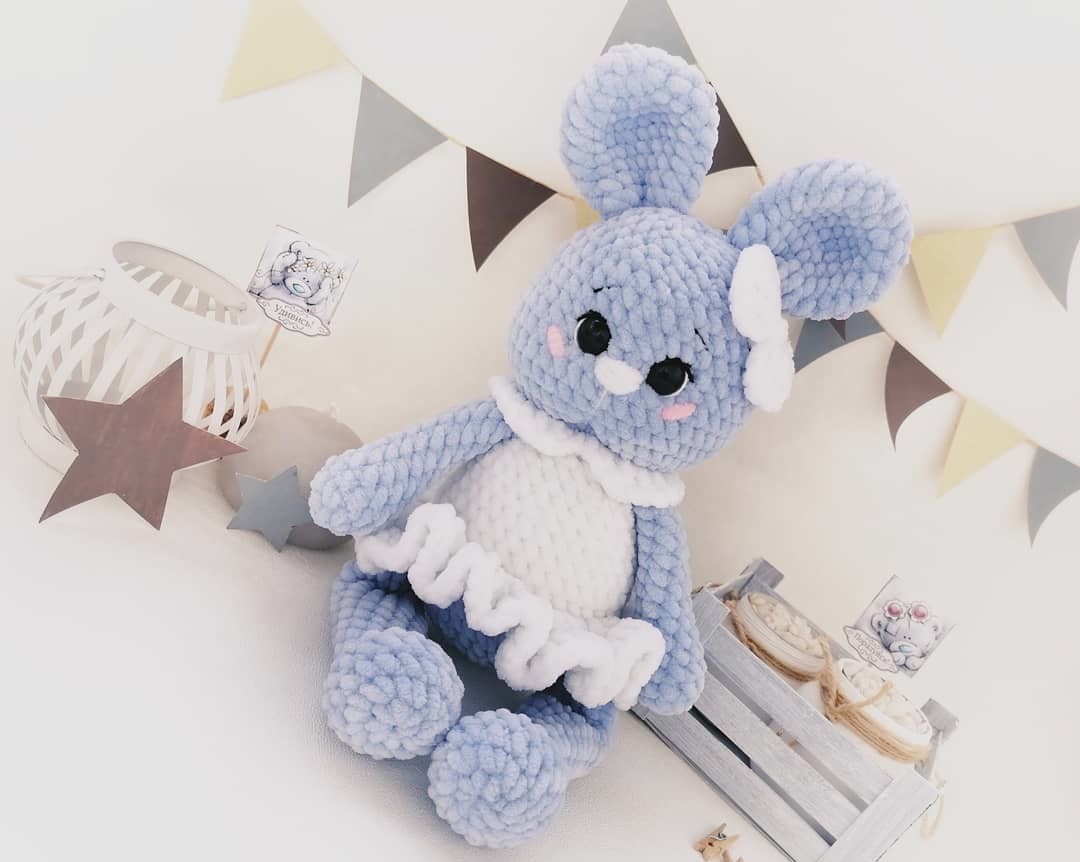
Hello amigurumi lovers and beautiful visitors, I wanted to share the free amigurumi patterns for you here. In my article I will share 1 pattern and how to make it for you. At the end of my article, I will share amigurumi patterns that can generate ideas for you.
Materials and tools:
- Plush Yarn Himalaya Dolphin Baby or YarnArt Dolce
- Hook 4.0 mm
- Safety eyelets 12 mm
- Cotton thread for embroidery and muzzle tightening
- Needle, scissors, marker
- Filler for a toy
Symbols:
V.P. – air loop
sc – single crochet
dc – double crochet
psn – half double crochet
U – decrease
P – increase
Legs (2 parts)
1. 2 ch, in the 2nd loop from the hook 8 sc
2. 8 P = 16 sc
3-5. 16 sc
6. 4 sc, 4 U, 4 sc = 12 sc
7-21. 12 sbn (15 rows)
After 11 rows, fill the lower part of the leg tightly. Fold in half and knit 6 sc.
Fasten the thread and hide.
Handles (2 parts)
1. 2 ch, in the 2nd loop from the hook 5 sc
2. 5 P = 10 sc
3-14. 10 sbn (12 rows)
Fill only the palm, fold in half and knit 5 sbn.
Fasten the thread and hide.
Ears (2 parts)
1. 2 ch, in the 2nd loop from the hook 6 sb
2. 6 P = 12 sb
3. (1 sb, P) * 6 = 18 sb
4. (2 sb, P) *6 = 24 sc
5-7. 24 sc (3 rows)
8. (2 sc, Y) * 6 = 18 sc
9-11. 18 sc (3 rows)
Make a connecting column, fasten the thread, leave a long tail for sewing.
Body and head
Stuff as you knit.
1. Ch 2, in the 2nd loop from the hook 6 sc
2. 6 P = 12 sc
3. (1 sc, P) * 6 = 18 sc
4. (2 sc, P) * 6 = 24 sc
5. (3 sbn, P) * 6 = 30 sbn
6. (4 sbn, P) * 6 = 36 sbn
7. 36 sbn
8. We knit legs: 6 sbn, 6 sbn together with the leg, 12 sbn, 6 sbn together with a leg, 6 sbn = 36 sbn
9. 36 sbn
Change the color to the color of the dress or blouse if you are knitting a boy.
10. 36 sbn 11. sbn
behind the back wall (for a boy we knit 36 sbn for both walls)7 sc = 32 sc 14. 32 sc 15. 13 sc, Y, 2 sc, Y, 13 sc = 30 sc
16. 4 sc, U, 18 sc, Y, 4 sc = 28 sc
17. 7 sc, U, 10 sc, Y, 7 sc = 26 sc
18. 5 sc, U, 12 sc, U, 5 sc = 24 sb
19. We knit handles: 5 sb, 5 sb with the handle, 6 sb, 5 sb with the handle, 3 sb = 24 sb
20. (2 sb, U) * 6 = 18 sb
21. 18 sb (we knit for the boy 18 sbn behind the back wall)
Knitting is not interrupted. We knit the required number of sc so that the marker is in the middle of the back of the body (I knitted 4 sc). Change the color to the main one.
22. 18 P = 36 sb
23. (5 sb, P) * 6 = 42 sb
24-28. 42 sc (5 rows)
29. 9 sc, Y, 20 sc, Y, 9 sc = 40 sc
30. 9 sc, U, 18 sc, Y, 9 sc = 38 sc
31. 10 sc, U, 14 sc, U, 10 sc = 36 sc
32. 36 sc
33. (4 sbn, Y) * 6 = 30 sbn
34. (3 sbn, Y) * 6 = 24 sbn
Between 28 and 29 rows at a distance of 5 sbn we set eyes.
35. 24 sc
36. (2 sc, Y) * 6 = 18 sc
37. (1 sc, Y) * 6 = 12 sc
38. 6 Y = 6 sc Pull the
hole, fasten and hide the thread.
Tail
1. 2 ch, in the 2nd loop from the hook 6 sbn
2. (1 sbn, P) * 3 = 9 sbn
3. 9 sbn
Knit a connecting column, fasten the thread and leave a long tail for sewing.
Fill the tail of the bunny a little and sew it to the body so that the color transition is not noticeable.
Skirt We
attach the thread to the back half-loop of the 11th row of the body.
1. 2 V.P., then in each half-loop we knit 2 dc = 72 dc, a connecting column.
2. 2 V.P., then in each loop 2 dc = 144 dc, connecting column.
Fasten the thread and hide.
Collar for a girl
We collect a chain of 29 air loops, in 2 loops from the hook 1 sbn, 1 dc, 24 dc, 1 dc, 1 sb We
put the collar on the bunny, sew the edges. You can sew a couple of stitches to fix the collar.
Collar for a boy
This collar is knitted in the same way as a skirt for a girl.
We attach the thread to the back half-loop of the 21st row of the body.
1. 2 V.P., then in each half-loop we knit 2 dc = 36 dc, a connecting column.
2. 2 VP, then in each loop 2 dc = 72 dc, connecting column.
Fasten the thread and hide.
Bow
We collect a chain of 5 VP, we knit 4 columns with two crochets into the loop of the base, we collect 4 VP, we knit a connecting column, then 4 VP, 4 columns with two crochets, 4 VP, connecting column, fasten the thread and leave a long tail for sewing.
Sew ears and a bow to the head, decorate the muzzle to your liking.
Feel free to tag me (@freeamigurumii) in your photos on Instagram or Facebook if you’d like!
All Finished.