Hello amigurumi lovers and beautiful visitors, I wanted to share the free amigurumi patterns for you here. In my article I will share 1 pattern and how to make it for you. At the end of my article, I will share amigurumi patterns that can generate ideas for you.
Pattern below.
You will need:
4mm crochet hook
8 ply (DK/ Light Worsted) acrylic yarn (in teal and orange)
small amount of yellow and pink yarn
2 x 12mm plastic safety eyes
toy stuffing
yarn needle
scissors
Abbreviations (US Terminology)
rnd – round
sc – single crochet
inc – increase (2 sc in one stitch)
dec – single crochet 2 together
rep – repeat
BODY (with teal or orange yarn)
Rnd 1: 6 sc in magic ring (6)
Rnd 2: 2 sc in each st around (12)
Rnd 3: Sc 1, inc; rep 6 times (18)
Rnd 4: Sc 2, inc; rep 6 times (24)
Rnd 5: Sc 3, inc; rep 6 times (30)
Rnd 6: Sc 4, inc; rep 6 times (36)
Rnds 7 – 10: Sc around (36)
Rnd 11: Sc 4, dec; rep 6 times (30)
Rnd 12: Sc around (30)
Rnd 13: Sc 4, inc; rep 6 times (36)
Rnd 14: Sc 5, inc; rep 6 times (42)
Rnds 15 – 19: Sc around (42)
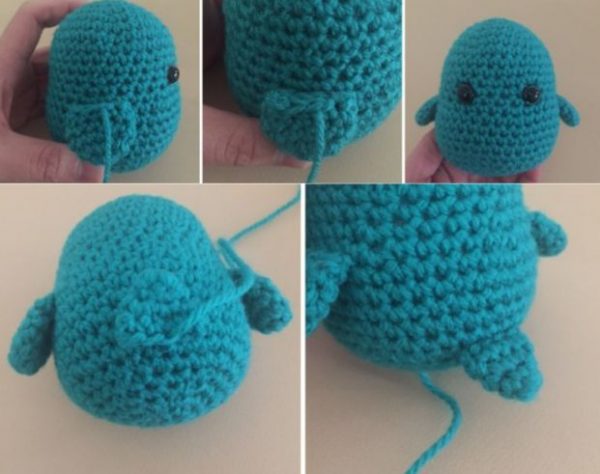
Attach eyes between Rounds 11 & 12, 3 stitches apart.
Rnd 20: Sc 5, dec; rep 6 times (36)
Rnd 21: Sc 4, dec; rep 6 times (30)
Rnd 22: Sc 3, dec; rep 6 times (24)
Begin to stuff firmly.
Rnd 23: Sc 2, dec; rep 6 times (18)
Rnd 24: Sc 1, dec; rep 6 times (12)
Continue to stuff firmly.
Rnd 25: Dec 6 times (6)
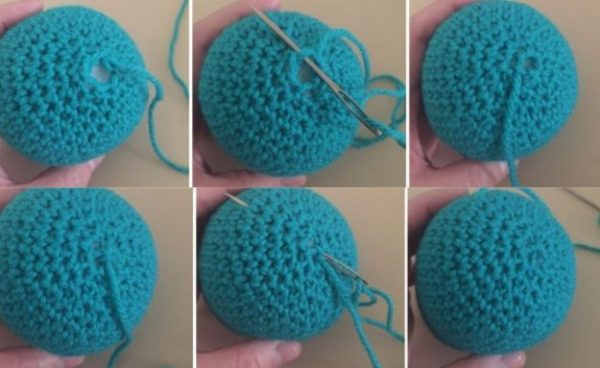
Fasten off and leave a long tail end. To close the body, weave tail end through all 6 stitches in the front loops only then pull. Weave in and hide tail end in the body. Scroll down to see pictures for reference.
WINGS (with teal or orange yarn) (MAKE 2)
Rnd 1: 6 sc in magic ring (6)
Rnd 2: 2 sc in each st around (12)
Rnds 3 – 4: Sc around (12)
Rnd 5: Sc 4, dec; rep 2 times (10)
Fasten off and leave long tail end for sewing.
TAIL (with teal or orange yarn)
Rnd 1: 5 sc in magic ring (5)
Rnd 2: Sc around (5)
Rnd 3: 2 sc in each st around (10)
Rnd 4: Sc around (10)
Fasten off and leave long tail end for sewing.
ASSEMBLY
Flatten wings and sew onto the sides of the body (between Rounds 13 & 14). Weave in and hide yarn end.
Flatten tail and sew onto the lower rear of the body (between Rounds 18 & 19). Weave in and hide yarn end.
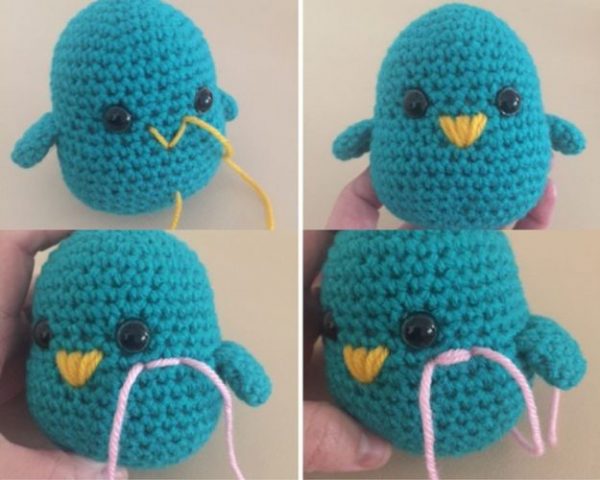
Using yellow yarn, embroider the beak. Weave in and hide yarn end.
Using pink yarn, embroider the blush. Don’t forget to weave in and hide yarn end!

Loop through a couple of strands of yellow yarn on top of the head.
Insert hook in the centre then out through one stitch hole. With the hook, grab a few strands of yellow yarn.
Yarn over and pull through the loop. Cut off yarn to preferred length.
HOW TO CLOSE
After the last round, Fasten off as per normal. Coming in from the centre always, weave in yarn tail end through the front loops of each stitch then pull the tail end carefully.
It should now close. Insert the needle in the centre again then weave in and hide the yarn tail through the piece several times. Cut off the excess yarn.
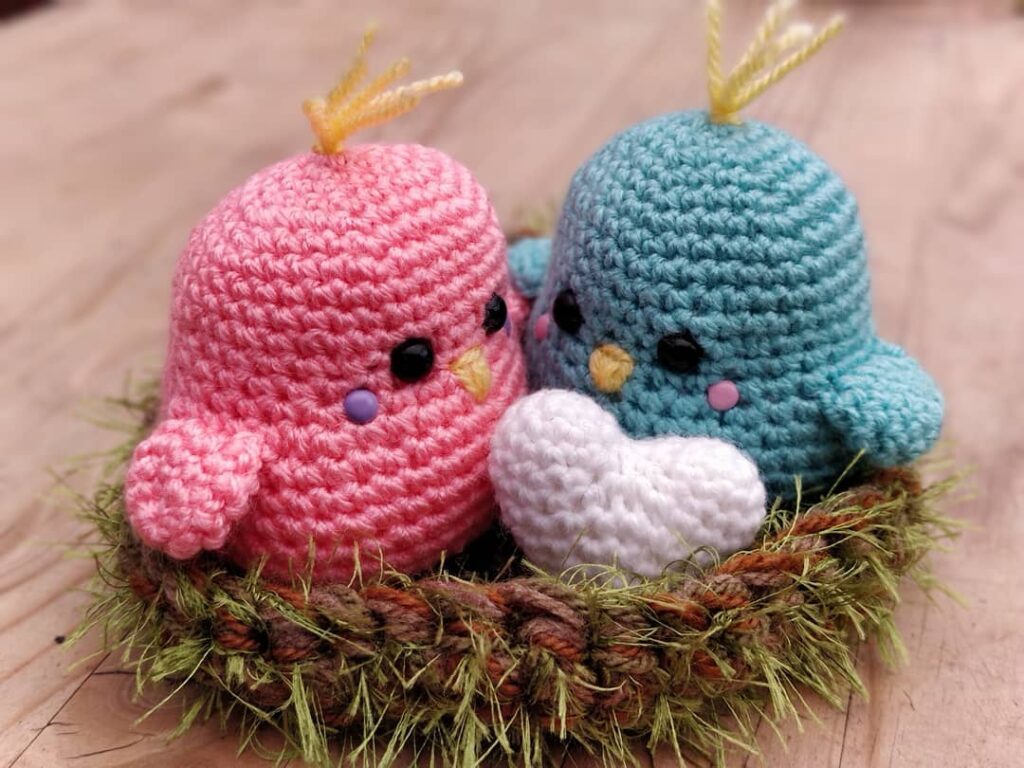
I just love how they’re so chubby looking and a little unusual! Make sure to make two lovebirds so they’re never alone!!
Feel free to tag me (@freeamigurumii) in your photos on Instagram or Facebook if you’d like!
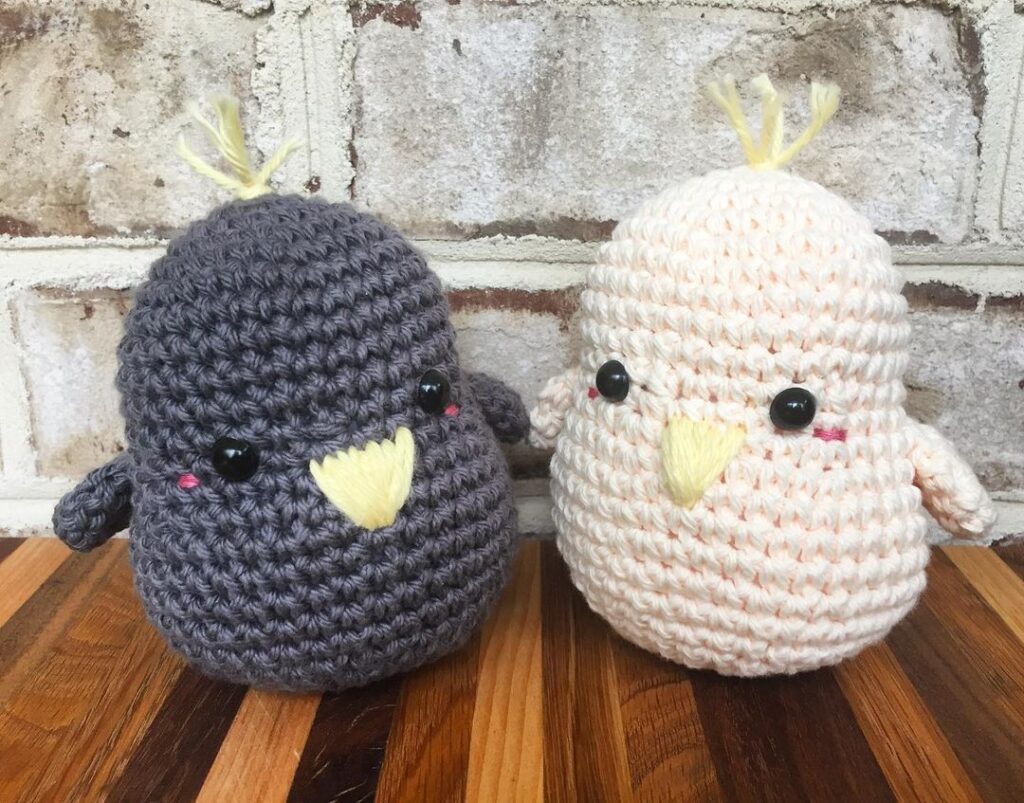
All Finished.