Hello amigurumi lovers and beautiful visitors, I wanted to share free amigurumi models with you here. In my article, I will share with you a model and how to make it. At the end of my article, I will share with you the detailed construction patterns of the mold.
Materials
• Yarn “Himalaya Dolphin Baby” (gray 80325) (2 skeins)
• Himalaya Dolphin Baby yarn (white 80301)
• Yarn “Alize softy” (white No 55)
• Hooks floor numbered No 5(4); No 2.5(3); no(8)
• Discs (3cm – 4pcs); (4cm – 4pcs), or joints of the same size
• Pins 4cm and 3.3cm long
• Eyes 18mm
• Spout 18mm
• Eyelashes
• Glue moment
• Round nose pliers
• Markers
• Scissors
• Thick thread for stitching parts
• Needle
Abbreviations
MR- Magic ring
Ch- Chain
Sc- Single crochet
Inc- Increase
Dec- Decrease
Sl st- Slip stitch
Hdc- Half double crochet
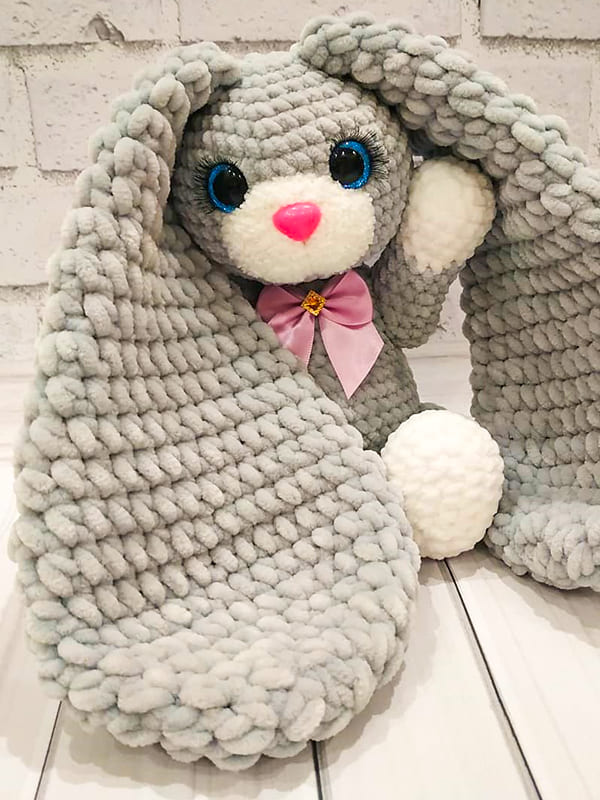
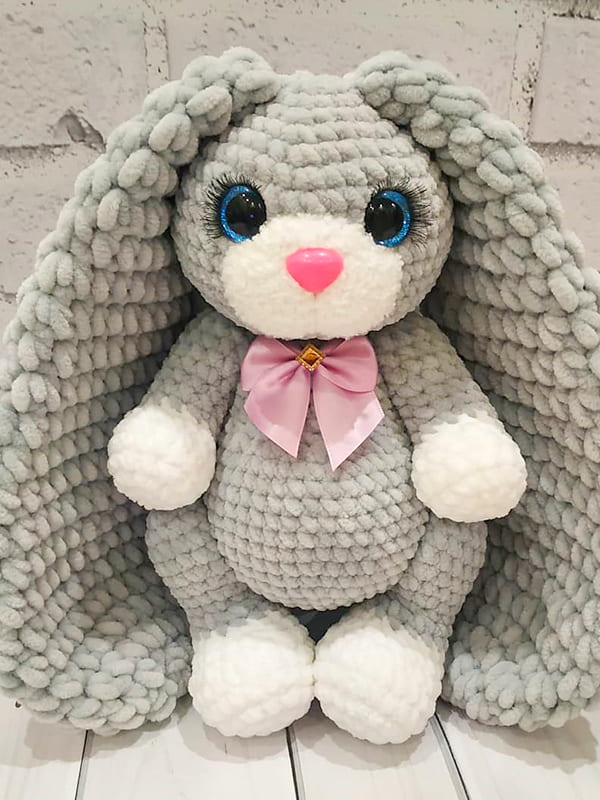
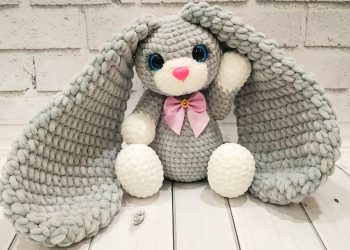
• The finished crochet plush rabbit size is approximately 26 cm.
Legs (Make 2)
Rnd 1. We start crocheting in white. We collect a chain of 5 ch
Rnd 2. In the second loop from the hook 1sc, 2sc, in the last 4th loop we crochet 5sc, turn; 2sc, 3sc in one loop (13)
Rnd 3. inc, 3sc, 4inc, 3sc, 2inc (20)
Rnd 4. 2inc, 4sc, (inc, 1sc)*3, 4sc, inc, 3sc (26)
Rnd 5-6. 26 sc
Rnd 7. 7sc, (dec, 1sc)*4, 7sc (22)
Rnd 8. 6sc, 2dec, 1sc, 2dec, 7sc (18)
Rnd 9. 7sc, 2dec, 7sc (16)
Rnd 10. Color change to gray: 16sc
Rnd 11. 6sc, 2dec, 6sc (14)
Rnd 12. 7sc, inc, 6sc (15) +1sc to shift row
Rnd 13. 6sc, inc, 8sc (16)
Rnd 14. 8sc, inc, 7sc (17)
Rnd 15. 8sc, inc, 8sc (18)
Rnd 16. inc, 17sc (19)
Rnd 17. 19 sc
After we finish crocheting the 17th row, we will insert a disc with a cotter pin.
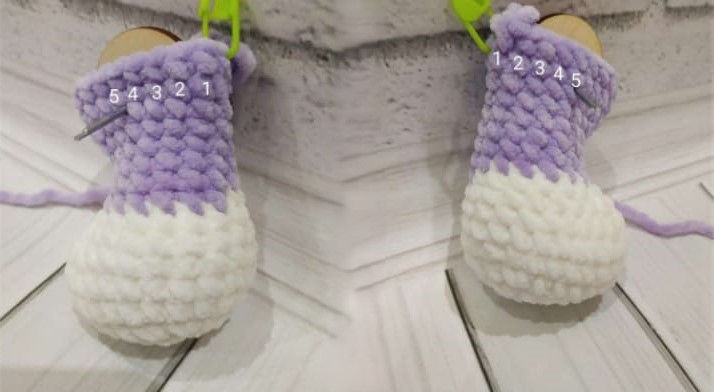
Right leg:
Between the 15th and 16th rows we insert a disc with a cotter pin, go down 1st row, in the 16th row at we had an increase, we count from it (including an increase) 5sc, insert a disk with cotter pin (joint). Next, we finish knitting the leg, (18, 19 and 20 rows).
Don’t forget to fill the leg!
Rnd 18. 1sc, dec, 16sc (18)
Rnd 19. (1sc, dec)*6 (12)
Rnd 20. 6 dec
Cut the thread, pull the hole, hide the tip.
The right leg is ready!
We crochet the left leg in the same way as the right one, only we will insert the disk with the cotter pin from the other sides.
Left leg:
Between 15 and 16 rows we insert a disk with a cotter pin (joint), go down 2 rows, back from the end of the 17th row, we count 5sc, insert the disc with the cotter pin (joint).
Next, we finish knitting the leg (18.19 and 20 rows).
Don’t forget to fill the leg!
The left leg is done!
Paws (Make 2)
Start crocheting white.
Rnd 1. 6 sc in MR
Rnd 2. 6inc (12)
Rnd 3. 2sc, inc, (1sc, inc)*3, 3sc (16)
Rnd 4-5. 16sc
Rnd 6. 4sc, 4dec, 4sc (12)
Rnd 7. 12sc
Rnd 8. Color change to gray 12sc
Rnd 9-10. 12sc
Rnd 11. inc, 5sc, inc, 5sc (14)
Rnd 12-14. 14sc
After we finish crocheting the 14th row, we will insert a disk with a cotter pin (joint).
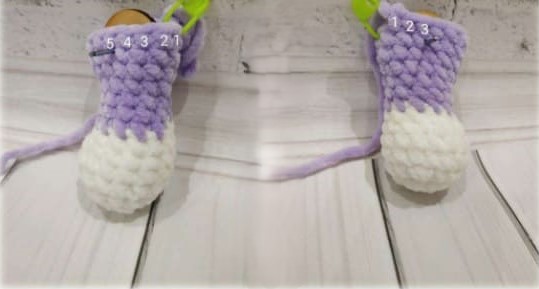
Right foot:
We count 5 sc forward, between the 13th and 14th rows we insert a disk with a cotter pin (joint).
Don’t forget to stuff your paw!
We complete the crochet of the foot, we knit the 15th and 16th rows.
Rnd 15. 1sc, dec, 5sc, dec, 4sc (12)
Rnd 16. 6 dec. Cut the thread, pull the hole, hide the tip.
The right paw is ready!
Left foot:
After we finish knitting the 14th row, we will insert a disk with a cotter pin (joint).
We count back 3sc, between the 13th and 14th rows we insert a disk with a cotter pin (joint).
Don’t forget to stuff your paw!
We complete the crocheting of the foot, we crochet the 15th and 16th rows.
Body
Rnd 1. 6sc in MR
Rnd 2. 6inc (12)
Rnd 3. (1sc, inc)*6 (18)
Rnd 4. (2sc, inc)*6 (24)
Rnd 5. (3sc, inc)*6 (30)
Rnd 6. (4sc, inc)*6 (36)
Rnd 7. 36sc
Rnd 8. (5sc, inc)*6 (42)
Rnd 9-14. 42sc (6 rnds)
Rnd 15. 14 sc, dec, 1sc, 4dec, 1sc, dec, 14sc (36)
Rnd 16. (4sc, dec)*6 (30)
After we finish knitting the 16th row, we will fasten the legs!
From the MR we count 7 rows, insert the legs between the 7th and 8th rows.
The distance between the fastening stitch of the legs in front is 18 sc (taking into account reductions, i.e. reduction counts as 1sc).
Next, we continue to knit the body to the end.
Rnd 17-19. 30sc (3 rows)
Rnd 20. (3sc, dec) * 6 (24)
Rnd 21-22. 24 sc (at the end of 22 rows we crochet + 3sc to shift the row)
Rnd 23. (2sc, dec) * 6 (18)
Rnd 24. 18sc.
Fasten the thread, cut off, hide.
Insert paws:
Between the 19th and 20th rows we fasten the legs, the distance between them in front is 12sc (decrease as 1sc)
Head
Rnd 1. 6sc in MR
Rnd 2. 6inc (12)
Rnd 3. (1sc, inc)*6 (18)
Rnd 4. (2sc, inc)*6 (24)
Rnd 5. (3sc, inc)*6 (30)
Rnd 6. (4sc, inc)*6 (36)
Rnd 7. (5sc, inc)*6 (42)
Rnd 8. 42sc
Rnd 9. (6sc, inc)*6 (48)
Rnd 10-14. 48sc (5 rnds)
Rnd 15. 3sc, dec, (6sc, dec)*5, 3sc (42)
Rnd 16. (5sc, dec)*6 (36)
Rnd 17. 2sc, dec, (4sc, dec)*5, 2sc (30)
Rnd 18. (3sc, dec)*6 (24)
Rnd 19. 1sc, dec, (2sc, dec)*5, 1sc (18)
Muzzle
Alize softy yarn
Rnd 1. We crochet a chain of 6 ch
Rnd 2. 4sc, 5sc in one loop, turn, 3sc, 3sc in one loop. Next, crochet in a circle.
Rnd 3. inc, 4sc, 4inc, 3sc, 3inc
Rnd 4. 1sc, inc, 4sc, (inc, 1sc)*4, 3sc, (inc, 1sc)*3
Rnd 5. inc, 4sc, inc, (2sc, inc)*4, 4sc, (inc, 2sc)*3
Rnd 6-7. 38sc.
(Alize softy yarn is very difficult, especially when crocheted with it, so if you have 1 – 2 sc more, it’s not scary)
Making a muzzle
Glue eyelashes to the eyes.
We insert the eyes between 9 and 10 rows, the distance between the eyes is 7sc.
We insert a nose into the muzzle, after we sew the muzzle.
We sew from the beginning of the 9th row to the end of the 16th.
We stuff the muzzle a little.
We make a tightening from the nose to the very bottom of the muzzle.
Ears (Make 2)
Rnd 1. 8 hdc in MR slst
Rnd 2. 8inc from hdc (16) slst
Rnd 3. (1hdc, inc)*8 (24)
Rnd 4. 24hdc
Rnd 5. (2hdc, inc)*8 (32)
Rnd 6-7. 32hdc
Rnd 8. 6hdc, dec, 14hdc, dec, 8hdc (30)
Rnd 9. 30hdc
Rnd 10. 6hdc, dec, 13hdc, dec, 7hdc (28)
Rnd 11. 28hdc
Rnd 12. 7hdc, dec, 12hdc, dec, 5hdc (26)
Rnd 13. 7hdc, dec,10hdc, dec, 5hdc (24)
Rnd 14. 6hdc, dec, 10hdc, dec, 4hdc (22)
Rnd 15. 22hdc + 2hdc to shift row
Rnd 16. 5hdc, dec, 9hdc, dec, 4hdc (20)
Rnd 17. 5hdc, dec, 8hdc, dec, 3hdc (18)
Rnd 18. 18hdc + 2hdc to shift row
Rnd 19. 3hdc, dec, 8hdc, dec, 3hdc (16)
Rnd 20. 3hdc, dec, 6hdc, dec, 3hdc (14)
Rnd 21. 3hdc, dec, 5hdc, dec, 2hdc (12)
Rnd 22. 3hdc, dec, 4hdc, dec, 1hdc (10) + 1 hdc for row shift
Rnd 23. 10 hdc.
Cut the thread, fasten, hide.
Ears are ready!
Tail
Rnd 1. 6sc in MR
Rnd 2. 6inc (12)
Rnd 3. (1sc, inc)*6 (18)
Rnd 4-5. 18sc
Rnd 6. (1sc, dec)*6 (12)
Rnd 7. 6 dec
Cut the thread, fasten to hide.
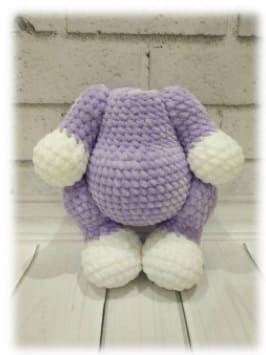
Assembly
• We sew the head to the body, then we sew the ears, and at the very least sew on a ponytail.
Feel free to tag me (@freeamigurumii) in your photos on Instagram or Facebook if you’d like!
All Finished.