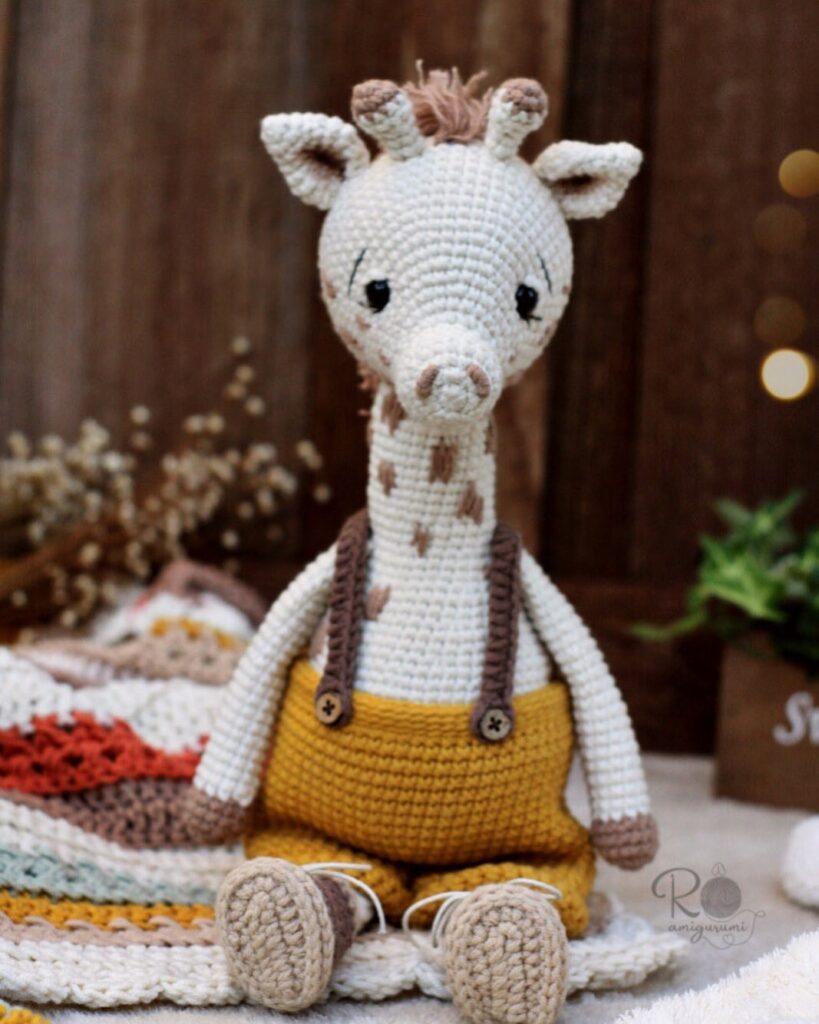
Hello amigurumi lovers and beautiful visitors, I wanted to share the free amigurumi patterns for you here. In my article I will share 1 pattern and how to make it for you. At the end of my article, I will share amigurumi patterns that can generate ideas for you.
Materials:
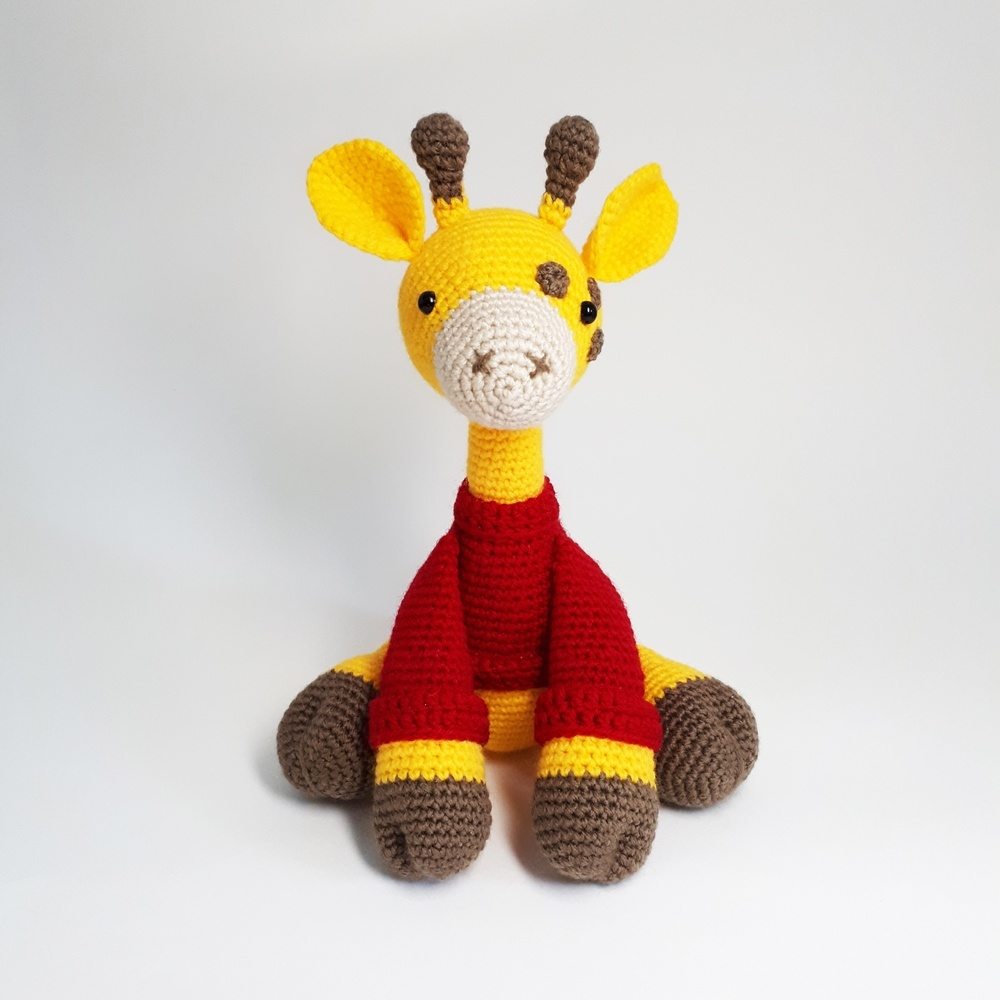
Yellow, beige, red and brown yarn.
Filler (synthetic winterizer, holofiber).
Eyes on a secure mount or black beads.
Hook, scissors and needle.
Symbols:
VP – air loop;
RLS – single crochet;
CCH – double crochet;
PR – increase (2 columns in one loop);
U – decrease (knit 2 columns together);
The number in brackets () is the number of columns in the row.
Head
We start in beige:
1 row: dial 2 VP and knit 6 sc in the second loop from the hook;
2 row: PR in each loop of the previous row (12);
3rd row: (1 sc, inc) x6 (18);
4th row: (2 sc, inc) x6 (24);
5 row: (3 RLS, PR) x6 (30);
6-9 rows: 30 sc (30);
Change the beige thread to yellow.
10 rows: 30 sc (30);
11 row: (4 sc, pr) x6 (36);
12 row: (5 RLS, PR) x6 (42):
13 row: (6 RLS, PR) x6 (48);
Between 12 and 13 rows, insert eyes at a distance of 14 loops.
14 row: (7 RLS, PR) x6 (52);
15-20 rows: 52 sc (52);
21 row: (7 sc, Y) x6 (48);
22 row: (6 sc, Y) x6 (42);
23rd row: (4 sc, Y) x6 (36);
From this moment, you can start filling the part with filler.
24th row: (5 sc, Y) x6 (30);
25 row: (3 RLS, Y) x6 (24);
26 row: (2 sc, Y) x6 (18);
27 row: (1 sc, Y) x6 (12);
28 row: 6 U (6).
Pull the circle and hide the thread inside the product.
On the muzzle, embroider two crosses with brown yarn.
Ears (2 parts)
1 row: amigurumi ring of 6 RLS (6);
2 row: 6 PR (12);
3rd row: (1 sc, inc) x6 (18);
4th row: (2 sc, inc) x6 (24);
5 row: (3 RLS, PRx6 (30);
6 row: (4 RLS, PR) x6 (36).
Fold the ears in half and sew to the head with the wrong side forward. You need to sew on the 20th row.
Horns (2 parts)
We knit in brown.
1 row: amigurumi ring of 6 sc (6);
2 row: 6 PR (12);
3-4 rows: 12 sc (12);
4th row: 6 U (6);
Fill the resulting cone.
5-6 rows: 6 sc (6);
Change the thread to yellow.
7-8 rows: 6 sc (6).
Fill the part and leave a long tip, then sew to the head.
Body
In yellow
1 row: dial 2 VP and knit 6 sc in the second loop from the hook;
2 row: PR in each loop of the previous row (12);
3rd row: (1 sc, inc) x6 (18);
4th row: (2 sc, inc) x6 (24);
5 row: (3 RLS, PR) x6 (30);
6 row: (4 sc, pr) x6 (36);
7 row: (5 RLS, PR) x6 (42):
8 row: (6 RLS, PR) x6 (48);
9 row: (7 RLS, PR) x6 (52);
10th row: (8 sc, pr) x6 (58);
11-14 rows: 58 sc (58);
15 row: (8 sc, Y) x6 (52);
16-18 rows: 52 sc (52);
19 row: (7 RLS, Y) x6 (48);
20 row: 48 sc (48);
Change the color of the thread to the color of the sweater and continue knitting.
21 row: 48 SBU (48);
22 row: (6 sc, Y) x6 (42);
23-25 rows: 42 sc (42);
26 row: (5 sc, Y) x6 (36);
27-28 rows: 36 sc (36);
29 row: (4 sc, Y) x6 (30);
30 row: 30 sc (30);
From this moment we begin to fill the part with filler. You need to hit it tight.
31 row: (3 sc, Y) x6 (24);
32 row: 24 sc (24);
33rd row: (2 sc, Y) x6 (18);
Change the thread to yellow:
34-43 rows: 18 sc (18).
Finish knitting and leave a long thread for sewing.
Collar
Before you start knitting the collar, the body of the giraffe must be taken upside down.
1 row: insert the hook into the first loop of the 34th row, grab the thread with a hook and pull it through the loop. After the thread
is on the hook, we knit the VP. Next, we knit another 17 RLS and at the end we do the SS. (eighteen);
2-3 rows: 2 VP, 18 dc, at the end make sl-st in those two VPs that we knitted at the beginning (18).
At the end, finish knitting and hide the thread inside the part. Turn the collar inside out.
We do the same on the bottom of the sweater.
1 row: on the 23rd row, insert a hook and knit 48 sc and connect the SS row (48);
2-3 rows: 2 VP, 18 dc, at the end make sl-st in those two VPs that we knitted at the beginning (48).
Finish knitting and hide the thread.
Legs (2 parts)
We start in brown:
1 row: dial 2 VP and knit 6 sc in the second loop from the hook;
2 row: PR in each loop of the previous row (12);
3rd row: (1 sc, inc) x6 (18);
4th row: (2 sc, inc) x6 (24);
5 row: (3 RLS, PR) x6 (30);
6 row: (4 sc, pr) x6 (36);
7-10 rows: 36 sc (36);
11 row: (4 sc, Y) x6 (30);
Change the thread to yellow:
12-15 rows: 30 sc (30);
We fill the part tightly, do not fill it further.
16 rows: (3 sc, Y) x6 (24);
17-20 rows: 24 sc (24);
21 row: (2 sc, Y) x6 (28);
22-25 rows: 18 sc (18).
Fold the part in half and knit RLS. Leave the end for sewing.
In order to make a hoof , you need to pull off the knitting right in the middle of the leg. We fix the thread and hide inside the knitting.
We sew the legs to the body so that the giraffe can sit and not fall over.
Handles (2 parts)
We start in brown:
1 row: dial 2 VP and knit 6 sc in the second loop from the hook;
2 row: PR in each loop of the previous row (12);
3rd row: (1 sc, inc) x6 (18);
4th row: (2 sc, inc) x6 (24);
5 row: (3 RLS, PR) x6 (30);
6-9 rows: 30 sc (30);
10 row: (3 sc, Y) x6 (24);
In this place, we densely fill the part. We fill up to 20 rows.
Change brown thread to yellow:
11-16 rows: 24 sc (24);
Change yellow thread to red.
17-20 rows: 24 sc (24);
21 row: (2 sc, y) x6 (18);
22-31 rows: 18 sc (18).
Fold the piece in half and knit RLS. After cutting off the long end for sewing.
We make the hoof in the same way as last time with the legs.
Lapel on the sleeve
Keep knitting upside down.
1 row: Insert the hook into the first loop of the 18th row and knit 24 sc (24);
2-3 rows: 2 VP, 24 dc, sl-st in the first loop of the row (24).
Sew the arms to the body at an angle.
Tail
We start in brown:
1 row: dial 2 VP and knit 6 sc in the second loop from the hook;
2 row: PR in each loop of the previous row (12);
3-7 rows: 12 sc (12);
8 row: 6 U (6);
From now on, we gradually fill the part.
Change the thread to yellow:
9-14 rows: 6 sc (6);
Fold the piece and knit RLS. Sew the piece to the body.
Now you need to tie the circles, which we will later sew to the head of the giraffe. To do this, you need to make 2 amigurumi rings of 4 SPNs and one circle consisting of 6 RLS, at the end of each circle you need to knit a SS.
Feel free to tag me (@freeamigurumii) in your photos on Instagram or Facebook if you’d like!
All Finished.