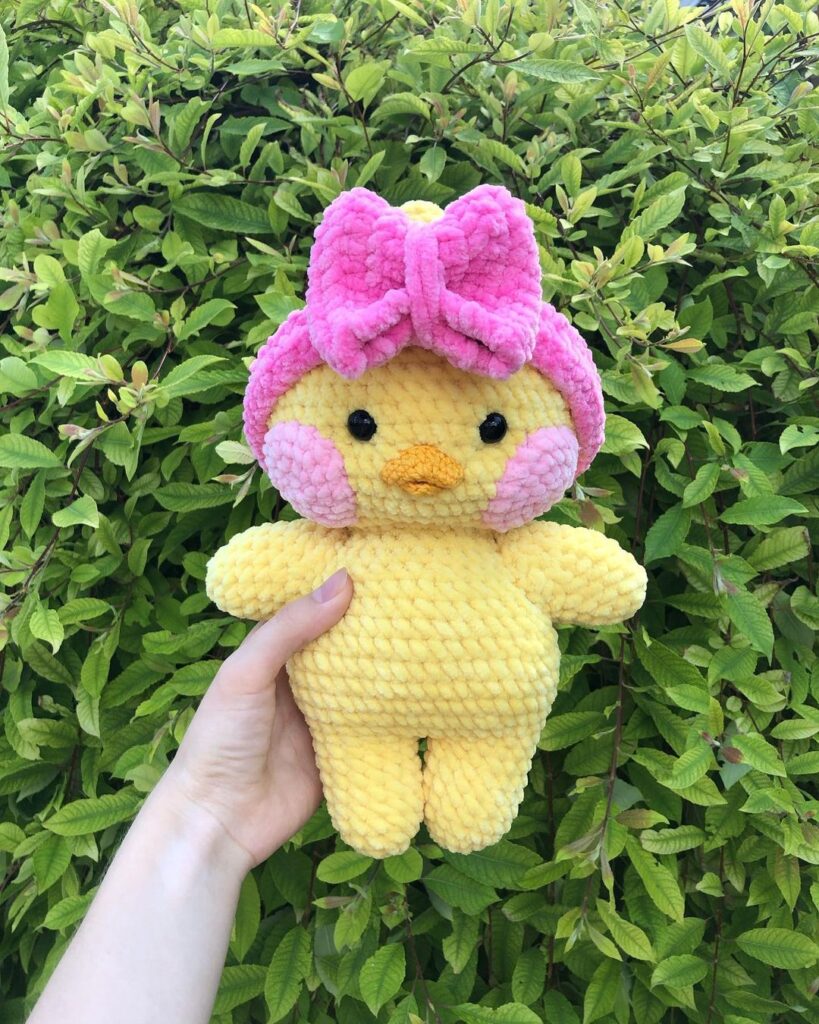
Hello amigurumi lovers and beautiful visitors, I wanted to share the free amigurumi patterns for you here. In my article I will share 1 pattern and how to make it for you. At the end of my article, I will share amigurumi patterns that can generate ideas for you.
Necessary materials:
- Yarn Himalaya Dolphin Baby (120 m / 100 g) or its other analogue in yellow or white (1 skein)
- Pink Himalaya Dolphin Baby yarn (just a little)
- Hook 3.5 mm (main) and 1.3 mm (for beak)
- Eyes 14 mm on a secure mount
- Two-fold floss for knitting a beak or other similar cotton thread
- White fur, square 1.5*1.5 cm
- Knitting marker
- Needle and thread for stitching parts
- Scissors
- Filler
Legend:
KA – amigurumi ring vp
– air loop
sbn – single crochet
ssn – double crochet
pssn – half double crochet
ss – connecting column
pr – increase (2 columns in one loop)
dec – decrease (knit 2 loops together)
( …) * n – in brackets it is shown that you need to repeat n times
(…) – at the end in brackets the number of loops in a row is indicated
Knitting of all parts (except for the upper part of the “arm” of the duckling) is carried out in a spiral without lifting loops. The upper part of the “arm” of the duckling is knitted in turning rows with a lifting loop.
The degree of knitting is dense.
The marker is placed in the first loop of the row.
The legs, body and head of the duck are knitted in one piece.
Legs, body, head
Legs (2 parts)
1p: 6 sbn in KA (6)
2p: 6 inc (12)
3p: (3 sbn, inc) * 3 (15)
4-8p: 15 sbn each (5 rows)
On the first leg we make sl-st and cut the thread.
We leave the thread on the second leg, continue knitting (we will knit the body):
9r: we knit 1 ch and connect the legs of the sl-st and then we knit 15 sbn on the right leg, 1 sbn in ch, 15 sbn on the left leg, 1 sbn in ch (32)
10r: (14 sb, 2 inc) * 2 (36)
11r: (5 sb, inc) * 6 (42)
12r: (6 sb, inc) * 6 (48)
13-15r: 48 sb each (3 rows )
We stuff the legs.
16r: (14 sb, dec) * 3 (45)
17r: (13 sb, dec) * 3 (42)
18r: (12 sb, dec) * 3 (39)
19r: (11 sb, dec) * 3 ( 36)
20p: (4 sc, dec) * 6 (30)
21r: 30 sc
22p: (3 sc, dec) * 6 (24)
23r: (2 sc, dec) * 6 (18)
24r: 18 inc ( 36)
25p: (2 sc, inc) * 12 (48)
26p: (7 sc, inc) * 6 (54)
27r: (8 sbn, inc) * 6 (60)
28-36r: 60 sbn each (9 rows)
Stuff the body.
37r: (8 sb, dec) * 6 (54)
38r: (7 sb, dec) * 6 (48)
39r: (6 sb, dec) * 6 (42)
40r: (5 sb, dec) * 6 ( 36)
41r: (4 sbn, dec) * 6 (30)
42r: (3 sbn, dec) * 6 (24)
Between the 31st and 32nd rows we insert the eyes on a secure mount, the distance between the eyes is 7 sbn.
We stuff the head, creating the shape of a ball, we stuff the neck especially tightly.
43r: 12 dec (12)
44r: 6 dec (6), sl-st Cut the
thread, tighten the hole, fasten the thread and hide.
Wing handles (2 parts)
1p: 6 sc in KA (6)
2p: 6 inc (12)
3p: (3 sc, inc) * 3 (15)
4-6r: 15 sc each (3 rows)
7p: 5 sbn, ch lifting, unfold knitting and from the second loop from the hook we knit 8 sbn; ch lifting, unfold knitting and from the second loop from the hook we knit 5 sc, dec; ch lifting, unfold knitting and from the second loop from the hook we knit 3 sc, dec; ch lifting, unfold knitting and knit in a circle 18 sbn, ss.
We cut the thread, fasten and stuff the part.
Cheeks (2 parts)
1p: 6 sbn in KA (6)
2p: 6 inc (12)
3p: (1 sbn, inc) * 6 (18)
4p: 18 sbn, ss Cut the
thread, fasten it.
Beak
Upper beak:
We collect a chain of 8 ch.
1p: We start knitting from the second loop from the hook: 3 sbn, 3 dc in one loop, 2 sbn, an increase of 3 sbn in one extreme loop (turning), on the reverse side of the chain we knit 5 sbn, inc in the last loop (18)
2p : 3 sbn, inc from pssn, pssn, inc from pssn, 3 sbn, inc, 7 sbn, inc (22)
3p: 11 sbn, ss Cut the
thread, fasten, leave for sewing. (The row is not complete, this is the upper part of the beak).
We hit just a little bit.
Lower beak:
We collect a chain of 6 ch.
1p: We start knitting from the second loop from the hook: 1 sbn, pssn, (pssn, ssn, pssn) in one loop, pssn, sbn, ss Cut the
thread, fasten, leave for sewing.
Feel free to tag me (@freeamigurumii) in your photos on Instagram or Facebook if you’d like!
All Finished.