Hello amigurumi lovers and beautiful visitors, I wanted to share free amigurumi models with you here. In my article, I will share with you a model and how to make it. At the end of my article, I will share with you the detailed construction patterns of the mold.
Materials
• Yarn “Jeans”, YarnArt ((50 gr/160 m) Composition: 55% cotton, 45% acrylic).
Basic color No. 46, consumption: 1/3 skein.
Red No. 51, Green No. 52, White No. 62 – flow rate 1/3 skein.
You can use yarn from other manufacturers, as well as yarn “Jeans” from others shades.
• Safety eyelets 8 mm.
• Floss for embroidery brown. A thin needle with a large eye for embroidery spout.
• Chenille wire, you can take a simple wire, which you usually use for frame. The total length of the wire is about 10 cm. (The wire can be omitted!)
• Black beads for decoration (about 30 pcs.), diameter – 3 mm, needle, black or red thin thread for sewing beads.
• Hook for your yarn (I have No. 2.5), needles for stitching parts, filler for toy stuffing.
• For crocheting the hood, “Jeans” yarn is used in the same colors as indicated in list above.
• crocheting needles No. 2, 5 for crocheting a hood, it is more convenient to use knitting needles on a fishing line.
• Two large black beads for hood strings, diameter – 7 mm.
Abbreviations
MR– Magic ring
Sc– Single crochet
Inc– Increase
Dec– Decrease
Ch– Chain
Tch– Turning chain
Upper Paws (Make 2)
Rnd 1. 6 sc in MR
Rnd 2. (inc,1sc)*3 (9)
Rnd 3-4. 9 sc (2 rows)
Rnd 5. 7 sc (8)
lightly fill the foot if you plug in the wire – stuffing not necessary at all.
Rnd 6-11. 8 sc (6 rows)
Rnd 12. dec, 6 sc (7)
Rnd 13. 7 sc
You can insert chenille wire by bending it at both ends with pliers.
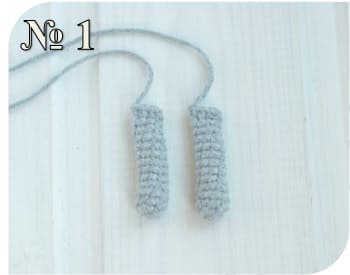
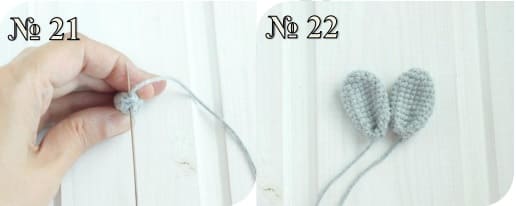
Crochet 3 sc, capturing both walls of the foot. Fasten the thread and cut. Photo No. 1 – top bunny paws.
Lower legs, body and head. (crochet in one piece)
Lower paws. 2 pcs.
We crochet the first paw.
We start crocheting with green yarn.
Rnd 1. 6 sc in MR
Rnd 2. 6 inc (12)
Rnd 3. (1sc,inc)*6 (18)
Rnd 4-6. 18 sc (3 rows)
Rnd 7. (dec)*6, 6sc (12)
Rnd 8. Change the thread to white, crochet 12 sc behind the back wall, do not cut the green thread, leave her on the inside.
Rnd 9. 12 sc
Rnd 10. We change the thread to gray (main color) we crochet 12 sc behind the back wall, the white thread is not cut off, leave it on the wrong side.
Rnd 11-13. 12 sc (3 rows)
Rnd 14. We change the thread to green crochet (inc, 2 sc)*4 (16) Gray thread, cut, fasten, hiding in the paw.
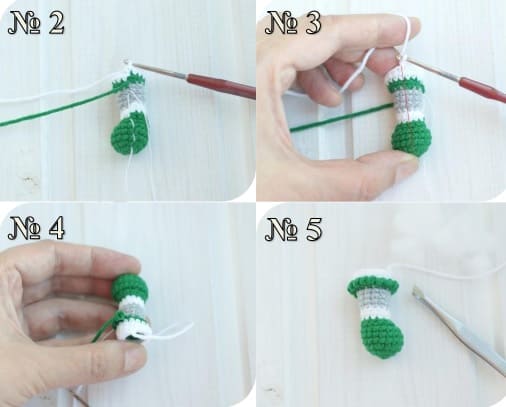
Rnd 15. Change the thread to white, crochet 16 sc behind the back wall, do not cut the green thread, leave it before work (photo No. 2).
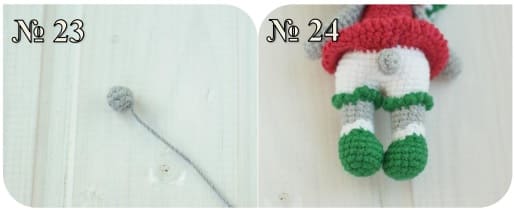
Rnd 16. 16 sc we crochet 5 sc offsets, so that the last knitted loop is at the level toe of the paw – photo No. 3 (the number of displacement columns may be different for you). We fix thread, cut, leaving a tip 10-12 cm long.
We crochet ruffles – the edging of white knickers. The green thread that was left before work, we crochet the “crawl step” pattern along the front half loops of the 15th row. When crocheting a pattern, we hold paw feet away from you (photo No. 4).
Fasten the thread, cut and hide in the paw.
Stuff the foot filler with tweezers.
We crocheting the second paw
The second paw is crocheting almost like the first, the changes are only in the 7th row and in the offset columns, which are crochet at the end of the crochet of the paw, so we knit the foot, focusing on photograph data above.
We start crocheting with green yarn.
Rnd 1. 6 sc in MR
Rnd 2. 6 inc (12)
Rnd 3. (1sc,inc)*6 (18)
Rnd 4-6. 18 sc (3 rows)
Rnd 7. (6sc,dec)*6 (12)
Rnd 8. Change the thread to white, crochet 12 sc behind the back wall, do not cut the green thread, leave her on the inside.
Rnd 9. 12 sc
Rnd 10. We change the thread to gray (main color) we crocheting 12 sc behind the back wall, the white thread is not cut off, leave it on the wrong side.
Rnd 11-13. 12 sc (3 rows)
Rnd 14. We change the thread to green crochet (inc, 2 sc)*4 (16) Gray thread, cut, fasten, hiding in the paw.
Rnd 15. Change the thread to white, crochet 16 sc behind the back wall, do not cut the green thread, leave it before work.
Rnd 16. 16 sc
Return to the 15th row, tie a ruffle with a green thread.
We crocheting 13 sc of the offset, so that the last crocheting loop is at the level of the toe of the leg (look at your foot, your number of offset columns may be different).
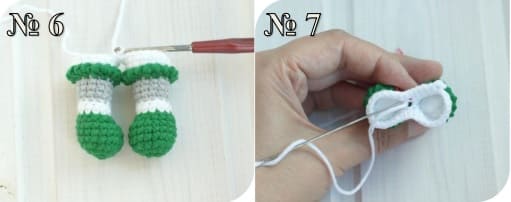
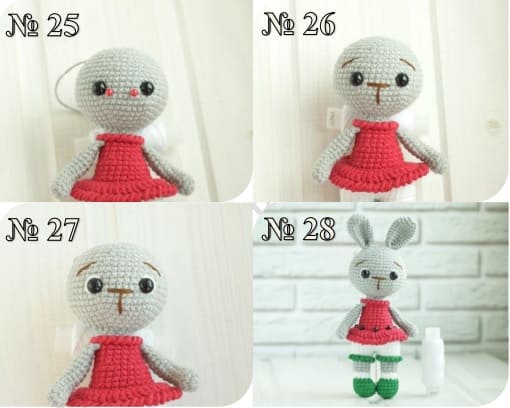
We do not cut the thread, we connect the legs, put the legs with socks to each other and crochet the next sc already the first leg, starting with the first remaining untied sc (photo No. 6), we crochet along the paw 16 sc, put a marker – the beginning of the row will be considered here! Further, all calculations proceed from this marker, we crochet the body, first on one leg, then on the other, round.
Rnd 17. inc, 6 sc, inc, 8 sc, inc, 7 sc, inc, 7 sc (36) (increases should turn out on the sides, in the front and in the back)
A small hole formed in the joint of the legs (photo No. 7), it was for it that we left the tip of the thread is 10 cm, we take a needle, we sew a hole from the inside, we fix the thread and hide it in the leg.
Rnd 18-20. 36 sc (3 rows)
Rnd 21. (4sc,dec)*6 (30)
Change the thread to red, fasten the white thread and cut.
Rnd 22. 30 sc
Rnd 23. 30 sc We crocheting this row for the back wall.
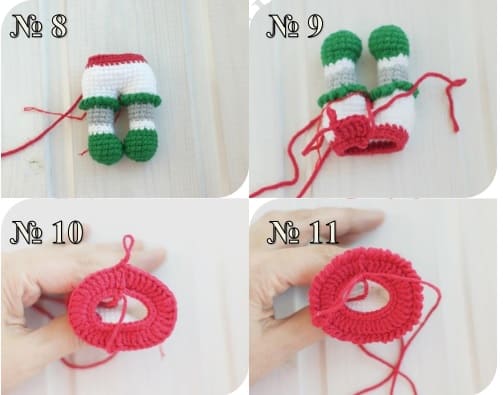
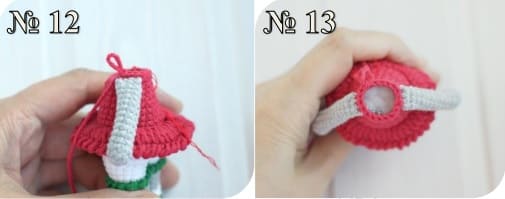
Let’s digress from crocheting the body – we will crochet a skirt (photo No. 8). In order not to cut the red thread, from the middle of the ball you need to get the second end of the thread. Attach this end to the front half-loop 23 rows (crocheting turned with legs away from you (photo No. 9)), we crochet 3 tch, then crochet (2 dc, inc) repeat 10 times, close the row with a connecting column (photo number 10). . The increase in this case is also crochet from sl st. If it seems to you that the skirt is not crochet very fluffy (1 dc, inc). We tie the edge of the skirt with a “crawl step” pattern (photo No. eleven). We fix the thread and hide it in the body of the bunny.
Rnd 24. (3sc,dec)*6 (24)
Rnd 25-27. 24 sc (3 rows), We stuff the part in the process of crocheting.
Rnd 28. (2sc,dec)*6 (18)
Rnd 29-30. 18 sc (2 rows), We fill the detail.
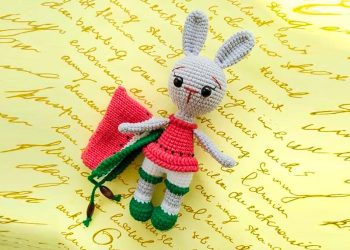
Rnd 31. In this row we knit the upper paws: 4 sc, 3 sc on the arm and body, 6 sc, 3 sc on the arm and body (paws should be on the sides, if you have them “gone” to the side – tie them in your calculations), 2 sc, at the end of the row we crochet an additional bias column. Photo No. 12, 13- we crocheting the upper paws.
Rnd 32. We change the thread to gray, we crocheting 18 sc behind the back wall. Leave the red thread in front work.
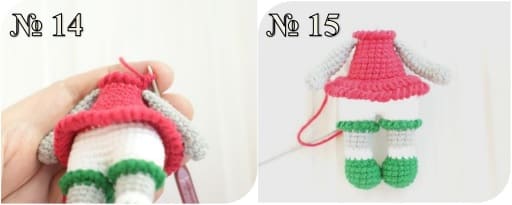
We crocheting ruffles – the upper edging of the dress. With the red thread that was before work, we knit pattern “crawl step” on the front half loops of 32 rows. When crocheting a pattern, hold the part with paws to yourself (photo No. 14). Fasten the thread, cut and hide in the details. Photo number 15 – the body of a bunny.
Rnd 33. (1sc,dec)*6 (12)
Rnd 34. 12 sc
Rnd 35. (1sc,inc)*6 (18)
Rnd 36. (2sc,inc)*6 (24)
Rnd 37. (3sc,inc)*6 (30)
Rnd 38. (4sc,inc)*6 (36)
Rnd 39. (5sc,inc)*6 (42)
Rnd 40. (6sc,inc)*6 (48)
Stuff the neck tightly with filler so that the head does not collapse.
Rnd 41-46. 48 sc (6 rows)
Rnd 47. (6sc,dec)*6 (42)
Rnd 48. 42 sc
Rnd 49. (5sc,dec)*6 (36)
Rnd 50. 36 sc
Let’s digress from crocheting – insert eyes.
Start stuffing your head – give it a shape.
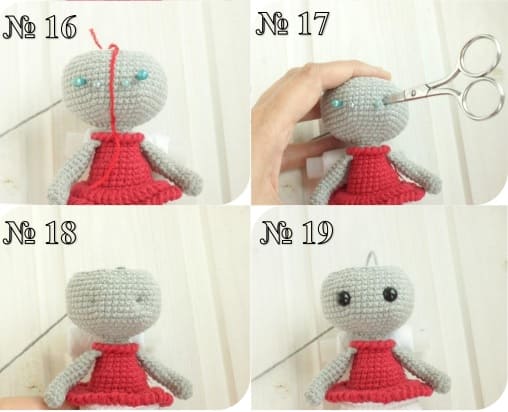
Mark the center of the face with a thread, between 42 and 43 a nose will be embroidered nearby – mark with pins along 2 sc in different directions from the center. From each pin 2 sc to the side and one row above put pins – there will be eyes (photo No. 16). Now you need to pull out the filler, with scissors, increase the hole between the sc (photo No. 17, 18), insert the eyes and secure.
Rnd 51. (4sc,dec)*6 (30)
Rnd 52. 30 sc, fill head with filler.
Rnd 53. (3sc,dec)*6 (24)
Rnd 54. (2sc,dec)*6 (18)
Rnd 55. (1sc,dec)*6 (12)
Rnd 56. dec 6 (6)
Pull the hole, fasten the thread, cut and hide.
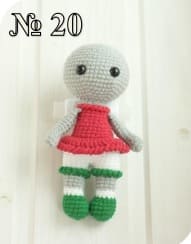
Photo No. 20 – finished part head – body with crochet paws.
Ears (Make 2)
Rnd 1. 6 sc in MR
Rnd 2. 6 inc (12)
Rnd 3. (3sc,inc)*3 (15)
Rnd 4-10. 15 sc (7 rows)
Rnd 11. (3sc,dec)*3 (12)
Rnd 12. 12 sc
Fold the ear, crochet 6x for both walls, cut the yarn, leave the yarn to stitch. Then fold your ear in half again and secure both sides by making 1-2 stitches with a needle.
Tail
Rnd 1. 5 sc in MR
Rnd 2. 5 inc (10)
Rnd 3. 10 sc
Rnd 4. (dec)*5 (5)
Before you make the last 2 reductions, fill the tail a little.
Fasten and cut the thread, leaving a small end for sewing.
Feel free to tag me (@freeamigurumii) in your photos on Instagram or Facebook if you’d like!