Hello amigurumi lovers and beautiful visitors, I wanted to share the free amigurumi patterns for you here. In my article I will share 1 pattern and how to make it for you. At the end of my article, I will share amigurumi patterns that can generate ideas for you.
MATERIALS (RECOMMENDATIONS IN PARENTHESES)
- Light weight yarn (DK, light-worsted, aran, or 4-ply) in orange and white or any 2 colors of your choosing (Rico Design Ricorumi DK in Orange and White)
- Embroidery floss in black for face (DMC Embroidery Floss in black)
- 2.75mm (C) hook (Clover Amour)
- Toy stuffing (Fairfield Poly-Fil)
- Stitch marker (Clover Quick Locking Stitch Markers Small – I LOVE these, they don’t leave big holes in your work!)
- Embroidery/sewing needle (DMC Embroidery Needle)
- Tapestry needle (DMC Tapestry Needle Size 16)
- Scissors (Gingher Stork Scissors)
GAUGE
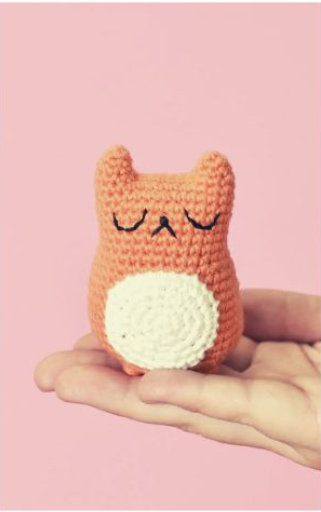
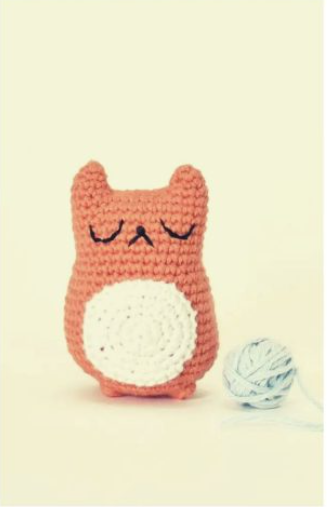
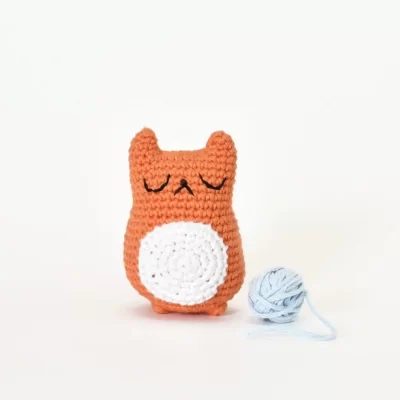
Gauge isn’t important for this amigurumi pattern. Just make sure your crochet stitches are tight to avoid stuffing show through. My finished Tiny Cat is 3 inches tall.
CROCHET STITCHES & ABBREVIATIONS (US TERMINOLOGY)
mr – magic ring
ch – chain
rnd(s) – round(s)
st(s) – stitch(es)
sl st – slip stitch
sc – single crochet
inc – single crochet increase
inv dec – invisible decrease
5-dc cl – 5 double crochet cluster stitch
x – times (indicates number of times to repeat)
[ ] – repeat steps between brackets for the specified number of times
( ) – the number of stitches you should have at the end of each round
NOTES
- All sections are worked in a continuous round.
- Mark the beginning of each round with a stitch marker.
- Make pieces in the order presented.
- Not all yarns are created equal! Yarns listed as the same weight frequently differ in size and stretch. Ricorumi DK is on the thinner end of light weight yarns.
TINY CAT AMIGURUMI PATTERN
EAR 1
rnd 1: With orange, make a mr, sc 4 (4 sts)
rnd 2: [inc 1, sc 1] 2x (6 sts)
rnd 3: [inc 1, sc 2] 2x (8 sts)
Sl st into next st. Fasten off, leaving an 8 inch tail for weaving in. Weave in ends or use to stuff ear.
EAR 2
Repeat rnds 1-3 from Ear 1 above. Don’t fasten off. Remove stitch marker.
rnd 4: ch 7, connect with a sl st to Ear 1 in same st as ending sl st. Sc 1, place stitch marker, sc 7 around ear 1, sc 7 in back bump of ch sts, sc 8 around ear 2, sc 7 through both loops of ch sts (30 sts)
Don’t fasten off and continue with head & body below.
HEAD & BODY
rnds 1-8: Continuing with orange, sc around (30 sts for 8 rnds)
rnd 9: [sc 2, inc 1, sc 1, inc 1, sc 1, inc 1, sc 8] 2x (36 sts)
— EMBROIDER FACE NOW —
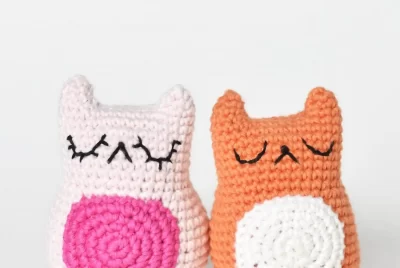
Using the photo as a guide, embroider the face using all 6 strands of embroidery floss and an embroidery needle. Make a french knot for the nose and backstitch for the eyes and mouth. The nose is at the center of rnd 4, the bottom of the mouth is at rnd 6, and the eyes are 4 sts wide and are placed over rnds 3-5 of head & body. You can choose to give your cat eyelashes, too!
rnd 10: sc around (36 sts)
rnd 11: [sc 5, inc 1, sc 2, inc 1, sc 9] 2x (40 sts)
rnd 12-18: sc around (40 sts for 7 rnds)
rnd 19: [sc 7, inv dec 1, sc 2, inv dec 1, sc 7] 2x (36 sts)
rnd 20: [sc 4, inv dec 1, sc 1, inv dec 1, sc 1, inv dec 1, sc 6] 2x (30 sts)
rnd 21: [sc 2, inv dec 1, 5-dc cl, sc 2, inv dec 1, sc 1, 5-dc cl, sc 1, inv dec 1, sc 1] 2x (24 sts)
— Push the 5-dc cl sts out so that the bumps are on the right side of the work. Stuff cat now and continue stuffing until closed. —
rnd 22: [sc 2, inv dec 1] 6x (18 sts)
rnd 23: [sc 1, inv dec 1] 6x (12 sts)
rnd 24: inv dec 6 (6 sts)
Sl st into next st, fasten off and finish off. Weave in ends.
BELLY
rnd 1: In white, sc 6 (6 sts)
rnd 2: inc 6 (12 sts)
rnd 3: [sc 1, inc 1] 6x (18 sts)
rnd 4: [sc 2, inc 1] 6x (24 sts)
rnd 5: [sc 3, inc 1] 6x (30 sts)
Sl st into next st. Fasten off, leaving a long tail for attaching. Attach belly to body from rnds 10-18.
TAIL
rnd 1: In white, sc 6 (6 sts)
rnds 2-3: sc around (6 sts for 2 rnds)
rnd 4: change color to orange, sc around (6 sts)
rnds 5-11: sc around (6 sts for 7 rnds)
Don’t stuff. Fasten off and sew closed. Attach onto rnds 19 and 20 of body.
Feel free to tag me (@freeamigurumii) in your photos on Instagram or Facebook if you’d like!
All Finished.